
Blog
The Second World War resulted in the deaths of around 85 million people. Additionally, tens of millions more people were displaced. However, amid all the carnage, people demonstrated remarkable courage, fortitude, compassion, mercy and sacrifice. We want to honour and celebrate all of those people. In the War Years Blog, we examine the extraordinary experiences of individual service personnel. We also review military history books, events, and museums. We also look at the history of unique World War II artefacts, medals, and anything else of interest.

The Silent Disaster: How Communication Failures Helped Doom Operation Market Garden
As we commemorate Operation Market Garden this September, it's worth reflecting on one of the most ambitious - and ultimately ill-fated - military operations of World War II. Launched in September 1944, Operation Market Garden aimed to secure a series of nine bridges in the Netherlands, potentially paving the way for a swift advance into Germany. It was a massive undertaking, involving over 34,000 airborne troops and 50,000 ground forces. Yet, what began with high hopes ended in a costly failure, partly because of a communications breakdown.
Operation Market Garden: 17 to 25 September 1944
As we commemorate Operation Market Garden this September, it's worth reflecting on one of the most ambitious - and ultimately ill-fated - military operations of World War II. Launched in September 1944, Operation Market Garden aimed to secure a series of nine bridges in the Netherlands, potentially paving the way for a swift advance into Germany. It was a massive undertaking, involving over 34,000 airborne troops and 50,000 ground forces. Yet, what began with high hopes ended in a costly failure, partly because of a communications breakdown.
At the heart of Market Garden's communication crisis was the inadequacy of the radio equipment. The British Army's standard radio set, the Wireless Set No. 22, proved insufficient for the task at hand. These radios had a maximum range of around six miles under ideal conditions, yet the Corps Headquarters was positioned a distant 15 miles away. To compound matters, the terrain around Arnhem presented additional challenges that the planners had failed to fully account for. The Arnhem area was characterised by woodland and urban buildings. These physical obstacles severely interfered with radio transmissions, further diminishing the already limited range of the No.22 sets. As a result, what should have been a vital lifeline for the paratroopers of the 1st Airborne Division fighting desperately to hold the north side of the bridge at Arnhem became a silent witness to their isolation and eventual defeat.
Interestingly, a potential solution to these communication problems was literally at hand. The Netherlands boasted an extensive and sophisticated telephone network, largely intact despite years of German occupation. This network was remarkably resilient, comprising three interconnected systems: the national Ryks Telefoon system, the Gelderland Provincial Electricity Board's private network, and a clandestine network operated by Resistance technicians. Even when key exchanges were disrupted, the Dutch were still able to communicate using alternative routings.
Yet, astonishingly, Allied planners failed to fully leverage this resource. This oversight raises profound questions about the rigidity of military thinking. Why did the Allied command, known for its adaptability in other areas, fail to pivot to this seemingly obvious solution? The answer likely lies in a combination of factors: overconfidence in existing systems, security concerns, lack of familiarity with local infrastructure, the fast-paced nature of the operation, and a wariness of the Dutch Resistance.
British XXX Corps cross the road bridge at Nijmegen
The consequences of this failure were dire. While some units made limited use of the phone system, the 1st Airborne Division at Arnhem - where the need was most critical - did not. They made no attempt to convey their urgent need for supplies or relief via the phone system to the corps headquarters. Ironically, Dutch agents inside the 82nd Airborne's landing area used the phone system early on D+1 to inform the 82nd that “the Germans are winning over the British at Arnhem” - the first indication that the 1st Airborne was in serious trouble.
In the face of radio failures, the Allied forces resorted to various other communication methods, each with its own limitations. Carrier pigeons proved unreliable, with many birds failing to deliver messages. Traditional forms of communication like land lines, runners, and dispatch riders were vulnerable to enemy fire and the chaos of battle. The artillery net ended up being one of the more reliable communication methods, allowing for effective artillery support and occasional relay of messages to higher command.
The communication failures during Operation Market Garden offer valuable insights into military organisational thinking. They underscore the importance of flexibility, the need to understand and potentially leverage local infrastructure, the crucial role of contingency planning, and the necessity of fostering a culture that encourages quick problem-solving and innovative thinking at all levels of command.
It's worth noting the contrast between the German military's mission-type tactics (Auftragstaktik), which emphasized flexibility and initiative, and the British Army's reliance on detailed orders and strict adherence to commands. This difference in command styles meant that German forces could often exploit opportunities more rapidly, while British forces maintained tighter control but at the cost of agility.
As we reflect on the events of eighty years ago, it's clear that the lessons learned extend far beyond the realm of military strategy. In any high-stakes endeavour, the ability to communicate effectively - and to adapt when primary methods fail - can mean the difference between success and catastrophic failure. The underutilisation of the Dutch phone system stands as a poignant example of how overlooking available resources can have far-reaching consequences.
The story of Operation Market Garden serves as a stark reminder of the critical role that effective communication plays not just in military operations, but in any complex undertaking. It's a lesson that remains relevant today, in fields ranging from business to disaster response. As we face our own challenges in an increasingly connected world, let's not forget the silent disaster that unfolded in Holland eighty years ago - and the valuable lessons it still has to teach us.
References
1. Middlebrook, M. (1994). Arnhem 1944: The Airborne Battle. Westview Press.
2. Ryan, C. (1974). A Bridge Too Far. Simon & Schuster.
3. Kershaw, R. (1990). It Never Snows in September: The German View of Market-Garden and the Battle of Arnhem, September 1944. Ian Allan Publishing.
4. Buckley, J. (2013). Monty's Men: The British Army and the Liberation of Europe. Yale University Press.
5. Beevor, A. (2018). The Battle of Arnhem: The Deadliest Airborne Operation of World War II. Viking.
6. Powell, G. (1992). The Devil's Birthday: The Bridges to Arnhem 1944. Leo Cooper.
7. Badsey, S. (1993). Arnhem 1944: Operation Market Garden. Osprey Publishing.
8. Hastings, M. (2004). Armageddon: The Battle for Germany, 1944-1945. Alfred A. Knopf.
9. Zaloga, S. J. (2014). Operation Market-Garden 1944 (1): The American Airborne Missions. Osprey Publishing.
10. Clark, L. (2008). Arnhem: Operation Market Garden, September 1944. Sutton Publishing.
11. MacDonald, C. B. (1963). The Siegfried Line Campaign. Center of Military History, United States Army.
12. Bennett, D. (2007). Airborne Communications in Market Garden, September 1944. Canadian Military History, 16(1), 41-42.
13. Greenacre, J. W. (2004). Assessing the Reasons for Failure: 1st British Airborne Division Signal Communications during Operation 'Market Garden'. Defence Studies, 4(3), 283-308. https://www.tandfonline.com/doi/full/10.1080/1470243042000344777#d1e290

Explore Berlin's Second World War History
In this guest article, Matti Geyer of www.toursofberlin.com provides a guide to some of Berlin's most significant Second World War sites, each offering a poignant glimpse into this crucial chapter of the city's history.


If you're fascinated by Second World War and Holocaust history, Berlin is a must-visit destination. The city is home to many solemn yet impactful reminders of the war's horrors. Visitors can explore the ruins and bullet-scarred structures that vividly recount tales of destruction and resilience. You can discover bunkers that echo wartime preparations, and visit Holocaust memorials that, though sombre, reflect Germany's commitment to confronting its past. Dive into remarkable museums that strive to educate, ensuring that the lessons of history are not forgotten. In this guest article, Matti Geyer of www.toursofberlin.com provides a guide to some of Berlin's most significant Second World War sites, each offering a poignant glimpse into this crucial chapter of the city's history.
1. Bunkers:
Boros Bunker: Constructed as an air-raid shelter during World War Two, the Boros Bunker in Mitte has evolved into a contemporary art gallery. Originally built to protect Berliners from aerial bombardment, this massive structure later witnessed various uses, from a tropical fruit warehouse to a techno club, before becoming a testament to the city's creative spirit.
Anhalter Bunker: Once a colossal air-raid shelter connected to the Anhalter Bahnhof, this bunker stands as a formidable reminder of Berlin's wartime preparedness. Now a museum, it provides a chilling insight into the harrowing experiences of those seeking refuge during air raids, complete with preserved gas masks and eerie remnants of the past.
RAW Kegelbunker: Nestled in the heart of Friedrichshain, the RAW Kegelbunker has a unique round shape, and was to protect workers from a nearby train depot. It now serves as a climbing wall.
Führerbunker: The Führerbunker, where Adolf Hitler spent his last days before his suicide, holds a solemn place in history. It was situated beneath the garden of the Reich Chancellery. The bunker site, now a parking lot where local residents walk their dogs, was destroyed in the 1980s.
2. WW2 Ruins:
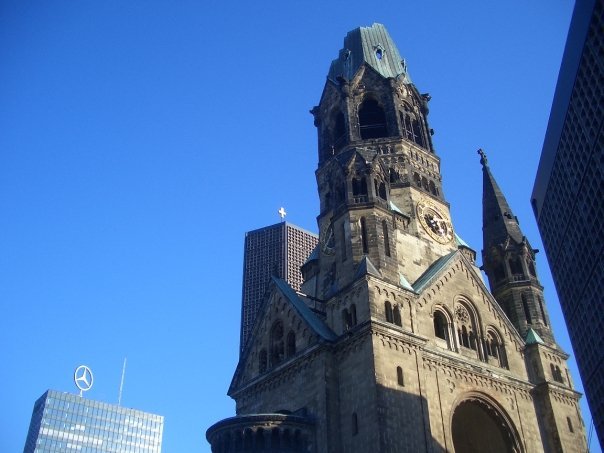
Kaiser-Wilhelm-Memorial Church: The haunting silhouette of the Kaiser-Wilhelm-Memorial Church's damaged spire serves as a poignant symbol of wartime destruction. Bombed during an air raid in 1943, the church was preserved as a memorial, with its adjacent modernist structure providing a striking contrast to the ruins.
Anhalter Bahnhof: Once one of Berlin's biggest railway stations, the Anhalter Bahnhof fell victim to several bombing campaigns. Its skeletal remains stand as silent witnesses to the devastating impact of air raids, a ghostly reminder of the city's former transportation hub. There is a plan to build an "exiles museum" next to the site, dedicated to all those who had to emigrate from Nazi Germany.
Jewish Cemetery Schönhauser Allee: The Jewish Cemetery Schönhauser Allee, which still bears visible war damage, bomb craters, and damaged graves, reflects the tragic toll of World War II as well as the Holocaust. Inscriptions, decorations, and metal grave fences were stolen and melted down. Towards the end of the war, foxholes were dug on the cemetery grounds and fortified with tombstones. Other stones were removed from the graves and randomly piled on top of each other. The cemetery, consecrated in 1827, was the only burial site of the Berlin Jews for more than 50 years. It is located in the triangle between Schönhauser Allee, Kollwitz- and Knaackstraße. There are still remains of cisterns on the site. In one of them, young deserters hid in the last days of the war in 1945. However, they were discovered by the Gestapo and hung on the cemetery trees.
3. Bullet Holes:
Museum Island: The Neues Museum on Museum Island proudly preserves bullet holes as scars of conflict, offering a visceral connection to the city's wartime struggles. These visible reminders evoke a sense of the fierce battles that unfolded in the heart of Berlin.
Martin Gropius Bau: This historic exhibition hall bears the scars of war, with bullet holes marring its grand façade. The building stood right next to the Gestapo HQ, which no longer exists.
S-Bahn Viaduct between Friedrichstraße and Museum Island: During the intense battles of 1945, the S-Bahn viaduct served as a crucial defensive barrier. The Soviet 7th Corps encountered significant resistance here, resulting in the viaduct's enduring scars that visitors can still see today.
4. Holocaust Memorials:
Memorial to the Murdered Jews of Europe: The solemn expanse of the Memorial to the Murdered Jews of Europe stands as a stark reminder of the Holocaust. Designed by Peter Eisenman, this field of 2711 concrete slabs provides a contemplative space for remembrance and reflection.
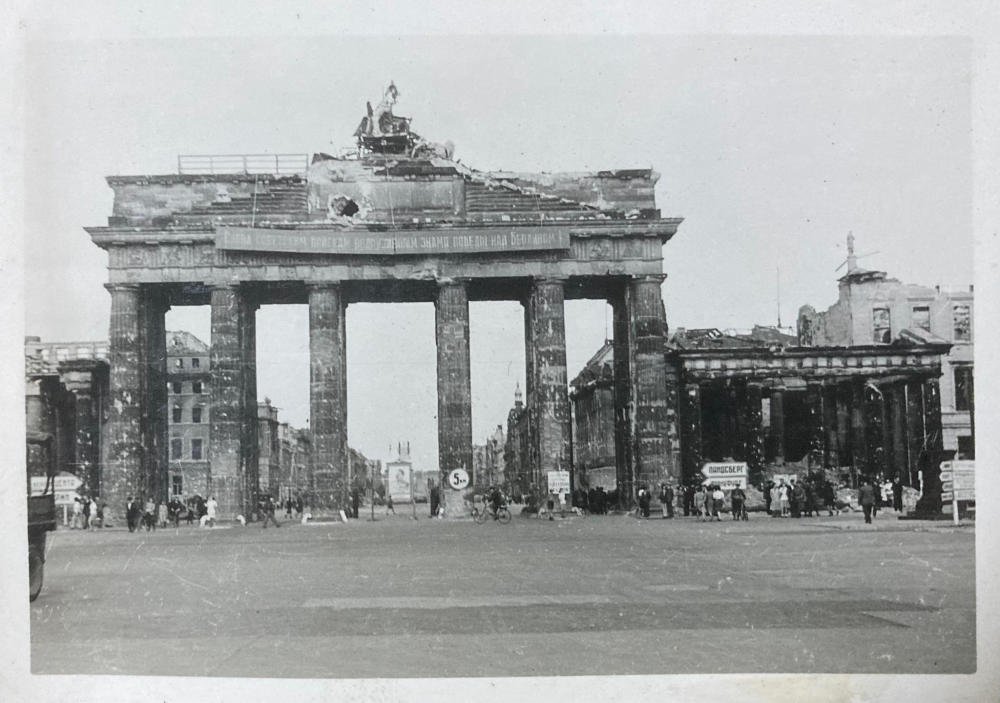
Memorial to Murdered Sinti & Roma: Adjacent to the Brandenburg Gate, this memorial commemorates the persecution and genocide of up to 500,000 Sinti and Roma people during the Nazi era. The tranquil setting invites visitors to ponder the impact of intolerance on marginalised communities.
T4 Memorial: Honouring the victims of the Nazi euthanasia program, the T4 Memorial in Tiergarten serves as a poignant reminder of the atrocities committed during this dark chapter of history. The Nazis targeted people with severe mental and physical disabilities, and those who seemed to have disabilities, because they believed that disabled people were a burden to society and the state. From 1939 to 1941, they ran a 'euthanasia' programme, called the T4 programme. The programme got its name from Tiergartenstrasse 4, the address where they coordinated it.
Grunewald Platform 17 Memorial: The Grunewald Station Platform 17 bears witness to the tragic deportations of Berlin's Jewish community. The memorial, adorned with inscriptions for every train that left from here to the camps and ghettos cross Eastern Europe, serves as a poignant reminder of the lives disrupted and lost during the Holocaust.

5. Nazi Architecture:
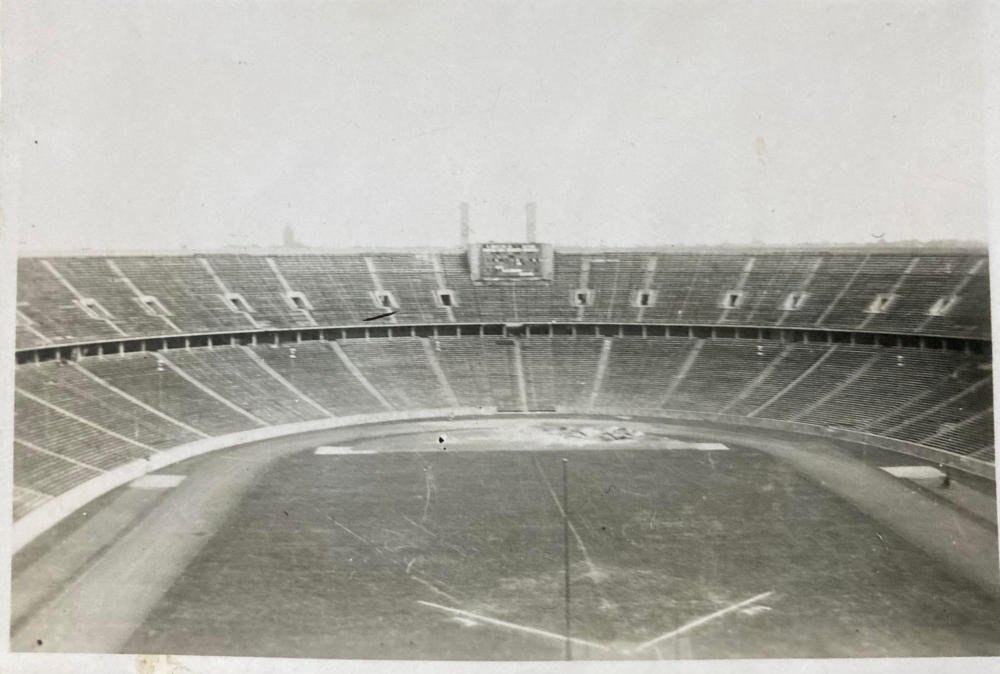
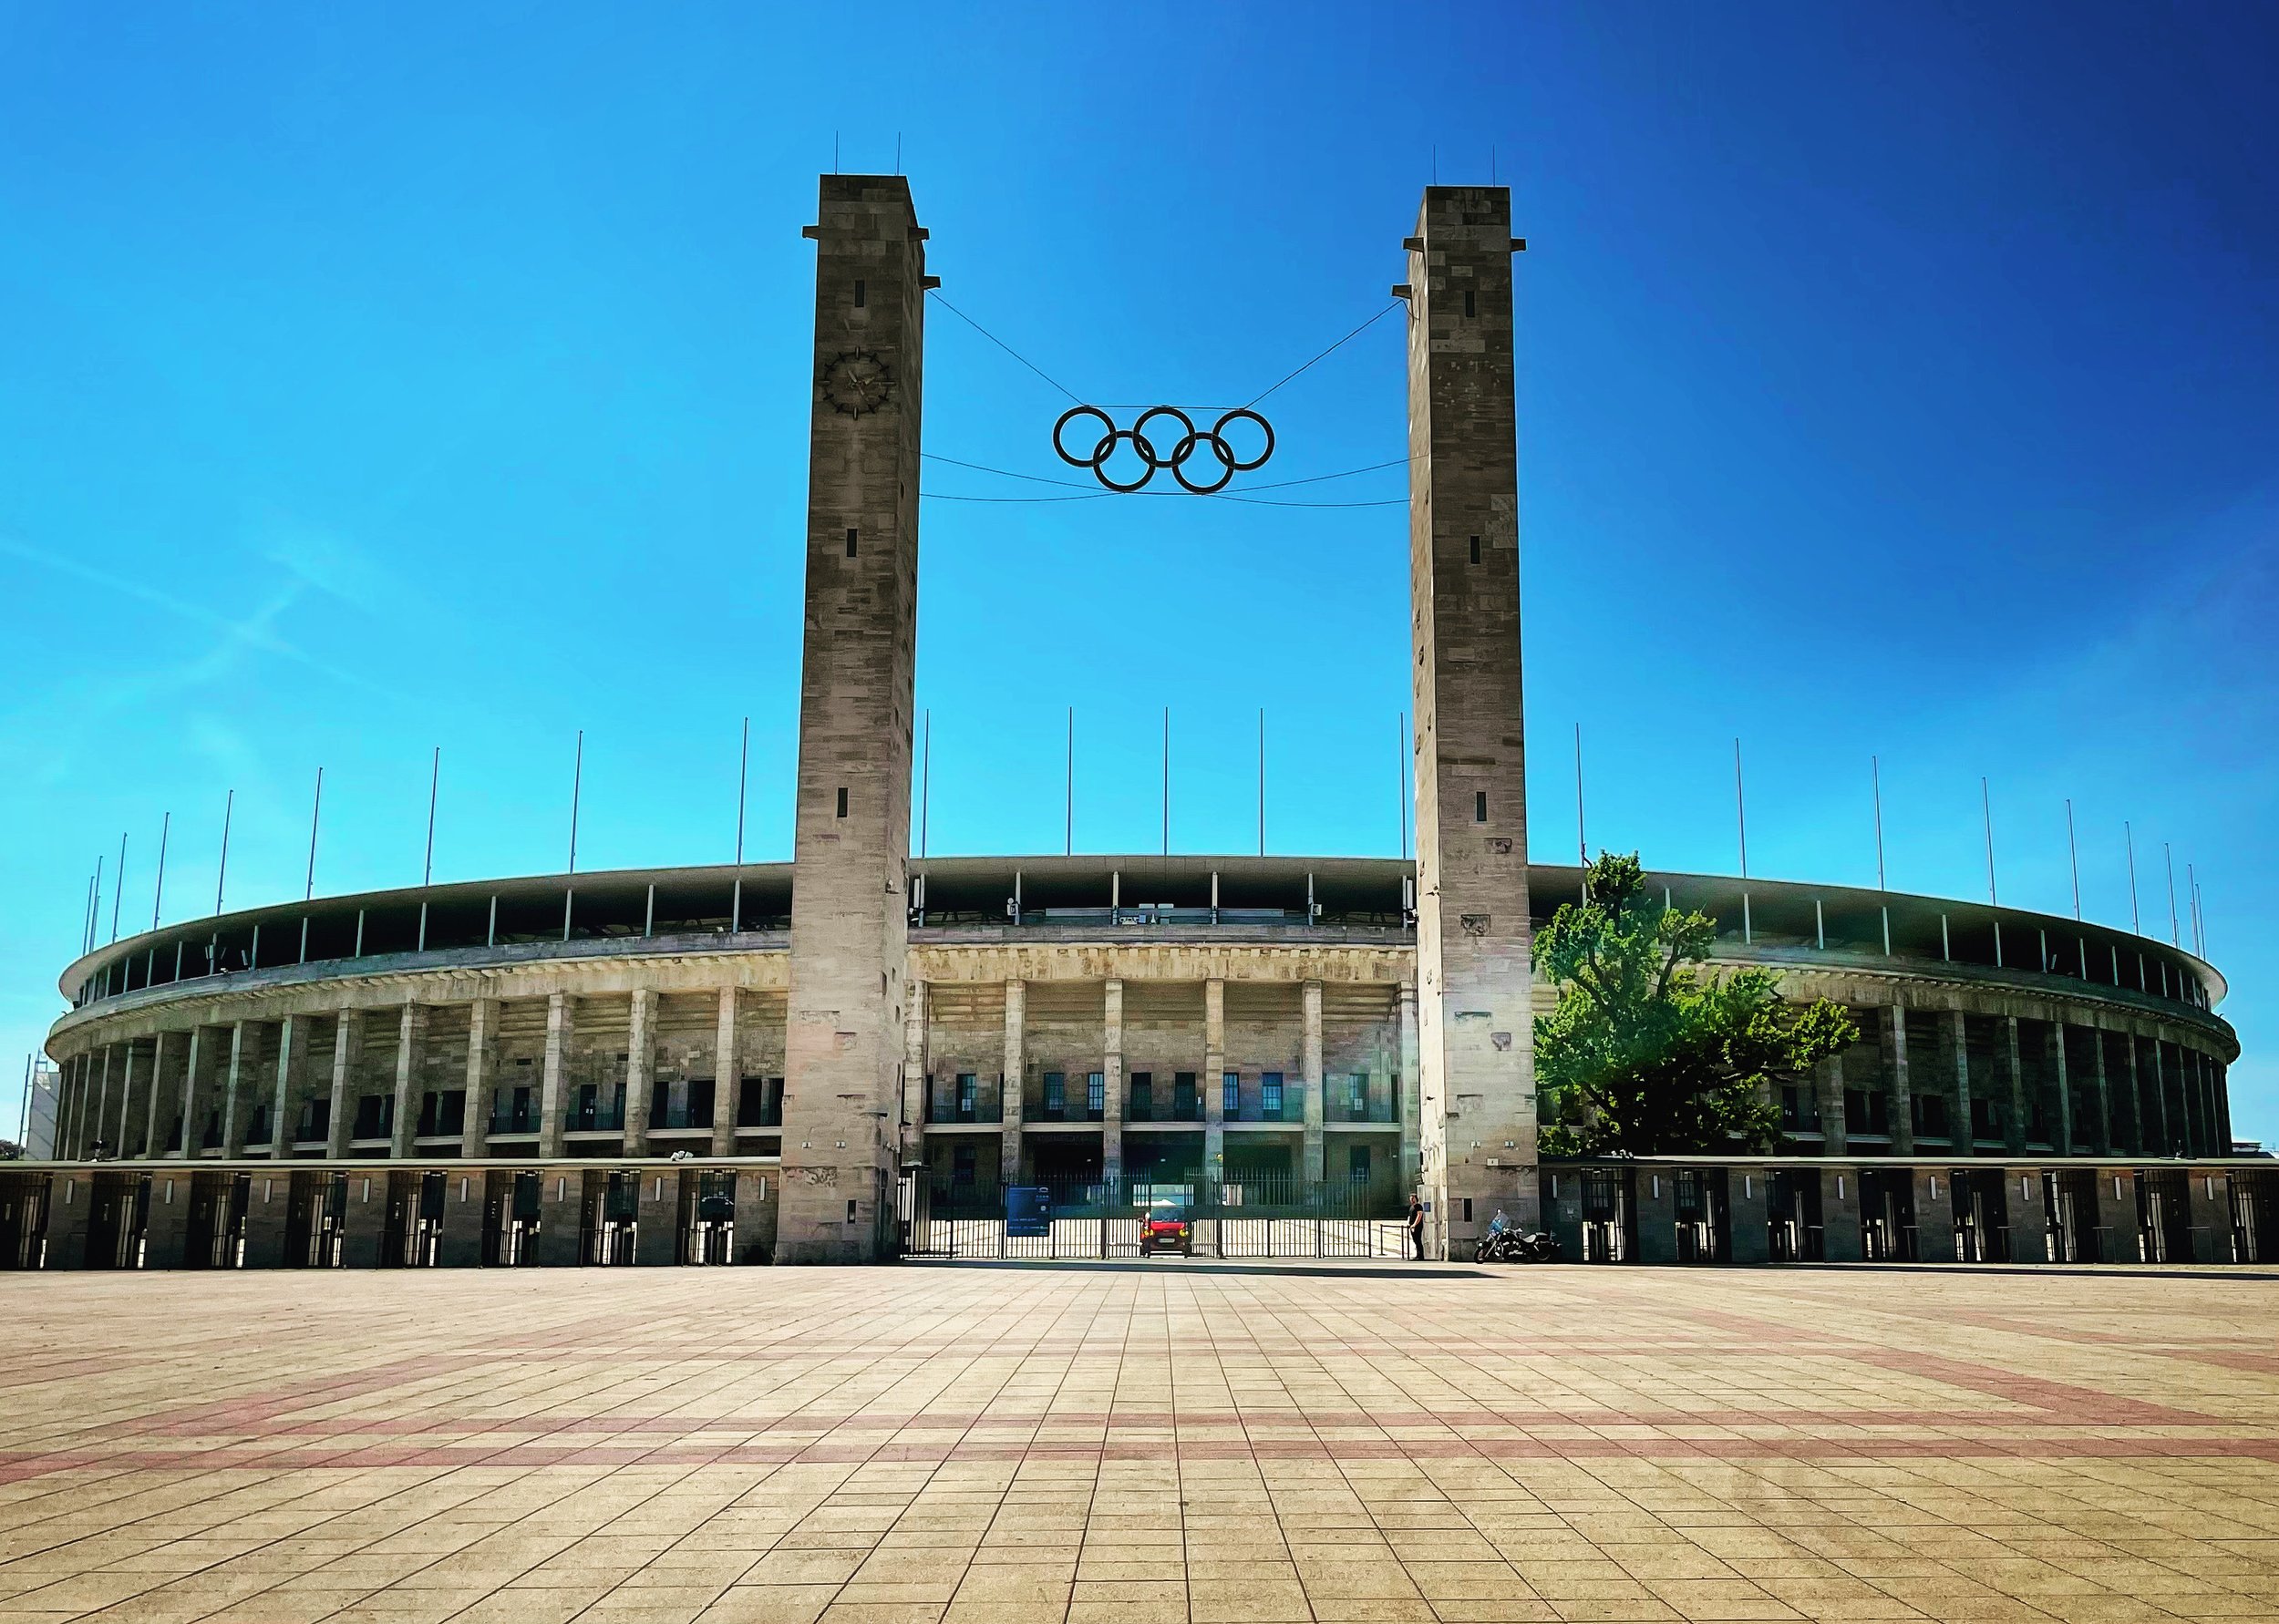
Olympic Stadium: Constructed for the 1936 Summer Olympics, the Olympic Stadium symbolises Nazi grandiosity. Today, it stands as a testament to the manipulation of architecture for propagandist purposes, though it is still used for sporting events.
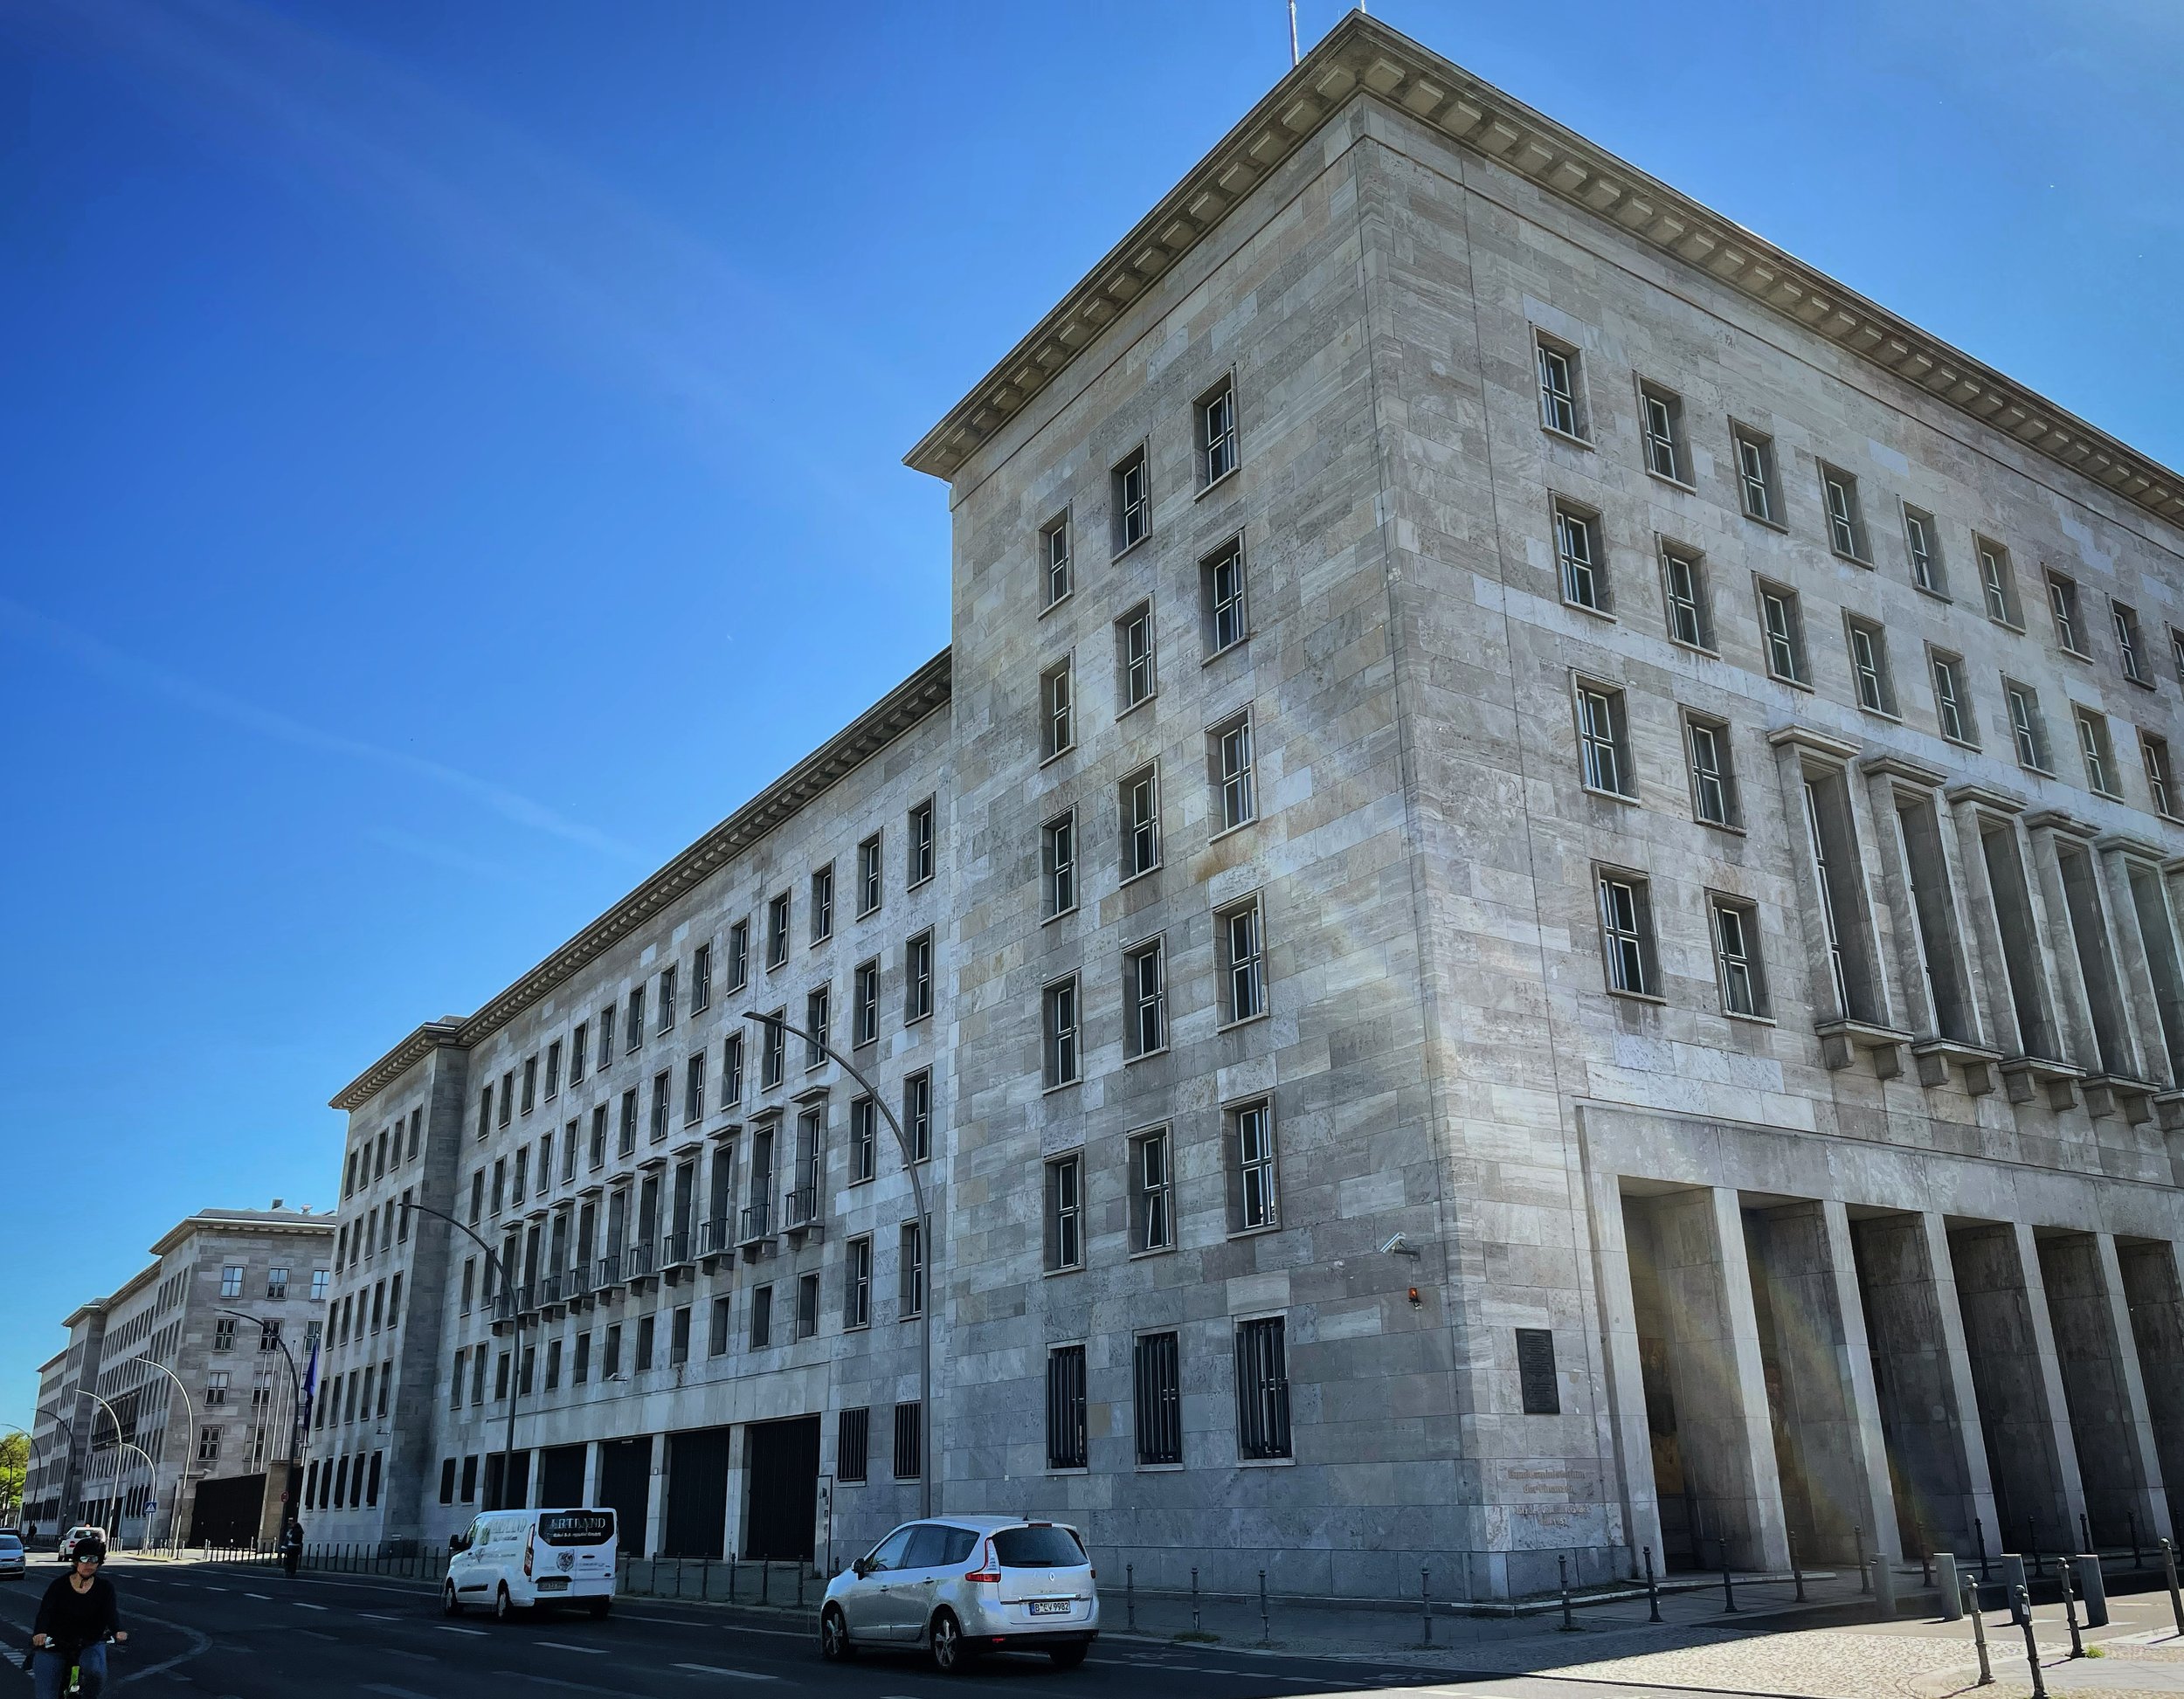
Air Force Ministry: The remnants of the Air Force Ministry, once a colossal symbol of Nazi power, reflect the megalomaniacal architectural ambitions of the Third Reich. Once one of the biggest office buildings in Europe, it miraculously survived the Second World War and now houses the German finance ministry.
Tempelhof Airport Building: The colossal Tempelhof Airport building, with its imposing Nazi-era architecture, remains an iconic landmark. Originally designed as an emblem of Hitler's vision for German aviation, the airport now serves as a multifaceted public space. Upon completion, it was the largest building in the world, until the Pentagon overtook it.
6. Museums:
Topography of Terror Documentation Centre: Built on the former site of the SS and Gestapo headquarters, the Topography of Terror Documentation Centre provides a chilling insight into the mechanisms of Nazi repression. The outdoor exhibition, complemented by preserved ruins, immerses visitors in the historical context.
Otto Weidt Workshop for the Blind: Otto Weidt's workshop, tucked away next to the Hackesche Höfe, served as a sanctuary for blind and deaf Jews during the Nazi regime. The workshop's survival stands as a testament to one man's defiance against persecution. A small windowless room that was hidden behind a shelf and housed an entire family for several months is especially impressive.
Resistance Museum in Bendlerblock: Nestled within the historic Bendlerblock, the Resistance Museum offers a detailed narrative of anti-Nazi resistance efforts, emphasising the courage and sacrifice displayed by individuals such as Claus Schenk Graf von Stauffenberg and members of the Reserve Army that used to be headquartered here. The exhibition halls vividly depict stories of those who sought justice during this tumultuous period, providing a compelling insight into the resilience of the resistance movements. It also marks the place where Stauffenberg was shot.
7. Additional Recommendations:
Soviet Memorial Treptower Park: The Soviet Memorial in Treptower Park is a grand tribute to the Red Army soldiers who lost their lives in the Battle of Berlin. The monumental statue of a Soviet soldier holding a German child and smashing a swastika with a sword stands at the centre. Opposite the statue stand two marble triangles. The marble used in their construction originally came from the Reich Chancellery building.
Sachsenhausen Concentration Camp: located north of Berlin, the camp serves as a chilling reminder of the Holocaust's horrors. Established in 1936, Sachsenhausen initially served as a model camp, evolving into a centre for SS training. The preserved barracks, watchtowers, and historical exhibits depict the systematic oppression and dehumanisation faced by inmates. The stark barracks reveal harsh living conditions, while looming watchtowers symbolise constant surveillance. Visiting Sachsenhausen is an emotional journey that ensures the preservation of memory and honours the countless lives lost during this dark period in history.
In conclusion, these immersive explorations into Berlin's World War II remnants offer a profound understanding of the city's resilience and collective memory. To delve even deeper into this historical tapestry, consider joining a guided tour specialising in the Third Reich, World War II, and Holocaust history. Knowledgeable guides provide contextual insights, transforming each location into a living testament to the city's enduring spirit amidst the shadows of its wartime past.
To learn more about Tours of Berlin or to make a reservation visit the website now: https://www.toursofberlin.com/private-tours/third-reich-ww2-berlin-tour

Dick Hewitt and the Desert Air Force
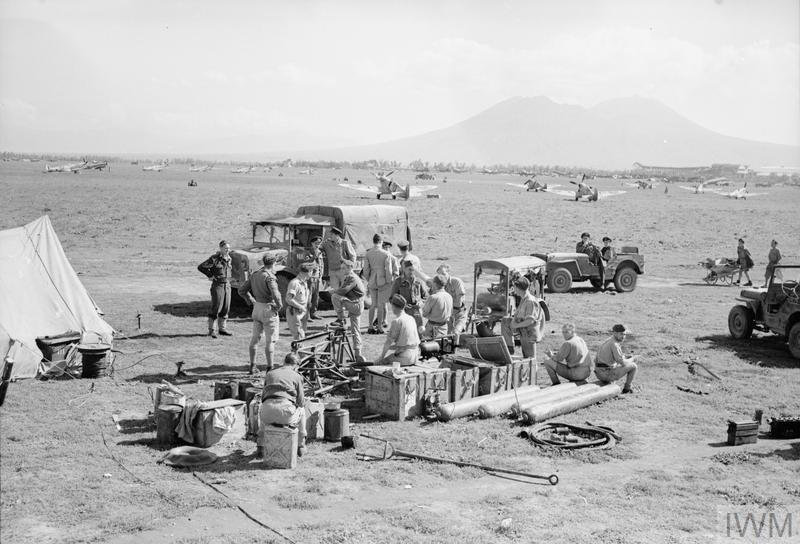
Dick Hewitt served as an Armourer with a mobile fighter squadron as part of the Desert Air Force (DAF) from 1943 to 1945. During Dick’s time in the RAF, he kept a diary, although this was against regulations. Although the diaries are incomplete, they have provided enough clues and information to be able to retell the wartime story of one Leading Aircraftman and his role in the Allied campaign for Italy.
Dick Hewitt served as an Armourer with a mobile fighter squadron as part of the Desert Air Force (DAF) from 1943 to 1945. During Dick’s time in the RAF, he kept a diary, although this was against regulations. Although the diaries are incomplete, they have provided enough clues and information to be able to retell the wartime story of one Leading Aircraftman and his role in the Allied campaign for Italy.
Dick Hewitt was born on Thursday 18 April 1901 in Leicester. Dick passed away on Friday 7 June 1985, aged 84, in Birmingham.
Service in the British Army
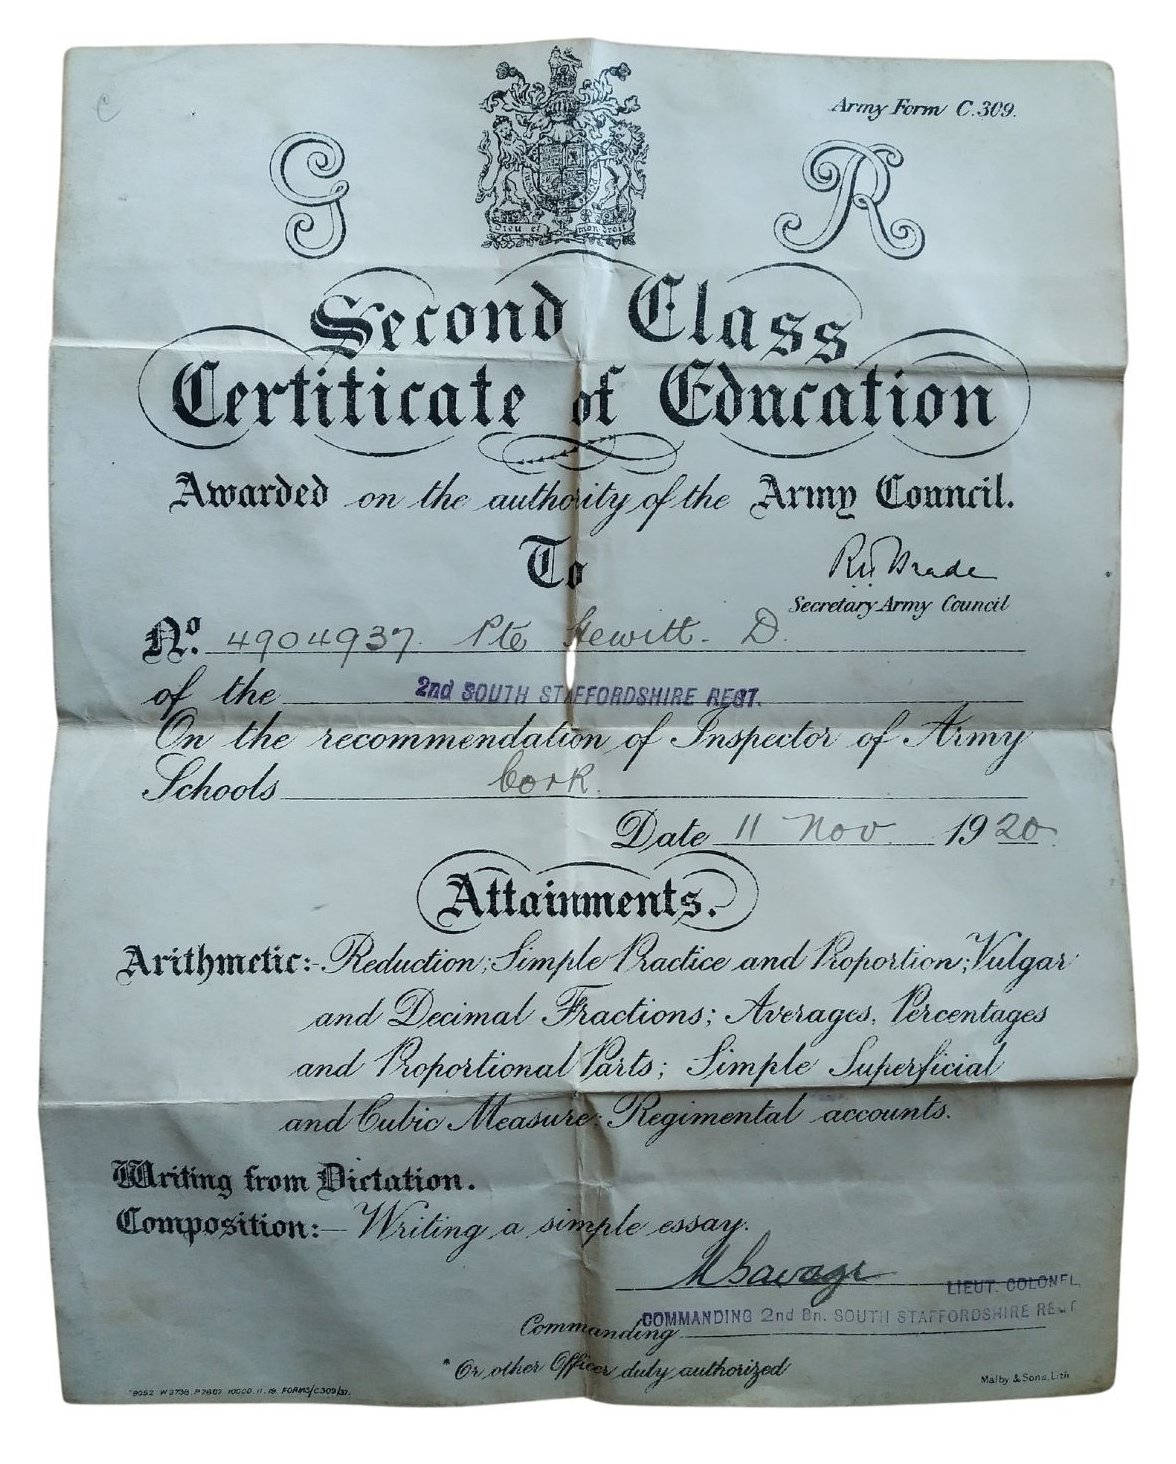
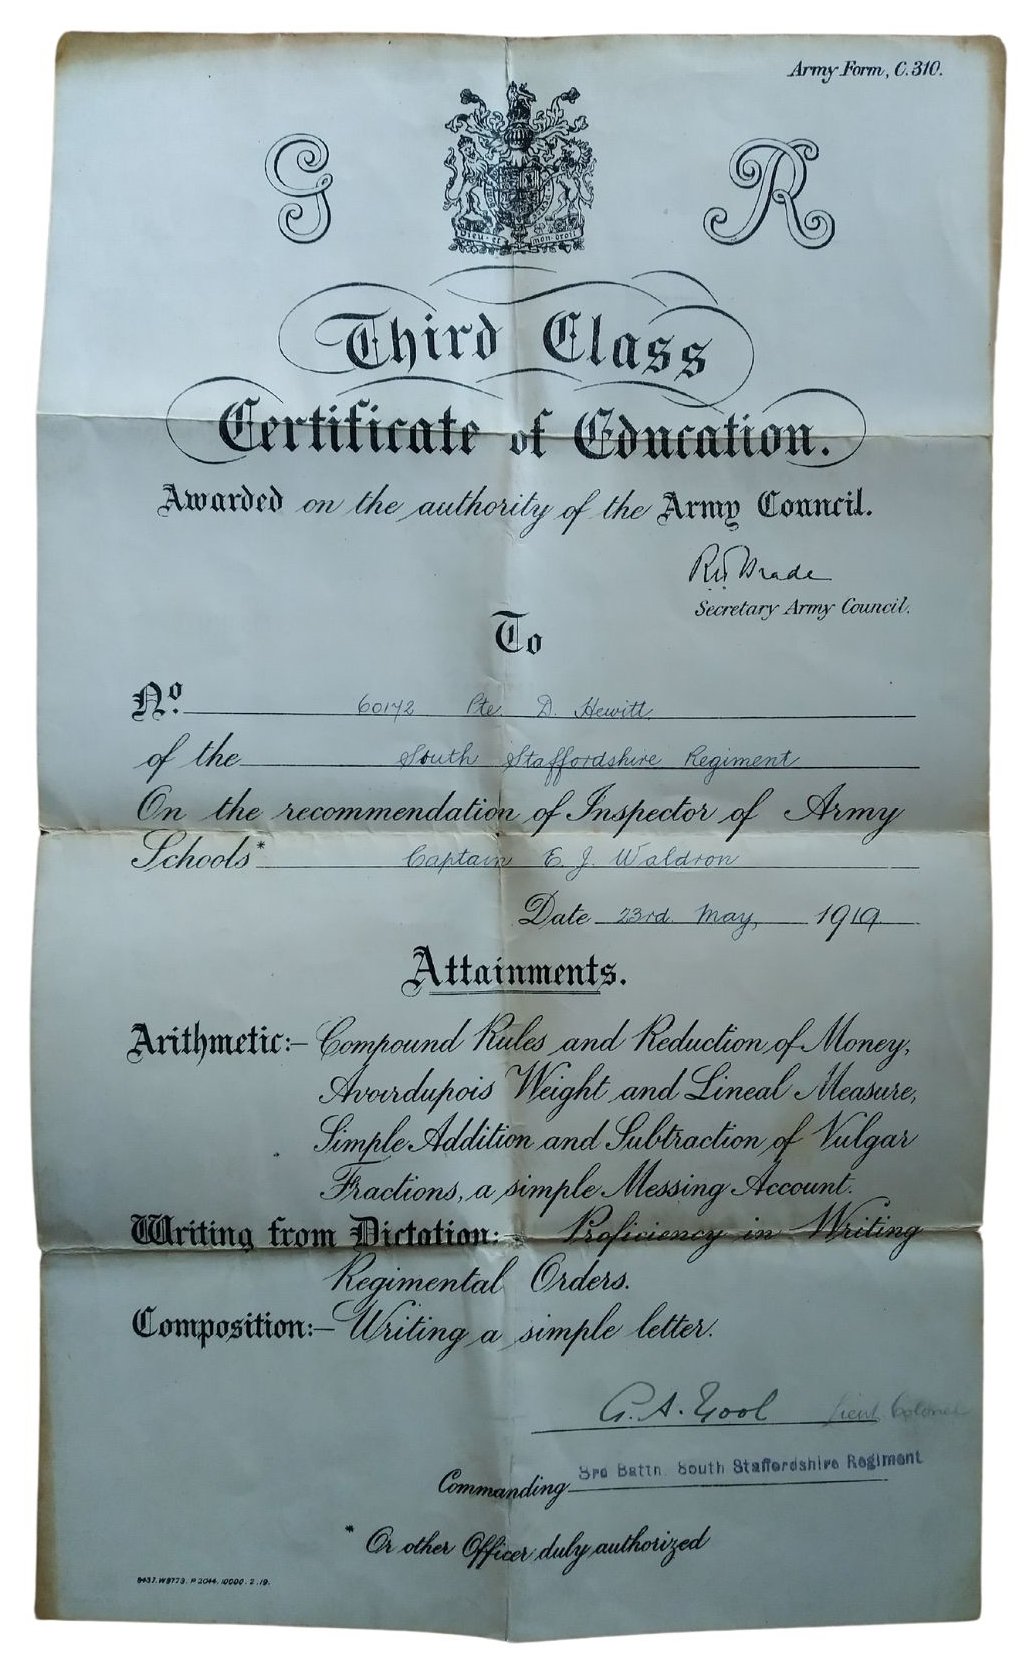
Amongst Dick’s personal papers, I found several Certificates of Education awarded to Private D. Hewitt, the 2nd Battalion, South Staffordshire Regiment issued in May 1919 and November 1920, which suggests that Dick was conscripted into the Army (as conscription did not end until mid-1919). The 2nd Battalion spent the immediate post-war years in Ireland during the War of Independence (1919-21). One of Dick’s Certificates of Education was issued from Cork, which confirms that he was stationed in Ireland. The Corps of Army Schoolmasters was replaced in 1920 by the Army Educational Corps (AEC). A brief search of The National Archives and British Army World War I Service Records, 1914-1920, found no record of Dick’s early military service with the South Staffordshire Regiment.
Dick was in his early to mid-forties during the Second World War. Most of his comrades would have been in their late teens to mid-twenties. Perhaps unsurprisingly, as an older man, it appears Dick’s comrades referred to him as ‘Pops’ based on some post-war correspondence found amongst Dick’s personal papers. Dick was married with two children while serving in the RAF and he sent money home to his family whenever he was able.
Service in the Royal Air Force
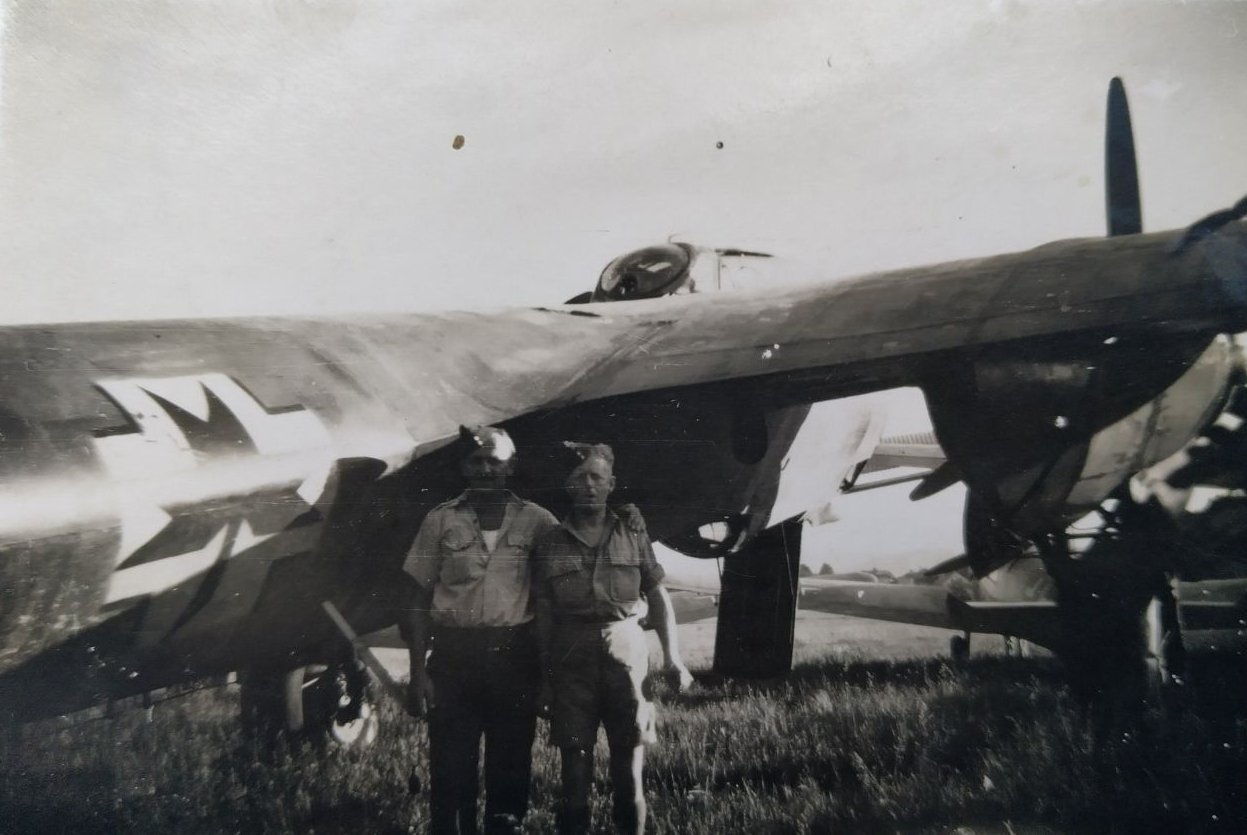
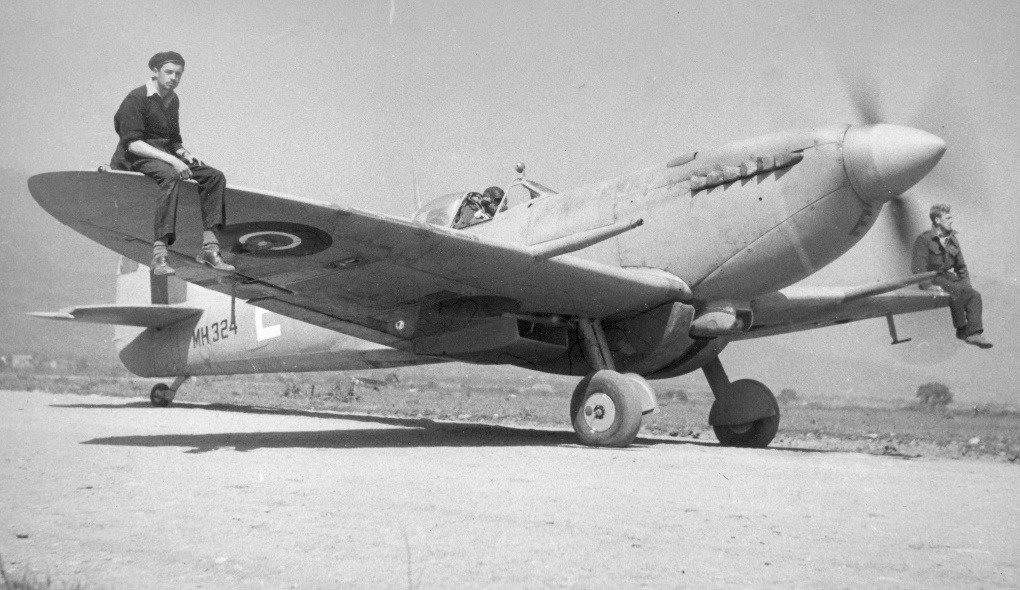
Dick’s RAF Service No: 1468728. He held the rank of Leading Aircraftman (LAC) and qualified as an Armourer. Dick served with 324 Wing, No. 93 Squadron, Royal Air Force, part of the BNAF (British North Africa Force). As part of a highly mobile fighter squadron originally equipped with Spitfire Mk. Vs and later Mk. IXs, Dick served in North Africa, Malta, Italy, Corsica, and southern France.
The Role of the Armourer
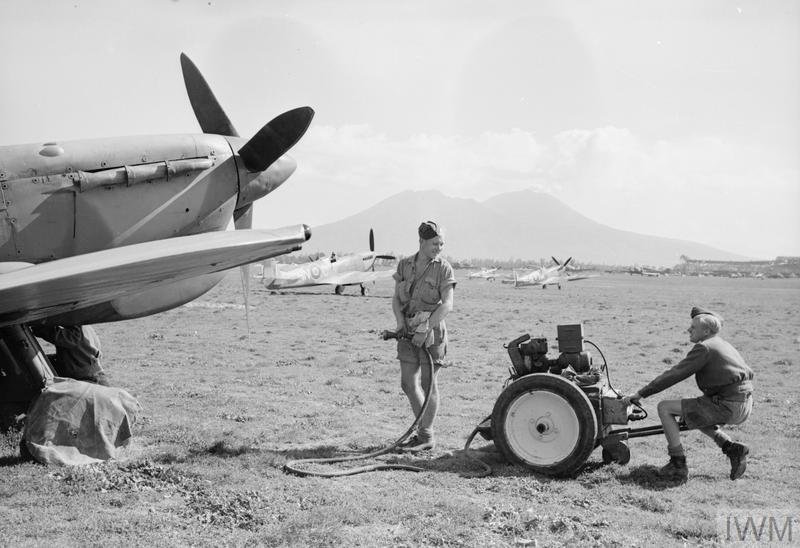
As an Armourer with No. 93 Squadron, Dick’s role was to arm the Spitfires of No. 93 Squadron with ammunition and bombs, regularly strip and clean the guns and perform general maintenance. Based on Dick’s diary entries, he also worked on fitting supplementary fuel tanks to the Spitfires, which extended their range.
Diary Entries: UK Training & Posting Overseas 1942
9 January: Left Halton Camp for Kirkham. RAF Halton, near Wendover, Buckinghamshire, was a major RAF training centre. Similarly, RAF Kirkham, Lancashire, was the main armament training centre for the RAF from November 1941.
1942: Passed Armourer’s course, A.C. II. – Aircraftman 2nd class.
30 March 1942: Passed L.A.C. exam – Leading Aircraftsman.
1942: Arrived at RAF Speke. Note: Today, RAF Speke is Liverpool John Lennon Airport.
1942: Promoted A.C. I. - Aircraftman 1st class.
11 November: Left Wareford for overseas. By train to Scotland. Arrived at Greenock at 08.00hrs.
13 November: Boarded the HMT (His Majesty's Transport) Bergensfjord (a former Norwegian ocean liner). Navy, Army, and Air Force personnel were all on board.
14 November: Left Greenock at 05.00hrs heading for the North Atlantic. There are 16 boats in our convoy escorted by Royal Navy Destroyers.
20 November: Nearing the Mediterranean, passed Gib (Gibraltar) at midnight. Could see Tangiers lit up at night.
Tunisia 1942
8 December: Arrived at Souk-El-Arba station (Tunisia) at 08.00hrs. We’re about 40 miles behind the frontline.
19 December: Had a terrible sight to witness as one of the (ditto) ground crews was taken up in the air sitting on the tail of a plane. The kite (RAF slang for aircraft) crashed on landing throwing the man right over the front of the kite. He sustained serious injuries to his legs. Note: During bad or windy weather, it was common practice to have a member of the groundcrew sit on the tailplane of an aircraft as it taxied to its take-off position. Usually, the groundcrew would dismount while the pilot carried out their pre-flight checks.
30 December: Nearly killed when strafed by a Jerry aircraft. Had to dive for cover on the roadside. Learned all the Squadron’s tools were lost when the boat carrying them was torpedoed on 18 December.
The Desert Air Force (DAF) in Tunisia
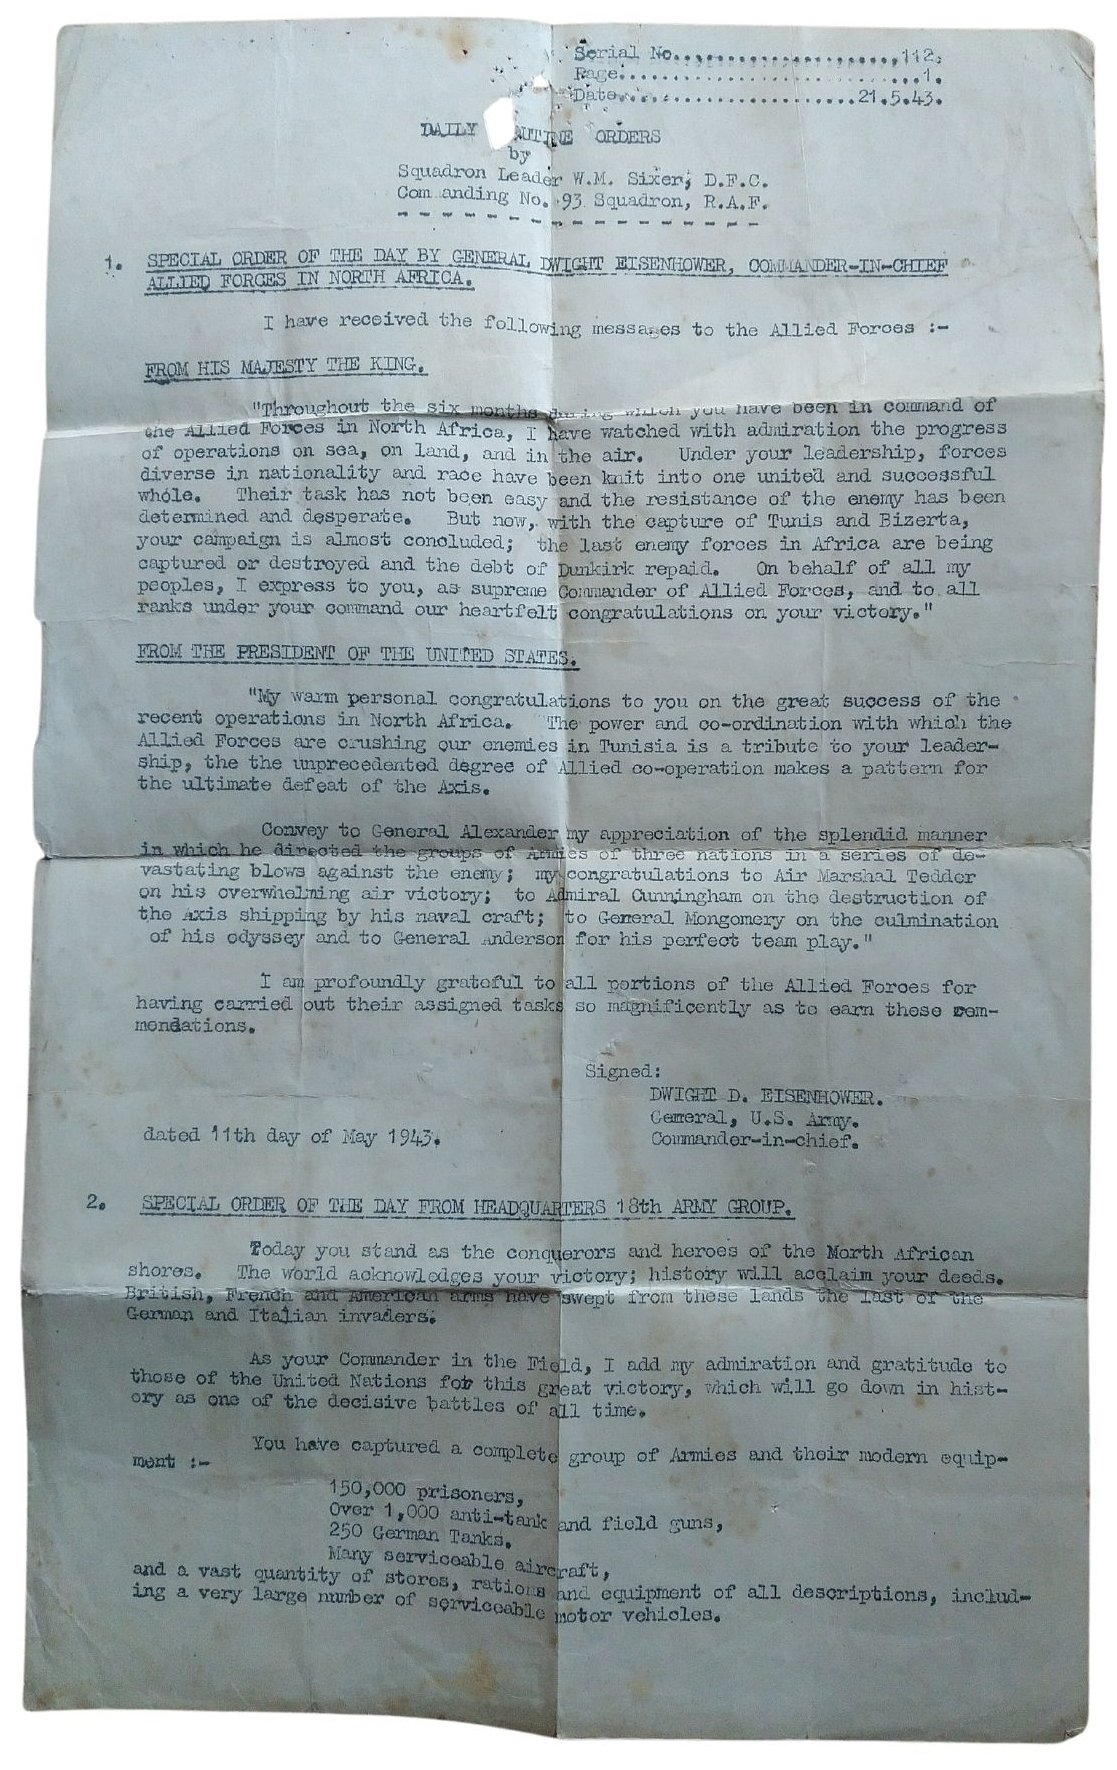
The Allied campaign in Tunisia started in November 1942. By late March and throughout April 1943, the Desert Air Force (DAF) was conducting bombing and strafing missions (interdiction) on infrastructure, such as bridges, supply routes, Luftwaffe airbases, Tunisian ports, and the capital of Tunis. They also flew missions over Sicily and southern Italy. The aim of the missions was twofold. First, starve Axis forces of everything from fuel and ammunition to food, and thus weaken their ability to resist. The second was to establish Allied air superiority over the battle space and enable the ground forces to make a final push on the Tunisian capital. The DAF also provided close air support to Allied ground forces.
On 7 May 1943, Allied armour rolled into Tunis, taking many Axis troops based in the city completely by surprise. By 10 May, the Luftwaffe had evacuated what aircraft and equipment they could salvage. The capture of Tunis led to an Axis surrender and the capture of around 250,000 prisoners. It was a significant Allied victory.
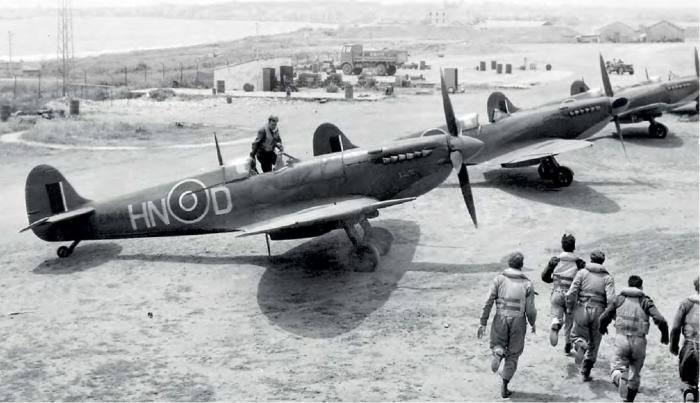
No 72 Squadron, 324 Wing RAF. Spitfire, North Africa 1943.
Diary Entries: Tunisia 1943
3 February 1943: Jerry bombed drome (aerodrome) in the morning. Three RAF were killed and five wounded. Bombs were released from FWs (Focke Wulf 190 fighter-bombers) while I was having a wash. Eight Spits U.S. (unserviceable).
22 February 1943: Fortresses (B.17 Flying Fortress heavy bomber) dropped bombs on Souk-El-Arba, 25 people killed by mistake. Note: There were two airfields at Souk-El-Arba both located near what was at the time the village of Souk-El-Arba but since 1966 has been known as Jendouba. The site is about 81 miles west-southwest of Tunis.
1 March 1943: Kites on a bomber escort, one Spit and one ME (presumably a Messerschmitt Bf 109) shot down during a dogfight over the drome at 12.30hrs.
2 March 1943: Air Marshal Sir Arthur Coningham arrived at the drome. Note: Today, Coningham is chiefly remembered as the person most responsible for the development of forward air control parties directing close air support, which he developed as commander of the Western Desert Air Force between 1941 and 1943.
16 March 1943: Dive-bombed without warning. Dived under a kite and watched bombs bursting. AA (anti-aircraft artillery) returned fire. One soldier was killed.
April 1943: Squadron mainly assigned to bomber escort missions. Note: The Allies heavily bombed Axis (Luftwaffe and Italian) airfields and infrastructure such as bridges. Enemy air activity diminished as the Allies' bombing campaign intensified.
7 May: Tunis reported taken.
10 May: Bizerta reported taken. After being reported missing Red Herbert got back to the airfield with 20 released prisoners.
12 May: Thousands of prisoners taken. End of the campaign in Africa.
14 May: Move to a new drome between Tunis and Bizerta. Met thousands of prisoners and passed through the battlefront. Saw plenty of wrecked tanks, etc.
15 May: On new drome. Found a camp bed, very useful. Bags of rifles, etc. Crashed and wrecked Ju-52s all over the airfield and two ME-109s. Had to be careful of boobytraps and mines. Note: The Junkers Ju-52 is a three-engine transport aircraft and was a mainstay of the German Air Force (Luftwaffe).
20 May: Victory Parade at Tunis. Thousands of troops were in the town.
24 May: Went souvenir hunting. Found the famous Ace of Spades Squadron drome. Every kite was either burned out or shot up. Bags of stores lying about. In this diary entry, Dick is referring to the Jagdgeschwader 53 (JG 53) fighter-wing of the Luftwaffe, known as the "Pik As" (Ace of Spades).
26 May: Move to a drome at Mateur, which is situated between Bizerta and Tunis.
8 June: Drove to Sfax harbour (south of Tunis) and boarded a Landing Ship, Tank (LST).
9 June: Arrived in Malta.
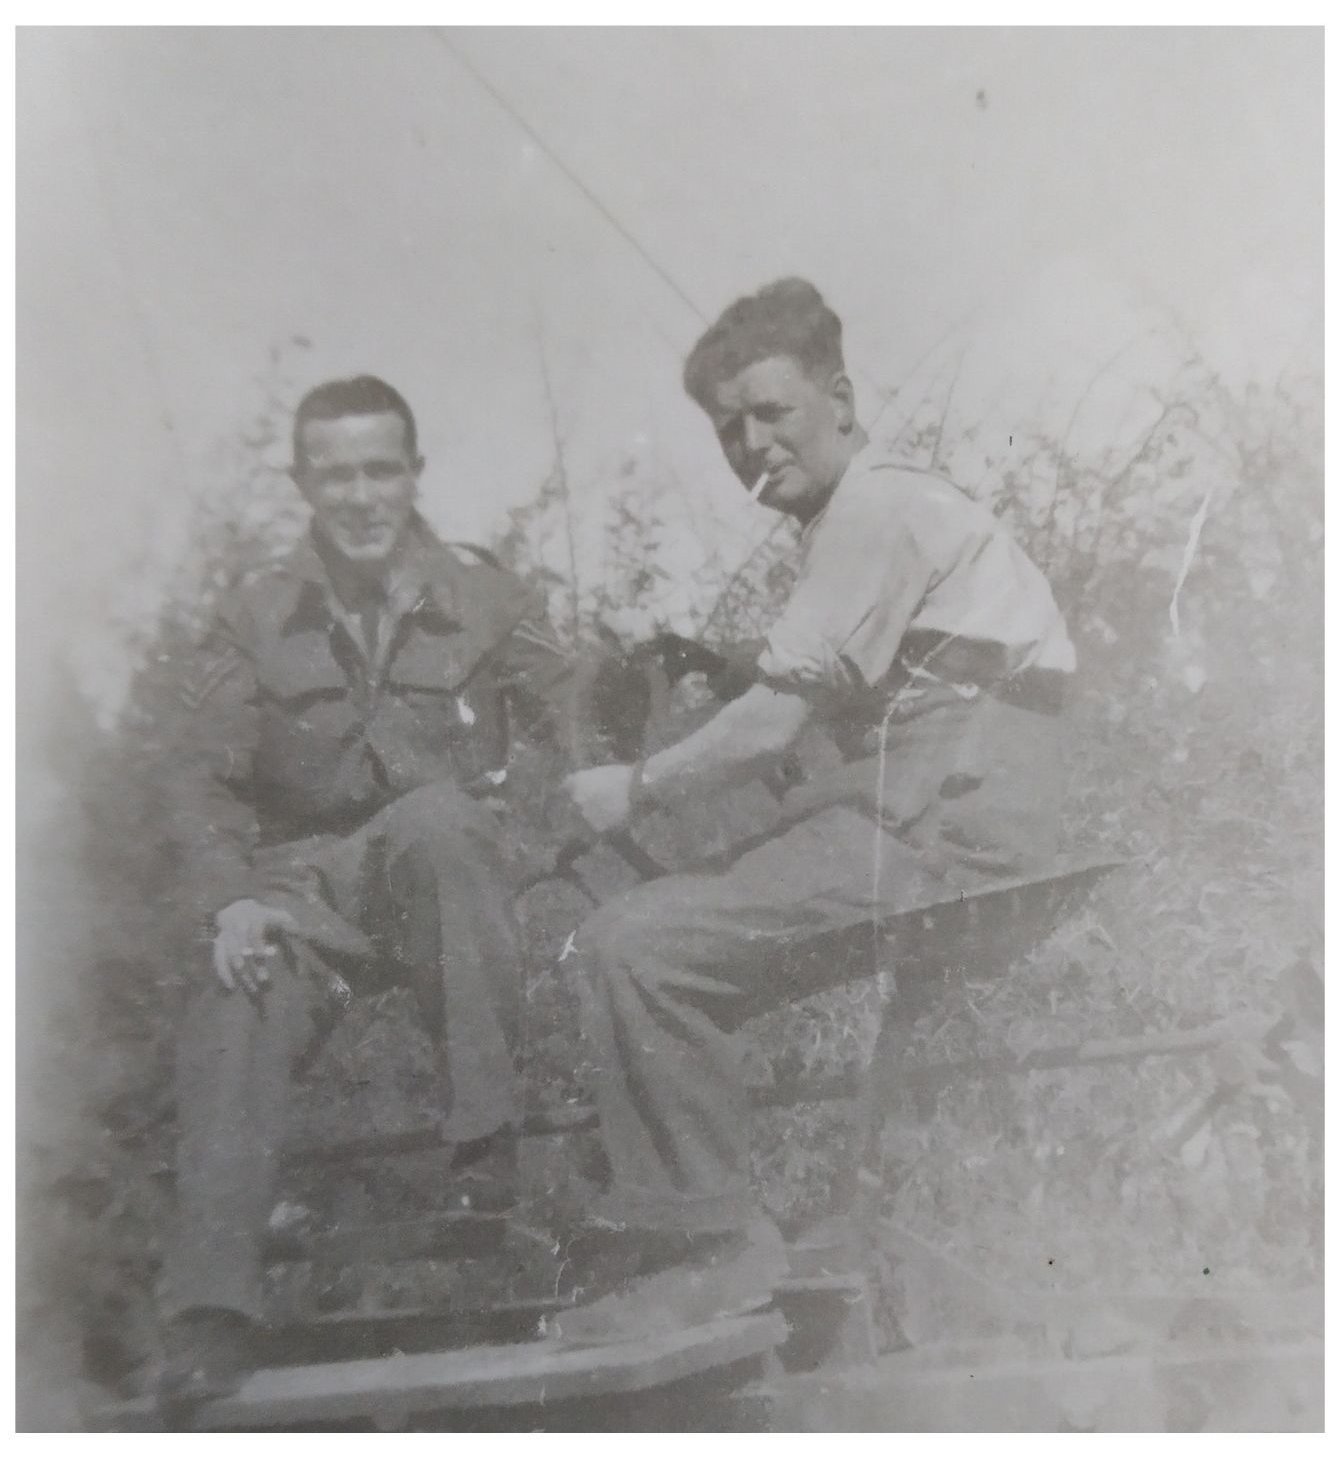
Dick Hewitt, on the left, sitting on the wing of a Spitfire. Date and location of photograph unknown.
Malta 1943
20 June: The King arrived in Malta. He visited the drome.
24 June: Sir Archibald Sinclair (Secretary of State for Air) visited the drome in the afternoon and gave a speech. He thanked us for our work in North Africa.
10 July: Operation HUSKY. Sicily was invaded by troops at 02.30hrs. Kites on dawn sweeps (sorties) over Sicily. Worked until 23.00hrs.
Operation HUSKY, Allied Invasion of Sicily, 9 July - 17 August 1943
Prior to an Allied invasion of the Italian mainland, it was necessary to capture the island of Sicily. Axis forces based on Sicily were resupplied across the Messina Strait. The key target of the invasion was the port of Messina, the link to the Italian mainland. But it was heavily defended and its distance from North Africa meant the Allies could not attack it directly.
A major concern and threat to the invasion fleet was the Italian island of Pantelleria, about 50 miles from the Tunisian coast and halfway to Sicily. The island could be used by Axis forces to attack the invasion fleet at sea. Consequently, the island was heavily bombed and then shelled by the navy. Finally, on 11 June 1943, British troops landed at the main harbour, and the island garrison surrendered.
During June and July 1943, the Desert Air Force started to relocate to Malta in preparation for the invasion of Sicily.
On 9 July, British, Commonwealth and American troops started landing on Sicily preceded by airborne forces. In the weeks prior to the invasion, the Allies had launched a concerted aerial bombardment of the Axis air forces on Sicily – winning air superiority. However, bad weather on the night of 9 July resulted in the airborne forces being scattered. Once ashore, the British 8th Army initially made steady progress north until checked at Catania. The Americans, under General Patton, took Palermo. After fighting a defensive campaign for about two weeks, the Axis forces started to withdraw. After 38 days, Allied forces finally took Messina. However, around 120,000 enemy troops had been successfully evacuated. At the time, Operation HUSKY was the largest amphibious invasion of the Second World War with over 180,000 men, 4,000 aircraft, and 3,000 vessels deployed.1
Italy 1943
19 – 20 July: Moved by tank landing craft to Sicily. Arrived Pachino beach (southern tip of Sicily) at 06.00hrs.
12 August: Jerry bombed Lentini Drome (south of Catania) during the night (surprise raid) 24 kites were written off, and 96 airmen were killed or wounded (322 Wing).
13 August: Jerry retreats toward Messina evacuating troops.
17 August: Messina reported taken.
18 August: End of Sicilian Campaign.
27 August: Moved to Gerbibi near Mount Etna (west of Catania).
7 September: Arrived Falcone (north coast of Sicily).
Operation AVALANCHE – Allied landings at Salerno, 8/9 September 1943
German forces correctly anticipated the Allied landings near the port of Salerno by the U.S. 5th Army and concentrated five divisions against the beachhead. Initially, it appeared the Allies might be thrown back into the sea. However, Allied airpower gradually strangled the Germans' ability to resupply its land forces, and gradually they had to give ground. However, the Germans exploited the mountainous terrain to their full advantage as they staged a fighting withdrawal northward. Eventually, Allied progress was brought to a halt along the heavily fortified ‘Gustav Line’.
8 September: We were told landings would be made near Naples during the night (Operation AVALANCHE). Ready to move to Naples. Italy surrendered and Naples invaded in the early hours.
During the next few days, the Squadron flew numerous sorties over the beachhead providing air support to the ground forces.
23 September: Moved to Milazzio (west of Messina) and boarded transport, moved off at 20.30hrs headed for the Italian mainland.
24 September: Convoy shelled. Landed midday near Salerno.
28 September: Moved to Battipaglia drome (east of Salerno).
11 October: Moved to Naples passing through Pompei.
30 October: Air Chief Marshal Sir Keith Park landed at Drome. Note: Park played a pivotal role in winning the Battle of Britain.
Usually, a Spitfire Squadron had twelve aircraft split into two flights of six (A and B Flights). In combat, the aircraft would typically divide into smaller groups of two or three aircraft.
12 November: German fighter bombers attacked a nearby airfield. The Squadron’s aircraft were scrambled and pursued the enemy aircraft, but they escaped.
14 November: 324 Wing broke the record for the number of kites shot down in 12 months: 301.5.
22 November: Enemy aircraft strafed the main road to Rome. Six enemy aircraft were shot down and another six were probably downed.
24 November: Six aircraft on shipping patrol and ‘L’ on patrol of the front line (presume that the letter ‘L’ refers to an individual aircraft).
26 November: A German Ju-88 (The Junkers Ju-88 twin-engine multirole combat aircraft) was shot down by 435 Squadron. Kites on mine sweeping patrol. Enemy aircraft over our drome and heavy AA fire (anti-aircraft artillery sometimes referred to by the British and Commonwealth forces as Ack-Ack).
28 November: Strafed road transport – four trucks and two staff cars hit. F/O (Flying Officer - a junior commissioned rank in the Royal Air Force) Swain dived too low, hit some trees, and then went straight into the ground.
2 December: Kites on bomb line patrol. Note: The bomb line is a line or limit beyond which aircraft may make attacks on the enemy without risking damage to their own troops.
5 December: Kit bags lost at BARI (Bari is a port city on the Adriatic Sea and the capital of southern Italy’s Puglia region). 12 ships sunk in the harbour. Souvenirs, etc. all lost, and 500 Woodbines (British brand of cigarettes).
7 December: Red Herbert shot down a Me-109, his first kill. Note: The Messerschmitt Bf 109 was the backbone of the Luftwaffe’s fighter force along with the Focke-Wulf Fw-190. Me-109 and Bf-109 are used interchangeably to refer to the aircraft.
10 December: Jet tanks fitted. Note: I am assuming this diary entry refers to the ground crew fitting jettisonable extra fuel tanks to the Spitfires. These fuel tanks extended the range a Spitfire could fly but also somewhat limited the aircraft’s performance. The fuel tanks were fitted under the central section of the fuselage and carried a 30, 45 or 90-gallon capacity. They were also known as drop tanks or ‘slipper’ tanks and could be jettisoned after use or before engaging enemy aircraft.
16 December: FLT (Flight Lieutenant) Taylor was shot down and belly-landed on a beach. Returned safely the next day.
Christmas: Dick seems to have enjoyed the Christmas period with plenty to eat and drink. He complained of feeling hungover on Christmas day after too much merry-making the night before.
The weather during the late autumn and early winter of 1943/44 steadily deteriorated. The Squadron was often at half-hour readiness (held ready to scramble into action if required). When not working, Dick appears to have spent much of his free time visiting local towns, going to the cinema and the occasional concert, and following the inter-squadron football matches. He was also assigned to sentry duty.
Italy 1944
11 January: Typhus is very bad in Naples.
13 January: Bombers over all day (Flying Fortresses) about 950 passed overhead on their way to bomb Cassino (Between 17 January and 18 May, Monte Cassino and the Gustav Line defences were attacked on four occasions by Allied troops.). All fives went away replaced by nines. Note: Dick is referring to the replacement of Mk. V Spitfires with the new Mk. IX variant.
14-16 January: Prepared to move to a new location. Left Naples at 10.30hrs and arrived at the new drome about 14.00hrs. Crossed the Volturno River Bridge.
18 January: Watched Bostons drop their loads on enemy positions and return safely. In this diary entry, Dick is referring to the American-built Douglas A-20 Havoc medium bomber that was renamed the Boston by the RAF.
19 January: 15 miles behind front lines – guns firing.
Operation SHINGLE, the Battle of Anzio, 22 January – 5 June 1944
To break the deadlock and get the Allied advance moving again, the High Command decided to launch another amphibious landing. The intention of Operation SHINGLE was to bypass the Gustav Line, forcing the Germans to pull troops back from Cassino and open the road to Rome. Operation SHINGLE was launched on 22 January 1944. Initially, the landings were unopposed. However, the Allies quickly lost the initiative and failed to break out from the beachhead. Instead, by 25 January, the Germans counterattacked with elements of five divisions and quickly surrounded the Allied landing force. For months, the Anzio campaign dragged on with neither side able to gain a significant advantage. Eventually, the deadlock was broken when the Allies launched a series of new operations compelling the Germans to redeploy their limited forces. On 4/5 June, Rome fell, but the Germans remained undefeated and pulled back to a new defensive position known as the Gothic Line.2
21 January: Told that another landing would be made 50 miles north of here during the night at Cape ANZIO.
22 January: Landings successful – no opposition. Went to the village of Mondragone (situated on the coast about 28 miles northwest of Naples). The village had been badly bombed.
27 January: The Squadron fetched four down and two damaged for the loss of one pilot missing. Dick often uses the term ‘fetched down’ in his diaries to indicate that the Squadron had either shot down or damaged enemy aircraft.
28 January: The Squadron is down to six serviceable aircraft due to prangs. Plenty of shelling night and day. Note: The loss of aircraft due to non-operational accidents seemed common at the time. Between 1939 and 1945 RAF Bomber Command, for example, lost 1,380 aircraft within the UK on operational flights and 3,986 aircraft in non-operational accidents.
7 February: Two MEs (Messerschmitt Bf 109s) shot down. Red Herbert forced landing with serious injuries.
10 February: Cruisers shelling enemy positions night and day.
12 February: Jerry active over ANZIO beach, bombing and strafing.
15 February: Red Herbert died in hospital. Note: In fact, Flight Sergeant Henry Ivor (Red) Herbert, Service Number: 415189, 93 Sqdn., Royal New Zealand Air Force, died on 7 February 1944, age 20. Red is buried at the Anzio War Cemetery. He had been flying Spitfire Mk. IX MA509.
16-17 February: Dick says the Wing shot down seven enemy aircraft over the ANZIO beachhead. He also writes that ‘R’ and ‘Z’ both had forced landings at ANZIO. I am assuming that Dick is referring to individual aircraft using the RAF letter code. The RAF used three-letter codes to identify aircraft from a distance. Two letters before the roundel, for the squadron to which the aircraft belonged, and another letter after the roundel for the individual aircraft.
1 March: Record of enemy kites destroyed 343.5.
16 March: Cassino was heavily bombed for two days.
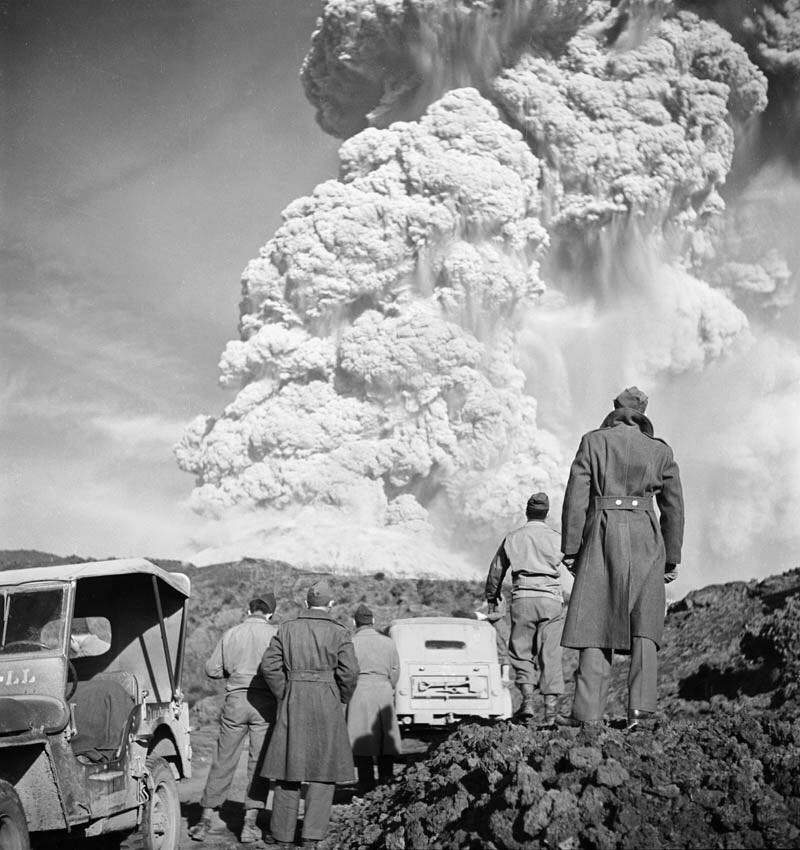
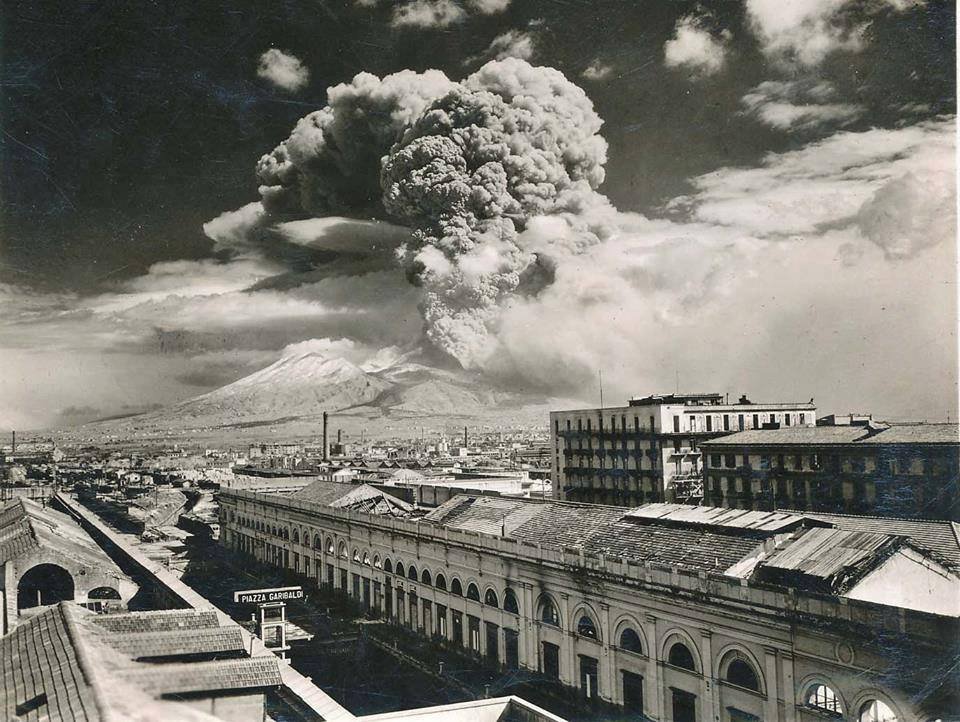
18 March: Went on a day trip to Napoli (Naples). Returning at night saw Mount Vesuvius in eruption. Most wonderful sight to see. Hot lava running down the sides. Still visible at 30 miles. The volcanic eruption had started the day before and lasted for about ten days.
22 March: Mount Vesuvius – People have started to evacuate southern Naples.
23 March: Finished work at 17.00hrs and went on a trip to see Mount Vesuvius at night. A sight worth seeing.
24 March: W/O (Warrant Officer) Bunting fetched two MEs down and then force-landed at ANZIO. He returned to our drome flying a Kitty-Hawk. Note: The RAF continued to operate Kittyhawks in Italy until the summer of 1944 when they were finally replaced with North American Mustangs.
30 March: The Squadron's total: 52.5 enemy aircraft shot down, 18 probably shot down, 72.5 damaged.
Between April and mid-May 1944, the Squadron flew numerous sorties over the ANZIO beachhead. Enemy air activity appears to have tailed off with only occasional dogfights. However, pilots and aircraft were still lost, but more due to accidents than enemy action. Dick seems to have spent most of his time as a duty armourer. In his spare time, Dick visited Naples, went to the cinema and went swimming in the sea as the weather steadily improved.
19 May: Cassino and Monastery Hill taken. Plenty of bombers flying north during the day.
21 May: Squadron fetched eight Jerries down.
23 May: Offensive started at ANZIO. Squadron ready to move up.
3 June: ‘A’ Party packed lorries. ‘B’ Party took over Squadron kites. ‘A’ Party left camp at 19.00hrs for a drome 96 miles north.
6 June: Started to pitch camp. Heard that the Second Front has started. Rome taken. The liberation of Rome was completely overshadowed by the Normandy landings of D-Day (Operation OVERLORD).
7 June: 05.00hrs woken by anti-aircraft fire. Jerry over our drome.
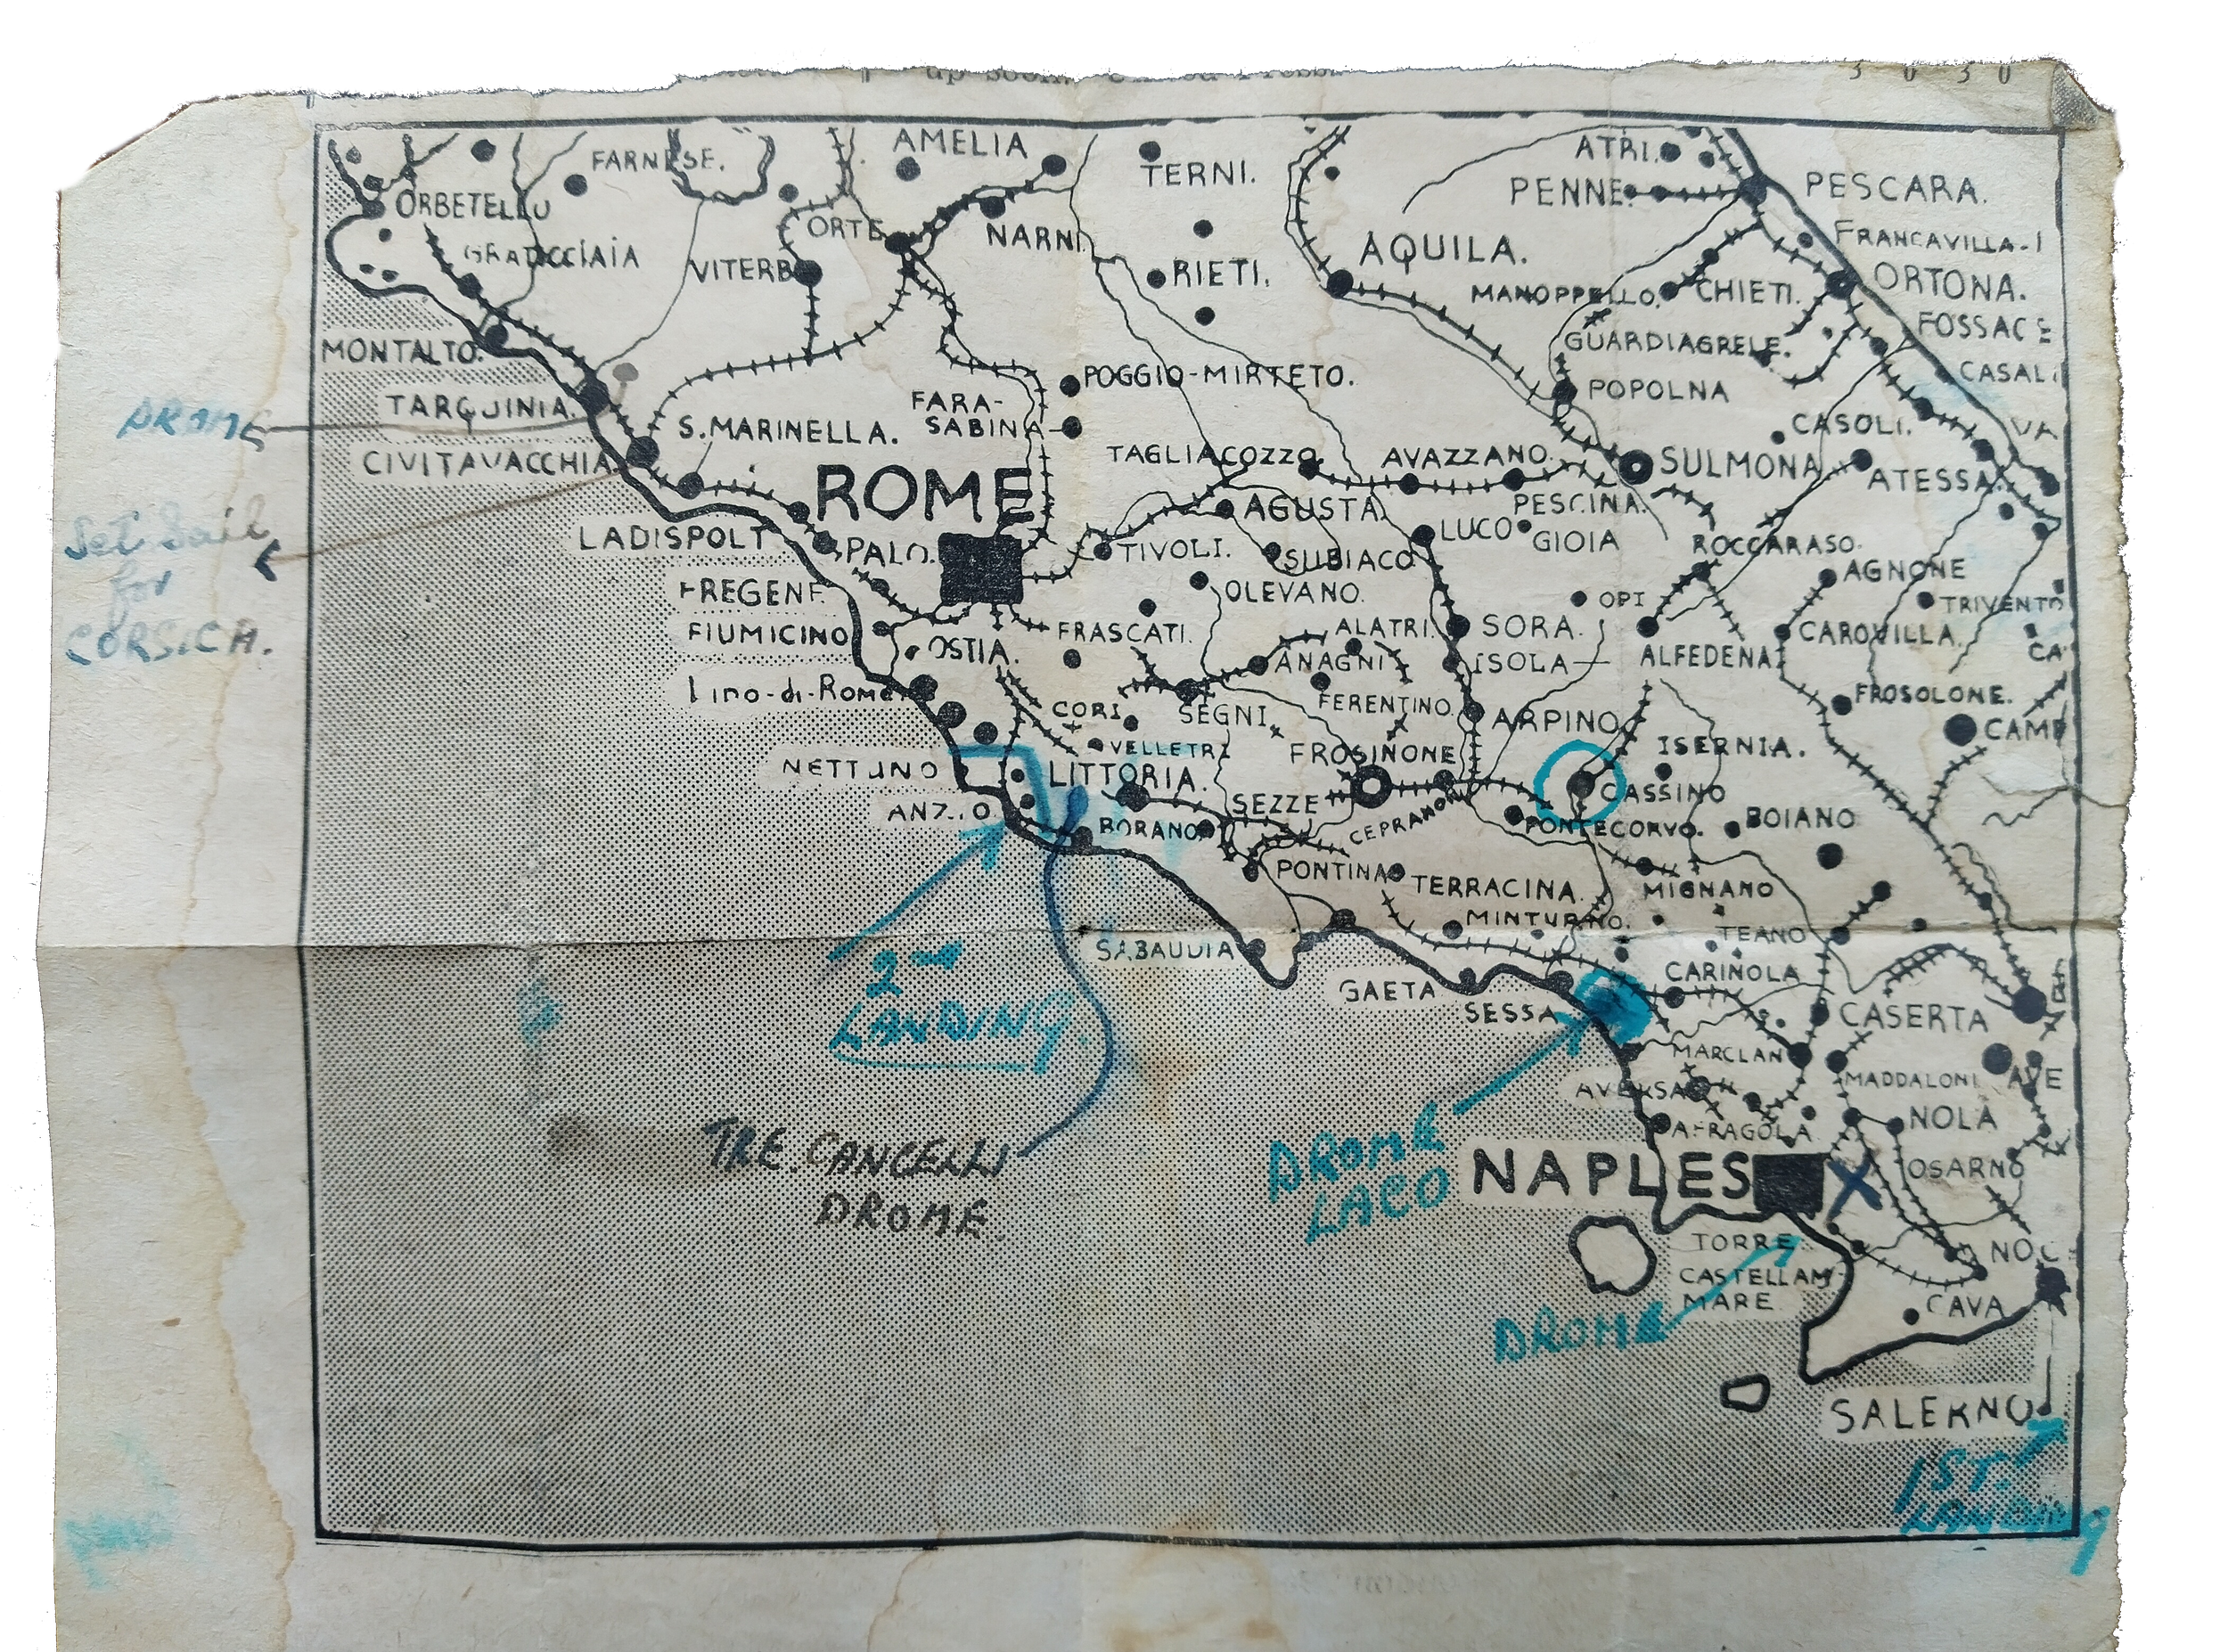
8 June: Transferred to No. 8 C.C.S. (Casualty Clearing Station) six miles north of ANZIO to an airstrip called Tre Cancelli.
12 June: Packed trucks ready to move at night. Plenty of wrecked tanks on the road and bridges blown up.
13 June: 93 miles north of Rome arrived at Tarquinia (the town is situated on the coast, northwest of Rome) airfield at 03.00hrs. Passed through Rome at midnight. Wonderful buildings. Stayed about an hour in the city.
17 June: Dakotas landing all day to take away the wounded. Note: The Douglas C47 Dakota is one of the most successful military transport aircraft designs in history and was widely used by the Allies during World War Two.
22 June: Left No. 8 C.C.S. for Rome – had a tour of the city.
24 June: Moved about 60 miles north and arrived at Grosseto (another town close to the coast, northwest of Rome). The town was bomb-damaged. The R.E. (Royal Engineers) worked to repair the bomb-cratered landing strip.
4 July: Moved 50 miles north to a new airstrip. It appears from Dick’s diary that enemy air activity had dropped off considerably.
15 July: Moved about 110 miles, south to the docks.
17 July: Left harbour at 19.00hrs heading west, nine LSTs in convoy. Note: The LST or Landing Ship, Tank, was designed to carry around 18 Sherman tanks or 30 3-ton trucks and birth 200 troops. The ship could land vehicles, troops and cargo directly onto beaches without the need for a harbour.
18 July: Arrived Porto Vecchio, Corsica, at 11.00hrs. Headed north along the coast road, stopped overnight at Bastia (northern tip of Corsica).
19 July: Arrived at drome near Calvi (west of Bastia, on the coast) at 17.00hrs.
26 July: Went into Calvi in the evening and sold 200 cigarettes for 30/- (30 shillings) – a good price. You can sell almost anything here at a good price.
27 July: Getting ready for the invasion of southern France (Operation DRAGOON). 90-gallon (drop) tanks fitted to the aircraft. Pilots doing night flying and early mornings. Just the same as in Malta.
30 July – 2 August: Fighters sweep over Genoa and north.
3 August: 93 and 72 Squadrons do sweeps over Nice.
7 August: 43 Squadron pilot burned to death after belly landing and jet tank caught fire. A pilot from 225 Squadron drowned after nose-diving into Calvi Bay.
11 August: The whole Wing went on a strafing raid at 18.00hrs. They wrecked a lot of radio location stations around Nice. The mission was a complete success.
Operation DRAGOON, Invasion of southern France, 15 August – 14 September 1944
Operation DRAGOON (originally codenamed ANVIL) was an Allied invasion of southern France that led to the drive up the Rhone River Valley. Originally intended to support the D-Day invasion and Operation Overlord, DRAGOON was carried out more than two months later because of a lack of supplies and equipment. Within days, the Allies secured more than 40 miles of coastline and captured the vital French ports of Toulon and Marseille, providing critical support to the Normandy-based Allied forces moving to the German border. DRAGOON was largely an American and French operation, however, 324 Wing, including 93 Squadron provided part of the air umbrella.3
15 August: Invasion took place (start of Operation DRAGOON). Two gliders landed at the drome. A Fortress (Flying Fortress) landed shot-up by flak (A contraction of the German Flugabwehrkanone meaning anti-aircraft artillery). Kites doing air cover over the invasion beaches from dawn to dusk, but no Jerries to be seen.
21 August: Moved off for docks at 09.00hrs. Boarded LST at L'Île-Rousse (Corsica) and pulled out of the harbour at 20.00hrs. Very rough sea, the ship was rolling and pitching.
22 August: Arrived at Cavalaire (Cavalaire-sur-Mer is southwest of Nice between Saint-Tropez and Toulon in the southeast region of France) at 20.00hrs. Slept at a marshalling area outside of the town.
23 August: Left at 09.00hrs for a drome 15 miles away at St. Tropez and arrived at 11.30hrs. Departed again at 15.30hrs for a drome 140 miles north.
24 August. Terrible accident on the way down a mountain, and two died. Arrived at Cisteron (sic. Sisteron) at 20.00hrs. Marseille and Bordeaux regions of France were liberated by the Allies.
27 August – 1 September: The Squadron flew strafing sorties against enemy transport, shooting up trains, trucks, cars, etc. During this period several pilots and aircraft were lost.
5 September: Moved about 115 miles toward Lyon.
6 September: Left camp at 08.00hrs. Passed through Vienne (south of Lyon). We saw hundreds of Jerry transports burnt out along the road. Rhône valley. Arrived at Lyon airport at 16.00hrs.
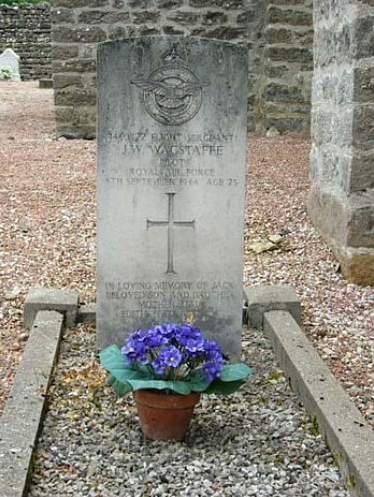
8 September: The Squadron flew sweeps over Germany – strafed Jerry trucks. ‘M’ shot down in flames. F/SGT Wagstaffe killed. Flight Sergeant John William Wagstaffe, service No. 1430722, Royal Air Force Volunteer Reserve, 93 Squadron, was killed in action flying Spitfire Mk IX MH324. He is buried in Bessey-La-Cour Churchyard, France.
22 September: Moved back to Lyon, 150 miles.
28 September: Passed through Avignon, France, and arrived at La Jass (sic. La Jasse) at 15.00hrs. Travelled 160 miles.
3 October: Moved to Marseille. Arrived at the staging area at 16.00hrs.
5 October: Boarded LST at 05.00hrs.
6 October: The boat moved out at 11.30hrs in a heavy thunderstorm. The boat was like a rocking horse.
7 October: Passed between Corsica and Sardinia at noon. Turned north for Leghorn. Note: Livorno, Italy, also known as Leghorn, which derives from the Genoese name Ligorna.
8 October: Disembarked at 18.00hrs.
During October and November, the weather in Italy steadily worsened with the airstrips often flooded, making them unserviceable (US). As no sorties could be flown for days at a time, Dick spent his time watching films and doing sentry duty.
17 – 18 November: Travelled by lorry 112 miles to Via Figliano (north of Florence) and then another 120 miles to Rimini.
20 November: Fitting bombs on the aircraft. They successfully bombed a railway.
Italy 1945
For the remainder of November, December and into January 1945, No. 93 Squadron flew interdiction missions, bombing and strafing enemy positions, infrastructure, and transport targets. Dick spent his time re-arming the Squadrons’ Spitfires. The winter weather would pause flying for days at a time. The Squadron continued to lose aircraft and pilots to enemy action and accidents.
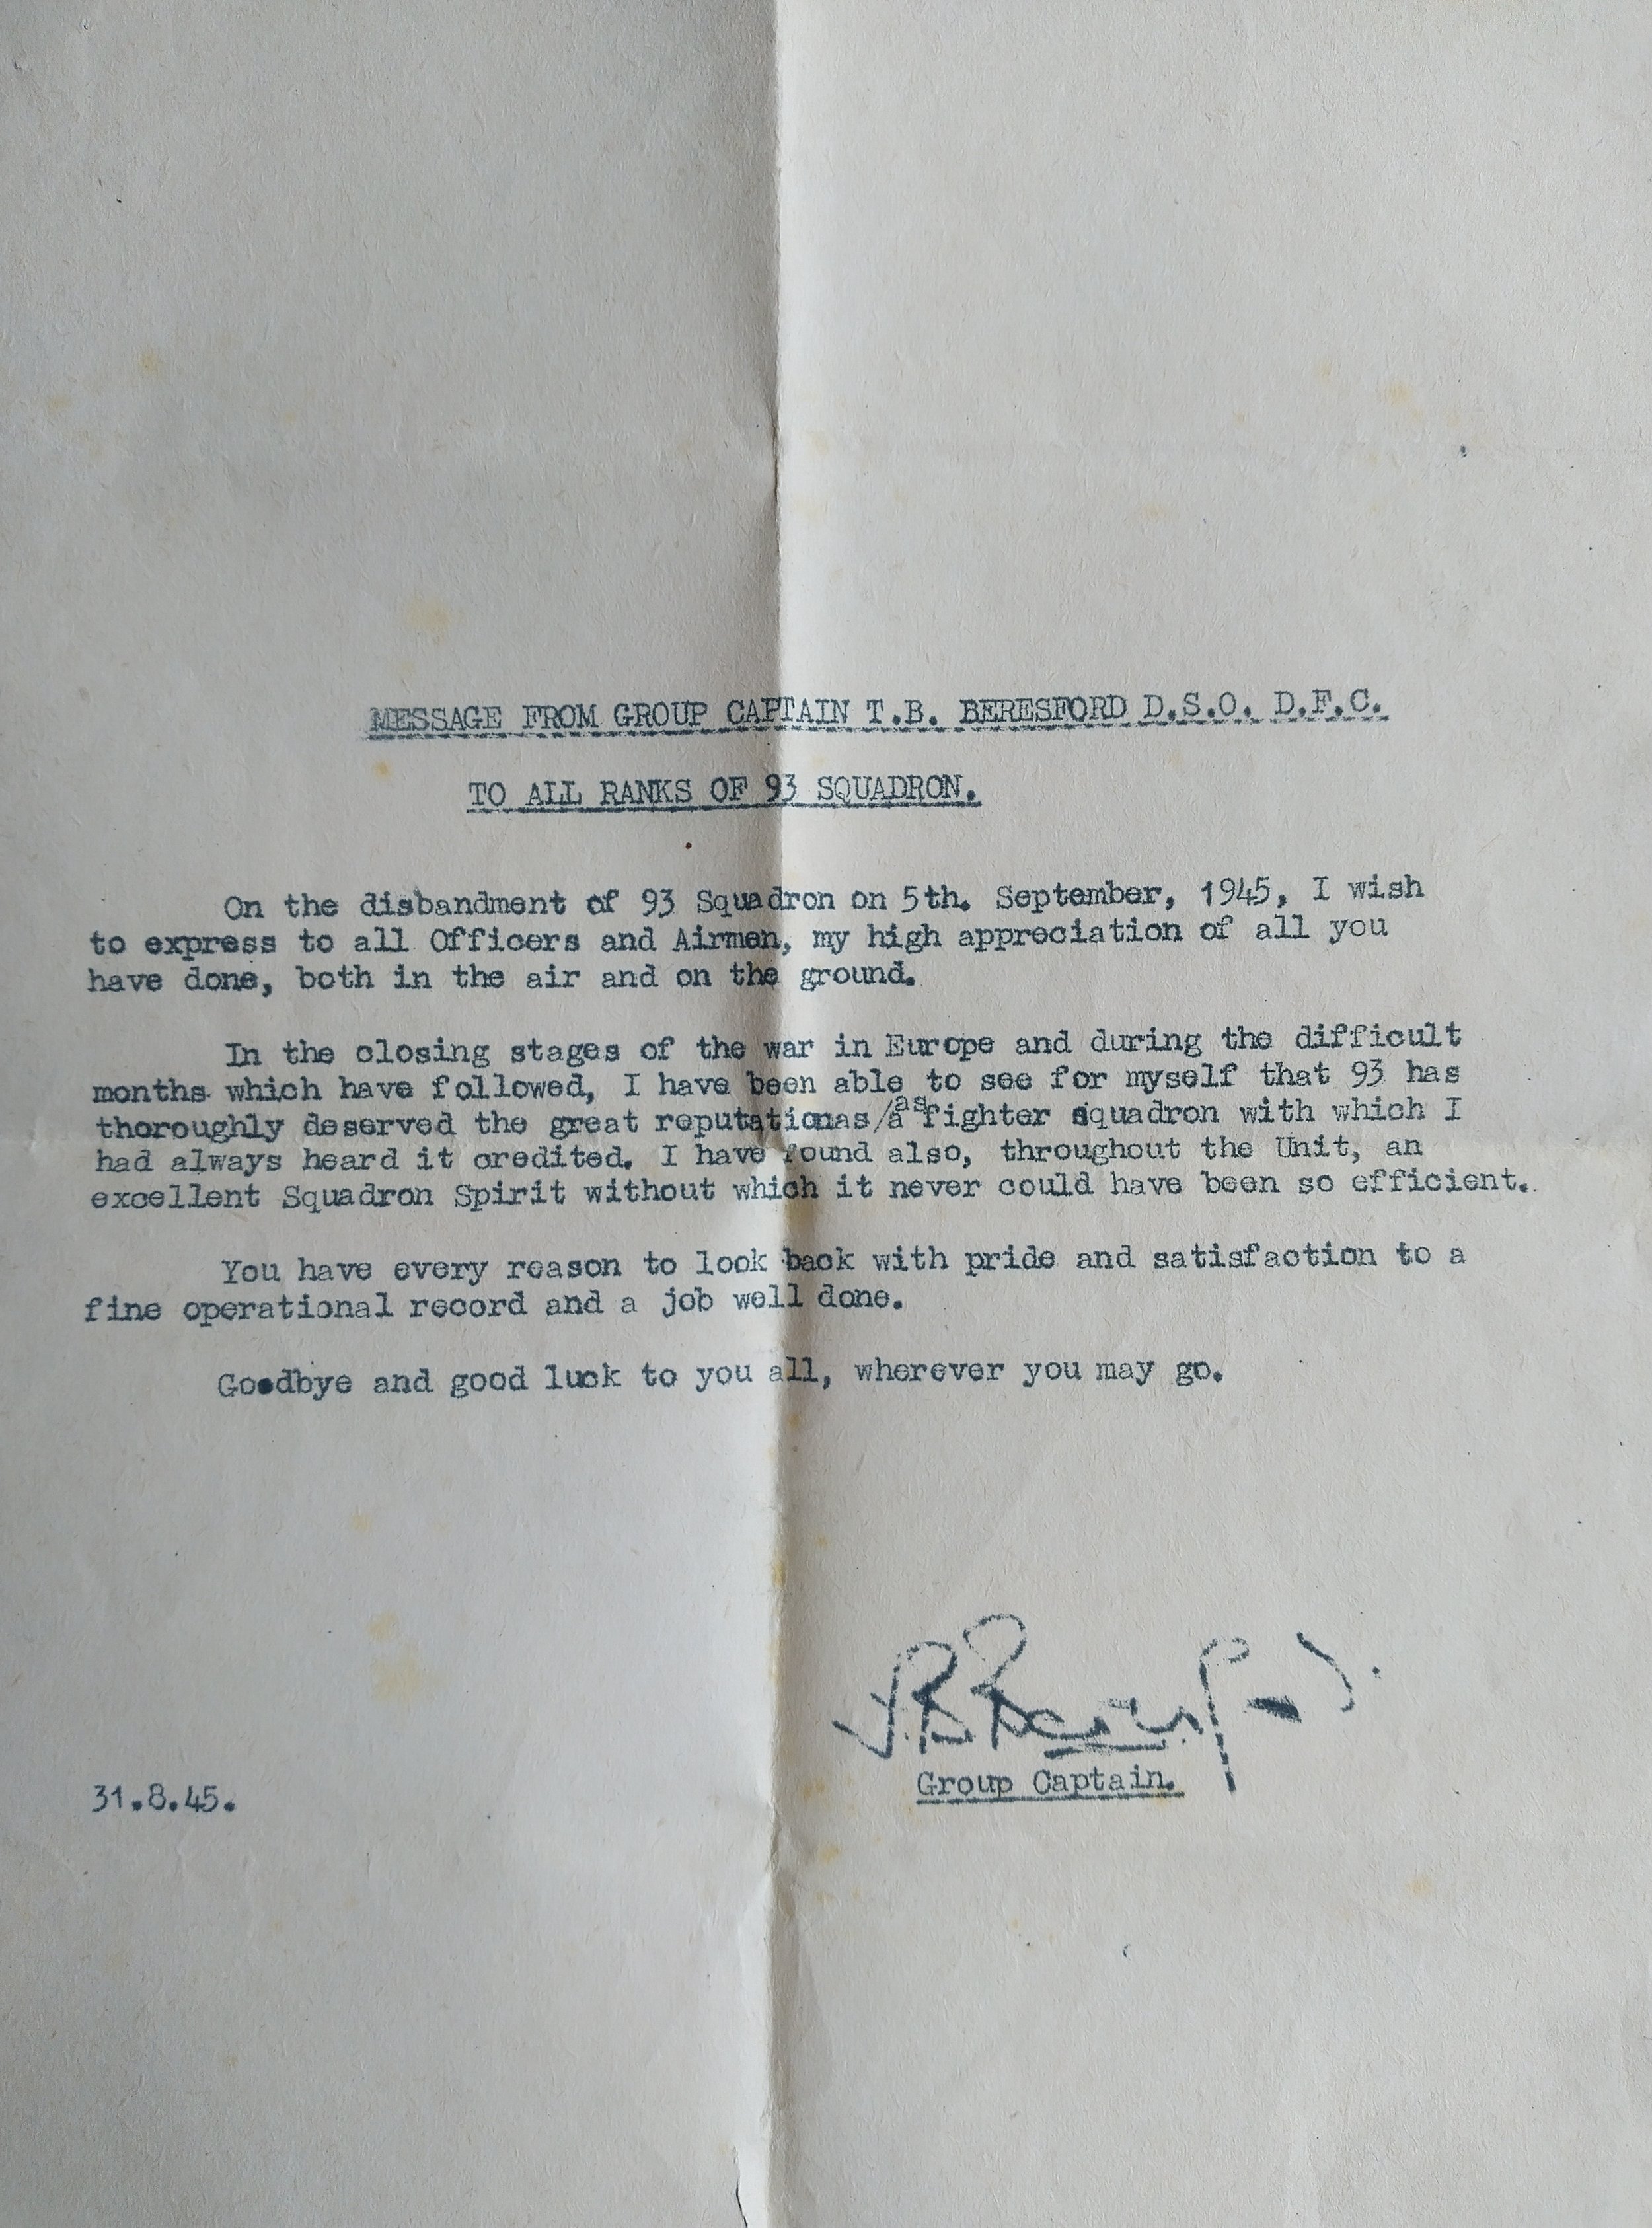
During the early months of 1945, No. 93 Squadron mainly flew interdiction missions in support of ground operations to defeat the last pockets of German resistance in the north of Italy. On 2 May 1945, the Germans surrendered in Italy to Field Marshal Harold Alexander. On 4 May, all German forces in northwest Europe submitted to Field Marshal Montgomery. On 8 May, Victory in Europe (VE Day) was declared.
The air war in Italy cost the Allied Air Forces around 8,000 aircraft and 12,000 service personnel. They had flown 865,000 sorties and in the last seven months of the campaign had dropped around half a million tons of bombs. Immediately after VE Day, 93 Squadron moved to Klagenfurt, Austria on 15 May. On 5 September 1945, the Squadron was disbanded.
Sources:
The personal papers and diaries of Dick Hewitt, No. 93 Squadron, RAF.
Books
Evans, Bryn, The Decisive Campaigns of the Desert Air Force 1942-1945 (Pen & Sword, 2014), eBook.
Farish, Greggs, McCaul, Michael, Algiers to Anzio with 72 & 111 Squadrons (Woodfield Publishing, 2002).
Rawlings, John, Fighter Squadrons of the R.A.F. and Their Aircraft (Crecy Publishing, 1992).
Websites
1. https://www.bbc.co.uk/history/ww2peopleswar/stories/01/a2055601.shtml
3. https://www.iwm.org.uk/history/operation-husky
4. https://www.iwm.org.uk/history/anzio-the-invasion-that-almost-failed
5. https://wikisummaries.org/operation-dragoon/
6. https://www.jeversteamlaundry.org/93squadhistory2.htm
7. https://www.keymilitary.com/article/prejudice-good-order
8. http://www.rafcommands.com/database/serials/details.php?uniq=MH324
HURRICANE: The poignant biography of the plane that won the war.
HURRICANE: The Plane That Won the War by Jacky Hyams tells the story of the Hawker Hurricane and the people who designed it, built it, fought in it, and maintained and repaired it. Read the full book review now.
One British aircraft of the Second World War has come to symbolize the indomitable spirit of the nation during the dark days of 1940, the Supermarine Spitfire. However, it was the Hawker Hurricane that shot down more than half of the Luftwaffe’s raiders during the Battle of Britain. In Jacky Hyams’s new book, HURRICANE: The Plane That Won the War, published by Michael O’Mara Books Limited, the bestselling author attempts to set the record straight.
HURRICANE is an account of how the aircraft was designed, built and its service history. The book is also a testament to the pilots, the Air Transport Auxiliary, the ground crews, and the many unsung heroes of the production line. The stubby Hawker Hurricane or ‘Hurri’ as it was affectionately known was the brainchild of entrepreneurial aircraft manufacturer Sir Tommy Sopwith and Chief Designer, Sir Sydney Camm. Today, Camm is largely forgotten while the name of R.J. Mitchell, the designer of the Spitfire, is familiar to many. Yet, Camm would lead the design teams of the Hawker Typhoon, Hawker Tempest, and the post-war marvel, the Hawker Siddeley Harrier ‘jump jet’.
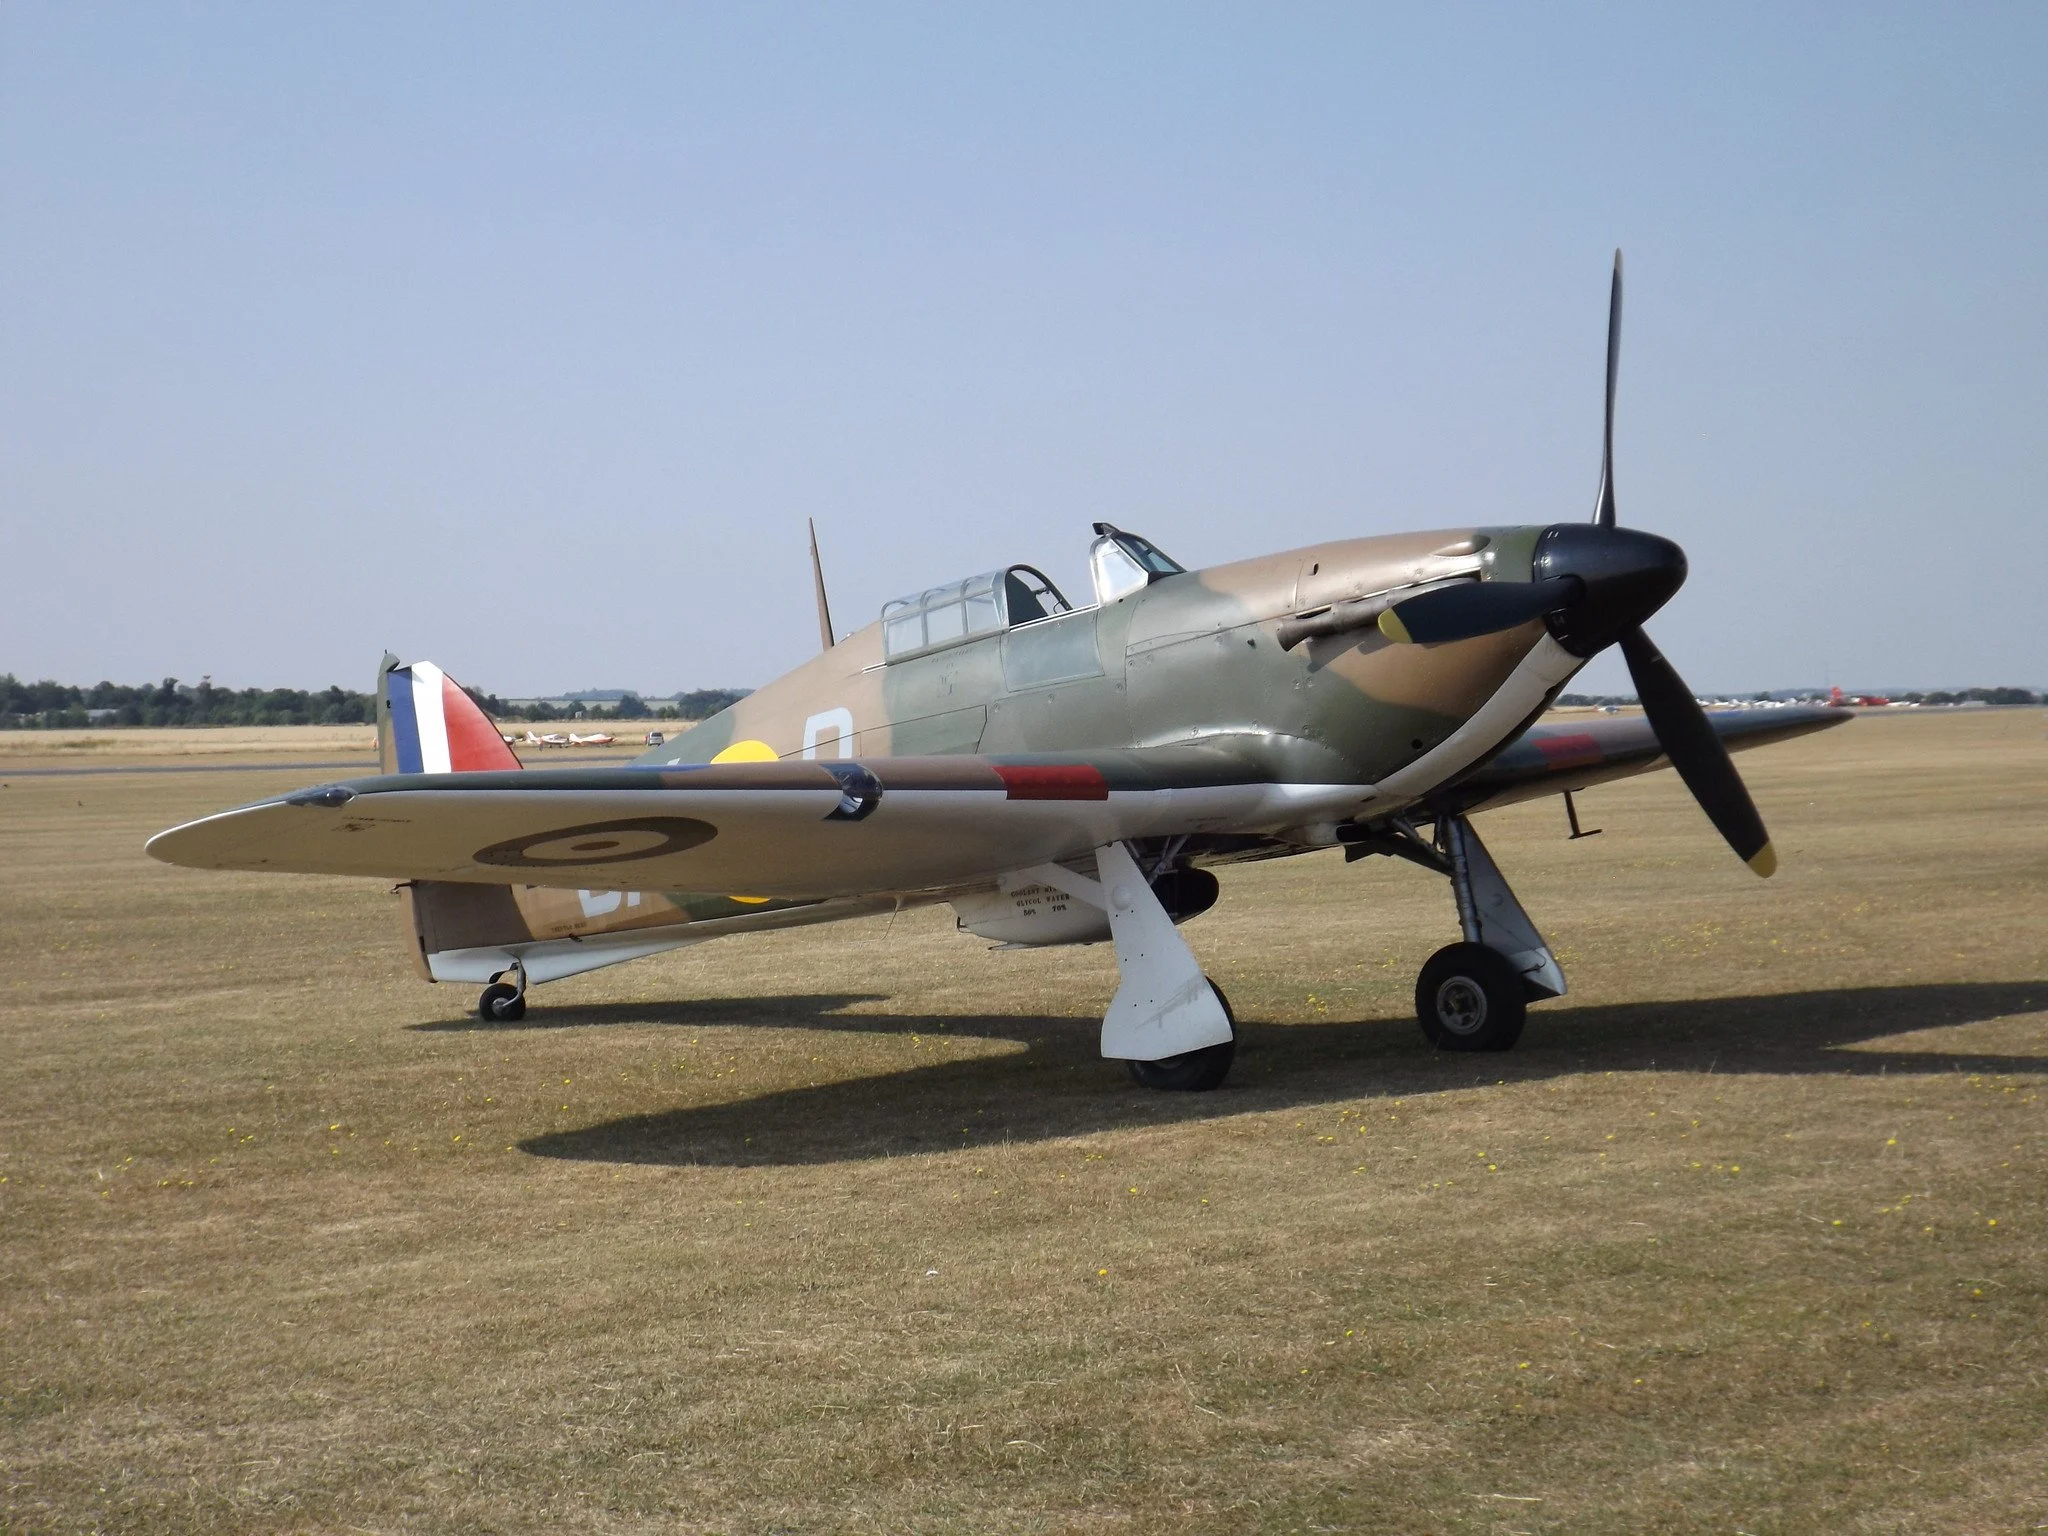
The Hurricane was the first monoplane fighter to enter service with the RAF, although the Bristol M1 was briefly in service at the end of the First World War. Partially constructed from wood and canvas, the Hurricane was quicker and cheaper to manufacture than its more glamorous stable mate, the Spitfire. The Hurri was also a more rugged aircraft, capable of withstanding Luftwaffe punishment that the Spitfire could not. The aircraft’s simple design meant that during the critical days of the Battle of Britain, seemingly unrepairable planes were patched up and put back into service by maintenance units. By the 15th of September 1940, the Hawker Hurricane had shot down more enemy aircraft than all other types of RAF aircraft and anti-aircraft (AA) guns put together.
Using a combination of archive materials and first-hand accounts, Jacky Hyams’s book retells more than just the history of the Hawker Hurricane. It is a book about the countless human stories of quiet courage, sacrifice, hard work, and emotional strain that the factory workers, pilots, and ground crews endured throughout the Second World War. The author keeps the technical jargon and military acronyms to a minimum, and when used she provides short, concise explanations.
Over the post-war period, the Hurri has proven fertile ground for authors, historians, and aircraft enthusiasts with over a hundred books and articles published on the subject. So, it might be fair to say there isn’t too much new to say about the fighter. Nevertheless, Jacky Hyams’s book is engaging, easy to read, poignant, and informative in turn.
By the end of its operational life, the Hawker Hurricane had served in every major theatre of the Second World War and flown with numerous air forces from Australia to Yugoslavia. Around 25 different variants of the aircraft were eventually produced, from Hawker Sea Hurricane to tank-busting ground attack aircraft. Together with the countless men and women who gave themselves so tirelessly to defeat tyranny perhaps Sir Sydney Camm’s stubby little aircraft, the Hawker Hurricane, was the plane that won the war.
4 Reasons to Research Your Ancestor's Military Service History
In this blog post, we'll explore why researching an ancestor's military service history can be of great benefit to individuals and families.

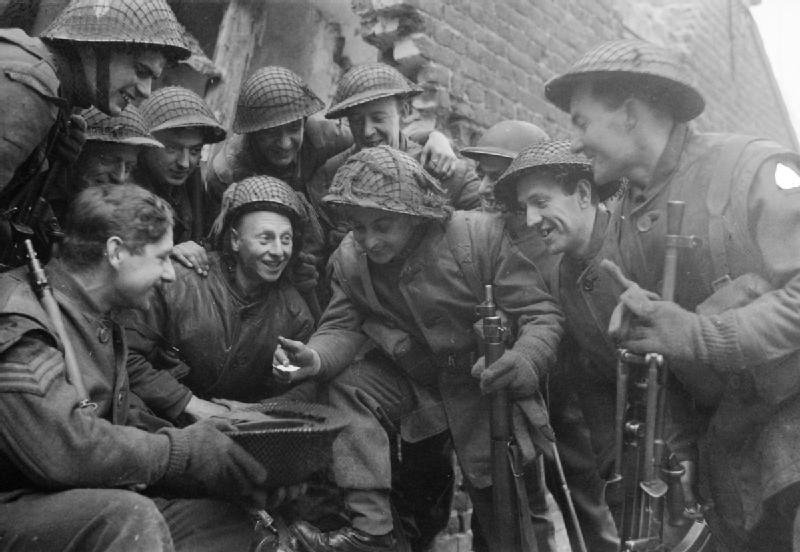
Malindine E G (Capt), No 5 Army Film & Photographic Unit, Public domain, via Wikimedia Commons
Genealogy, or the study of family history and ancestry, has become increasingly popular in recent years. It allows individuals to discover their roots, learn about their ancestors' lives, and connect with their heritage. One aspect of genealogy that can be particularly fascinating is researching an ancestor's military service history.
In this blog post, we'll explore why researching an ancestor's military service history can be of great benefit to individuals and families.
1. Gaining a deeper understanding of your family history
One of the main benefits of researching an ancestor's military service history is that it allows individuals to gain a deeper understanding of their family history. Military service records can provide details on an ancestor's rank, service dates, and where they served. This information can help individuals develop a clearer picture of their ancestor's life and experiences. For example, The National Archives provides access to military service records for British Army soldiers who served between 1914 and 1920. By examining these records, individuals can discover where their ancestors served, what battles they may have fought in, and even details about their injuries or medals awarded.
2. Connecting with national heritage
Researching an ancestor's military service history can also help individuals connect with their national heritage. In the UK, military service has played a significant role in shaping the country's history and identity. By researching an ancestor's military service, individuals can gain a better understanding of the contributions made by their family members to the country's military efforts. This can help individuals develop a stronger sense of connection to their country and its history. For example, the Imperial War Museum (IWM) in London has a collection of over 1 million items that tell the story of modern war and conflict, from personal accounts of soldiers who served in the British Army to numerous films, photographs, and publications. These documents can provide a first-hand look at what life was like for soldiers on the front lines, and help individuals connect with their ancestor's experiences.
3. Discovering previously unknown information
Researching an ancestor's military service history can also uncover previously unknown information about their life and experiences. Military service records may provide details about an ancestor's family, occupation, and other aspects of their life that were not previously known. For example, The National Archives notes that military service records can include details about an individual's next of kin, address, and occupation before and after their military service. By discovering this information, individuals can develop a more complete picture of their ancestor's life.
4. Honouring an ancestor's military service
Researching an ancestor's military service history can also be a way to honour their service and sacrifice. By uncovering the details of an ancestor's military service, individuals can gain a deeper appreciation for the challenges they faced and the contributions they made. This can be especially meaningful for individuals whose ancestors were killed in action or suffered injuries during their service. For example, the Commonwealth War Graves Commission (CWGC) maintains records of individuals who died in military service during both World Wars. By researching these records, individuals can pay tribute to their ancestors who made the ultimate sacrifice for their country.
In conclusion, researching an ancestor's military service history can be a valuable and rewarding aspect of genealogy. By gaining a deeper understanding of family history, connecting with national heritage, discovering previously unknown information, and honouring an ancestor's service, individuals can develop a stronger sense of connection to their past and their family's contributions to history. The UK is home to a wealth of resources for researching military service history, including the National Archives, the Imperial War Museum, and the Commonwealth War Graves Commission. By utilizing these resources, individuals can unlock the fascinating and often poignant stories of their ancestors' military service.
If you want to know more about your ancestors' military service, please contact me today.
John Thorne, British Prisoner of War: Escape, Camp Life and Liberation
Cpl. John Thorne joined the Territorial Army in 1939. By 27 May 1940, John was a prisoner of war (PoW) and headed for a series of camps in Poland and Germany. John would escape, only to be recaptured. Eventually, John was sent to Stalag 383 where he would remain until April 1945. This is his story.
John Thorne joined the Territorial Army in 1939. By 27 May 1940, John was a prisoner of war and headed for a series of camps in Poland and Germany. John would escape, only to be recaptured. Eventually, John was sent to Stalag 383 where he would remain until April 1945. A member of the Scout Movement in civilian life, John was a founding member of the camp’s Richard Coeur-de-Lion, Rover Scout Crew. When the camp was evacuated by the Germans in April 1945, John and some of his comrades escaped once again. However, John’s bid for freedom and journey home did not pass without incident. This is his story.
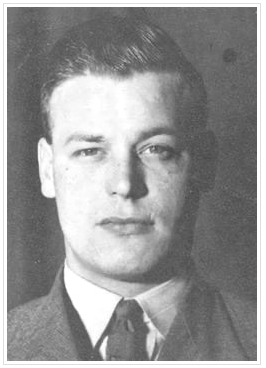
John in uniform, probably taken in 1939 or 1940 before his deployment with the 5th Buffs to France.
April 1939
John joined the Territorial Army (TA), the 4th/5th Battalion, Royal East Kent Regiment (the Buffs). The 5th Battalion was reformed in 1939 as a 2nd Line duplicate of the 4th Battalion when the Territorial Army was doubled in size. Initially, the 5th Buffs was assigned to the 37th Infantry Brigade, part of the 12th (Eastern) Infantry Division, which was a 2nd Line duplicate of the 44th (Home Counties) Division. However, on 26 October 1939, it was transferred to the Division's 36th Infantry Brigade in exchange for the 2/6th East Surreys.
The 5th Buffs, along with the 6th and 7th Royal West Kents, remained in the 36th Brigade for the rest of the war. The battalion served with the BEF (British Expeditionary Force) in France in 1940 and fought in the Battle of France and was evacuated at Dunkirk. The 12th Division suffered heavy casualties. Unfortunately, many of the men had only very basic training before embarkation. The Division also received minimal artillery support.1
July 1939
John was promoted to full Corporal at Wannock Camp near Eastbourne.
August 1939
John’s unit was mobilised, and he was officially ‘called up’ for active service.
September 1939
The Second World War starts. John is assigned to guard Dover Priory Station and railway tunnels.
October 1939
John is promoted to acting Lance-Sergeant, Dover Priory Station, second in command (2IC) of the guard.
November 1939
John is sent on a course to the brigade tactical school (junior commanders). He reverts to the rank of Corporal. He passed the course and was recommended for a commission and then re-joined his battalion at Canterbury.
January 1940
John is sent on gas and passive air defence (camouflage and concealment) courses. Again, he is recommended for a commission.
14 April 1940
The brigade is sent to France as part of British Expeditionary Force (BEF).
May 1940
John’s unit was based at Fleury-sur-Andelle near Rouen, Normandy. He gave lectures to troops on gas and passive air defence. He was informed by his battalion commander that he would be sent home to start officer training. He was supposed to report to Aldershot on 6 June 1940.
10 May 1940
Germany invades Holland. John’s battalion is moved to Doullens, a major road intersection between Abbeville and Arras and Amiens and Saint-Pol-sur-Ternoise, making it strategically important. The battalion was based at a Catholic Seminary (boy’s school) and tasked with placing roadblocks across bridges.
20 May 1940
The 5th Buffs covered a frontage of approximately 6.5 miles with three companies forward, from Pommera on the right to La Herliere. The 6th Royal West Kent, on their right, covered the approaches to Doullens. Probably the first sign of impending trouble was a wave of retreating French soldiers who passed through the line held by the Buffs. Next, the 6th Royal West Kent positioned were shelled and machine-gunned. By 12.30hrs German tank and infantry attacks were coming in along the British extended defensive line.
At about 13.00hrs the 5th Buffs were ordered to withdraw. However, it appears that this order never reached the forward companies. According to John’s written testimony, his battalion was attacked and quickly overrun by what he believed to be units of the 6th Panzer Division. According to Gregory Blaxland, the 6th Panzer Division hit the 6th Royal West Kent at Doullens while the 8th Panzer Division struck the 5th Buffs and 70th Brigade. The speed and tempo of the German advance simply could not be matched by the French and British response.
The 5th Buffs 6.5-mile defensive line, Doullens, on N25 main road, Northern France, map not to scale.
Those men who avoided immediate capture by the Germans hid in a cabbage field near a train station, and then started marching south towards Amiens. The remnants of the 5th Buffs and 6th Royal West Kent fell back on the Somme in small groups.2
During the brief fighting at La Herliere, Arras Railhead, John mentioned the brave and defiant actions of Private John Arthur Lungley (Service Number: 6584460), B Company, 5th Battalion, The Buffs. Lungley refused to surrender and kept firing his Bren light machine gun until the Germans brought up a tank to deal with him. Lungley is buried in La Herliere Communal Cemetery, France.3
Initially, Lungley was buried in the hole from which he fought. The French villagers, in defiance of the Germans, would lay fresh flowers on his grave every night. When the villagers decided to rebury Lungley in the local cemetery, the event caused such unrest, the Germans stopped the ceremony. Instead, he was quietly reburied at night but the villagers never forgot his stubborn defiance or his sacrifice.4
John’s personal notes, Monday 20 May 1940
We moved out of the seminary in Doullens just after dawn and were taken by company trucks to Le Brey Saute. The company commander, Captain Hart and his second in command (2IC) Captain Rawlins gathered the NCOs (Non-Commissioned Officers) and took us forward to inspect the ground ahead for good concealment and arcs of fire. Dispositions having been decided, the company moved forward by platoons and sections and settled into their positions by 09.30hrs.
Officially we had been told that a few AFVs (armoured fighting vehicles) had broken through on our front. In fact, it was the spearhead of 6th Panzer Division. The enemy column advanced up the road toward B Company at around lunchtime, when many of the men were in the rear area visiting the ration truck.
The platoon .55 calibre Boyes anti-tank rifle was manned by No. 1 Section, who opened fire. This gunfire stopped the enemy lead vehicles. After just three rounds had been fired the order was given by B Company commander for all those manning Brens (Bren light machine gun) and ATRs (anti-tank rifles) to retire to the nearby train station, where trucks were waiting to evacuate us.
On arrival at the train station, the Germans brought a heavy machine gun into play, sweeping the station forecourt, where our trucks were situated. Captains Hart and Rawlins were trying to organise a defense of the station. Under heavy fire, I received permission to get boxes of ammunition off the trucks. Shortly after returning to the company, Captain Hart gave the order, ‘Every man for himself.’ At this point it became obvious many of us would become prisoners of war (PoWs). I decided to try and get away and contact one of the other companies. I managed to get through a barbed-wire fence and across a railway embankment without being spotted by the Germans.
Crawling into a cabbage field, John came across Captains Hart and Rawlins and several NCOs from the company who had also evaded capture. They watched while the Germans used the company’s own trucks as prisoner transport. The group of escapees moved west until they came across a road filled with a constant flow of German vehicles. Hidden at the roadside, the group waited about an hour for a break in the traffic and eventually decided to change direction and move south and try to reach the Maginot Line.
Tuesday 21 May 1940
John’s group of fourteen men moved south across-country. They were provisioned by the generosity of local French inhabitants. Captain Hart was able to draw up a route of march for the group by copying a map provided by a French villager. The group observed endless columns of German vehicles on all the major roads. Captain Hart’s route would take them south and then southwest to Les Andelys.
Wednesday 22 May 1940
On leaving the village where they had received help, the group moved cross-country once again, avoiding main roads. They crossed a field crisscrossed with tank tracks and discovered the bodies of several dead French soldiers laying in a ditch.
Saturday 25 May 1940
The men became separated into two groups while crossing a road during a brief gap in the German traffic. The two groups were never reunited.
Sunday 26 May 1940
John’s group moved toward the river Somme. German artillery had the far bank of the river under fire with shells passing over the heads of the men.
Monday 27 May 1940
John’s group decided to try and cross the river to reach the Allied side. However, the group were surprised by a German sentry and taken prisoner. The group was transported to the German company headquarters, where they gave their names, ranks and serial numbers. Captain Hart was separated from the other ranks. The group was moved by truck to Albert. Next, they were taken to a French aircraft factory and put under guard outside one of the hangers. John recalled how the group of British prisoners became an object of curiosity to passing German troops.
In general, the Germans were either friendly or indifferent to the British servicemen. One German soldier (sometimes referred to as a Landser) stopped to chat with the group in English, and even shared his rations with them. At around 14.00hrs the group was transported toward Bapaume. At about 17.30hrs the group was moved by lorry to Cambrai, where they spent the night at a barracks, sleeping outside on the parade square.
Map of the Principle British and Dominion prisoner of war camps in Europe, 1944,
British Red Cross, Museum & Archives.
Tuesday 28 May 1940
John’s group were taken to Charleville on the river Meuse. Later, they were driven to Bitburg, north of Trier, where they were forced to camp in the open for five days.
Monday 3 June 1940
The prisoners were taken to a railway siding and loaded onto cattle trucks. John was appointed the NCO in charge of his truck, which was overcrowded with around 70 men. John believed the cattle trucks should have accommodated no more than 40 men. From Bitburg the train took them northeast to Koblenz, north to Bonn, Cologne, Dusseldorf, Duisburg, Essen, east to Kassel, northeast to Magdeburg, Berlin, east to Poznan, and finally northeast to Thorn (Torun), Poland. John simply described the journey as long and uncomfortable.
The prisoners were held at Stalag XX-A (Fort 12, Camp 13) until sent to work in Danzig on 25 June 1940.5
Notification that John was interned as a prisoner of war, June 1940.
25 June – 25 August 1940 – Danzig (Gdańsk)
John was rather vague in his description of the camp at Danzig. Using information on the Forces War Records website, John was probably moved to Stalag XX-B Marienburg, Danzig (now Malbork Poland). Originally built during the First World War, the camp was in a poor condition by the time British, Poles and Serbs were held there in 1940. He does say the camp was built on a hillside overlooking the harbour.6
During the second week at the camp, John became friends with Ted Lancaster, Bert Johnson (Sherwood Foresters) captured in Norway, Lance-Corporal Bill Bailey (King's Own Yorkshire Light Infantry) also taken in Norway and Sergeant Bill (Darkie) Jones (Royal Signals) captured in France. Together, John and his new group of friends planned to escape from the camp.
The escape was scheduled for 25 August 1940. The men were provisioned by the camp’s escape committee. Having cut a hole in the perimeter fence, the group slipped out of the camp. The poor upkeep of the camp might have made the group’s escape easier. They climbed up a slope covered with undergrowth and emerged in what appeared to be a public park with many people enjoying a Sunday stroll. The men remained hidden in the undergrowth until dark. Ted had managed to keep a compass hidden on his person. They spent the next few days moving at night and laying up during the day.
29 August 1940
The escapees passed out of the Free State of Danzig. Next day they turned east towards the Russian frontier.
5 September 1940
The group reached the banks of the River Vistula just before midnight but it was too wide to swim across. They found a small rowing boat with just a single oar, and managed to cross the fast-flowing river, which John estimated was about a mile distance.
7 September 1940
Moving along the back of a row of houses, a German policemen apprehended the group at gunpoint. The group had allowed themselves to be seen by several civilians during the previous days. Additionally, just before their capture, two of the group had stopped to ask a resident of the village for cigarettes. The men might not have realised it at the time but around 95 percent of the population of the Free State of Danzig were German, not Polish, and so likely to inform the authorities about them.
On re-capture, the group was transported by truck to a German military prison before being sent back to Danzig by rail. The journey took around three and a half hours by train. It had taken the men 14-days to cover the same distance on foot. To add insult to injury while at Stalag XXA, Camp 13, John and many other prisoners contracted lice.
September 1940 – April 1941 - Stalag XX-A (Thorn/Torun)
On their return to Stalag XXA, the escapees were first kept together in a cell, separated from the other prisoners, for about three weeks. As a punishment for their escape each man would be kept in isolation for 68-days. However, before the punishment was carried out, John was taken ill with suspected Diphtheria (a serious bacterial infection which can cause breathing problems, heart failure and death). He was sent to Fort 14, the camp hospital, and confined there for four weeks. On discharge from hospital, John was sent to Camp 13 where he was placed in a large barracks with hundreds of men, all sleeping in cramped three-tiered bunks.
Suddenly, without warning, John and about 100 other prisoners, all escapees, were transferred by rail and then road to Stalag XI-B Fallingbostel (work camp).
April – July 1941 - Stalag XI-B Fallingbostel (work camp)
Stalag XI-B was one of the Wehrmacht's largest prisoners of war (PoW) camps, holding up to 95,000 prisoners from various countries. In fact, the camp was a complex of small camps spread over many square miles. Stalag XI-C was part of this complex but is better known today as the infamous Bergen-Belsen. The new arrivals at the camp showered, had their heads shaved and uniforms disinfected. John wrote that the camp was clean and well kept. The British prisoners were quartered with a group of French junior officers. The two groups immediately started to plan an escape. However, John’s group were separated from the Frenchmen a few days later and assigned to work parties.
John’s work party was given the task of laying pipes for an agricultural irrigation system. Over a period of a few weeks several men took opportunities to escape. However, most of these escape attempts were spur of the moment decisions and poorly planned.
May – June 1941 – Stalag XI-B - Lüneburg Heath, north of the camp
As John’s work group received no food from their German captors, they decided to go on strike. The guards threatened to shoot the prisoners if they did not go back to work. After a tense standoff between the two groups, the prisoners finally returned to work. As a punishment for refusing to work, John’s group were confined to their quarters without food for five days. It later emerged that the reason the Germans had not fed John’s work party the day of the strike was because it was the Whitson holiday. The guards had planned to return the work party to the camp early and allow the men a half-day holiday. Instead, on release from their confinement, John’s group were immediately transferred out of the camp and sent back to Poland.
Stalag XXI-A, Schildberg, Posen
On arrival at the new camp, John found many of the prisoners were recovering from wounds and some were awaiting repatriation to their home countries. After a few weeks, John and his comrades were assigned to a work party but discovered that it was war work, which was a violation of the Geneva Convention. Naturally, the British refused to work. Once again, the group was threatened with loaded rifles by the German guards but this time they did not back down. Instead, the group was returned to the camp.
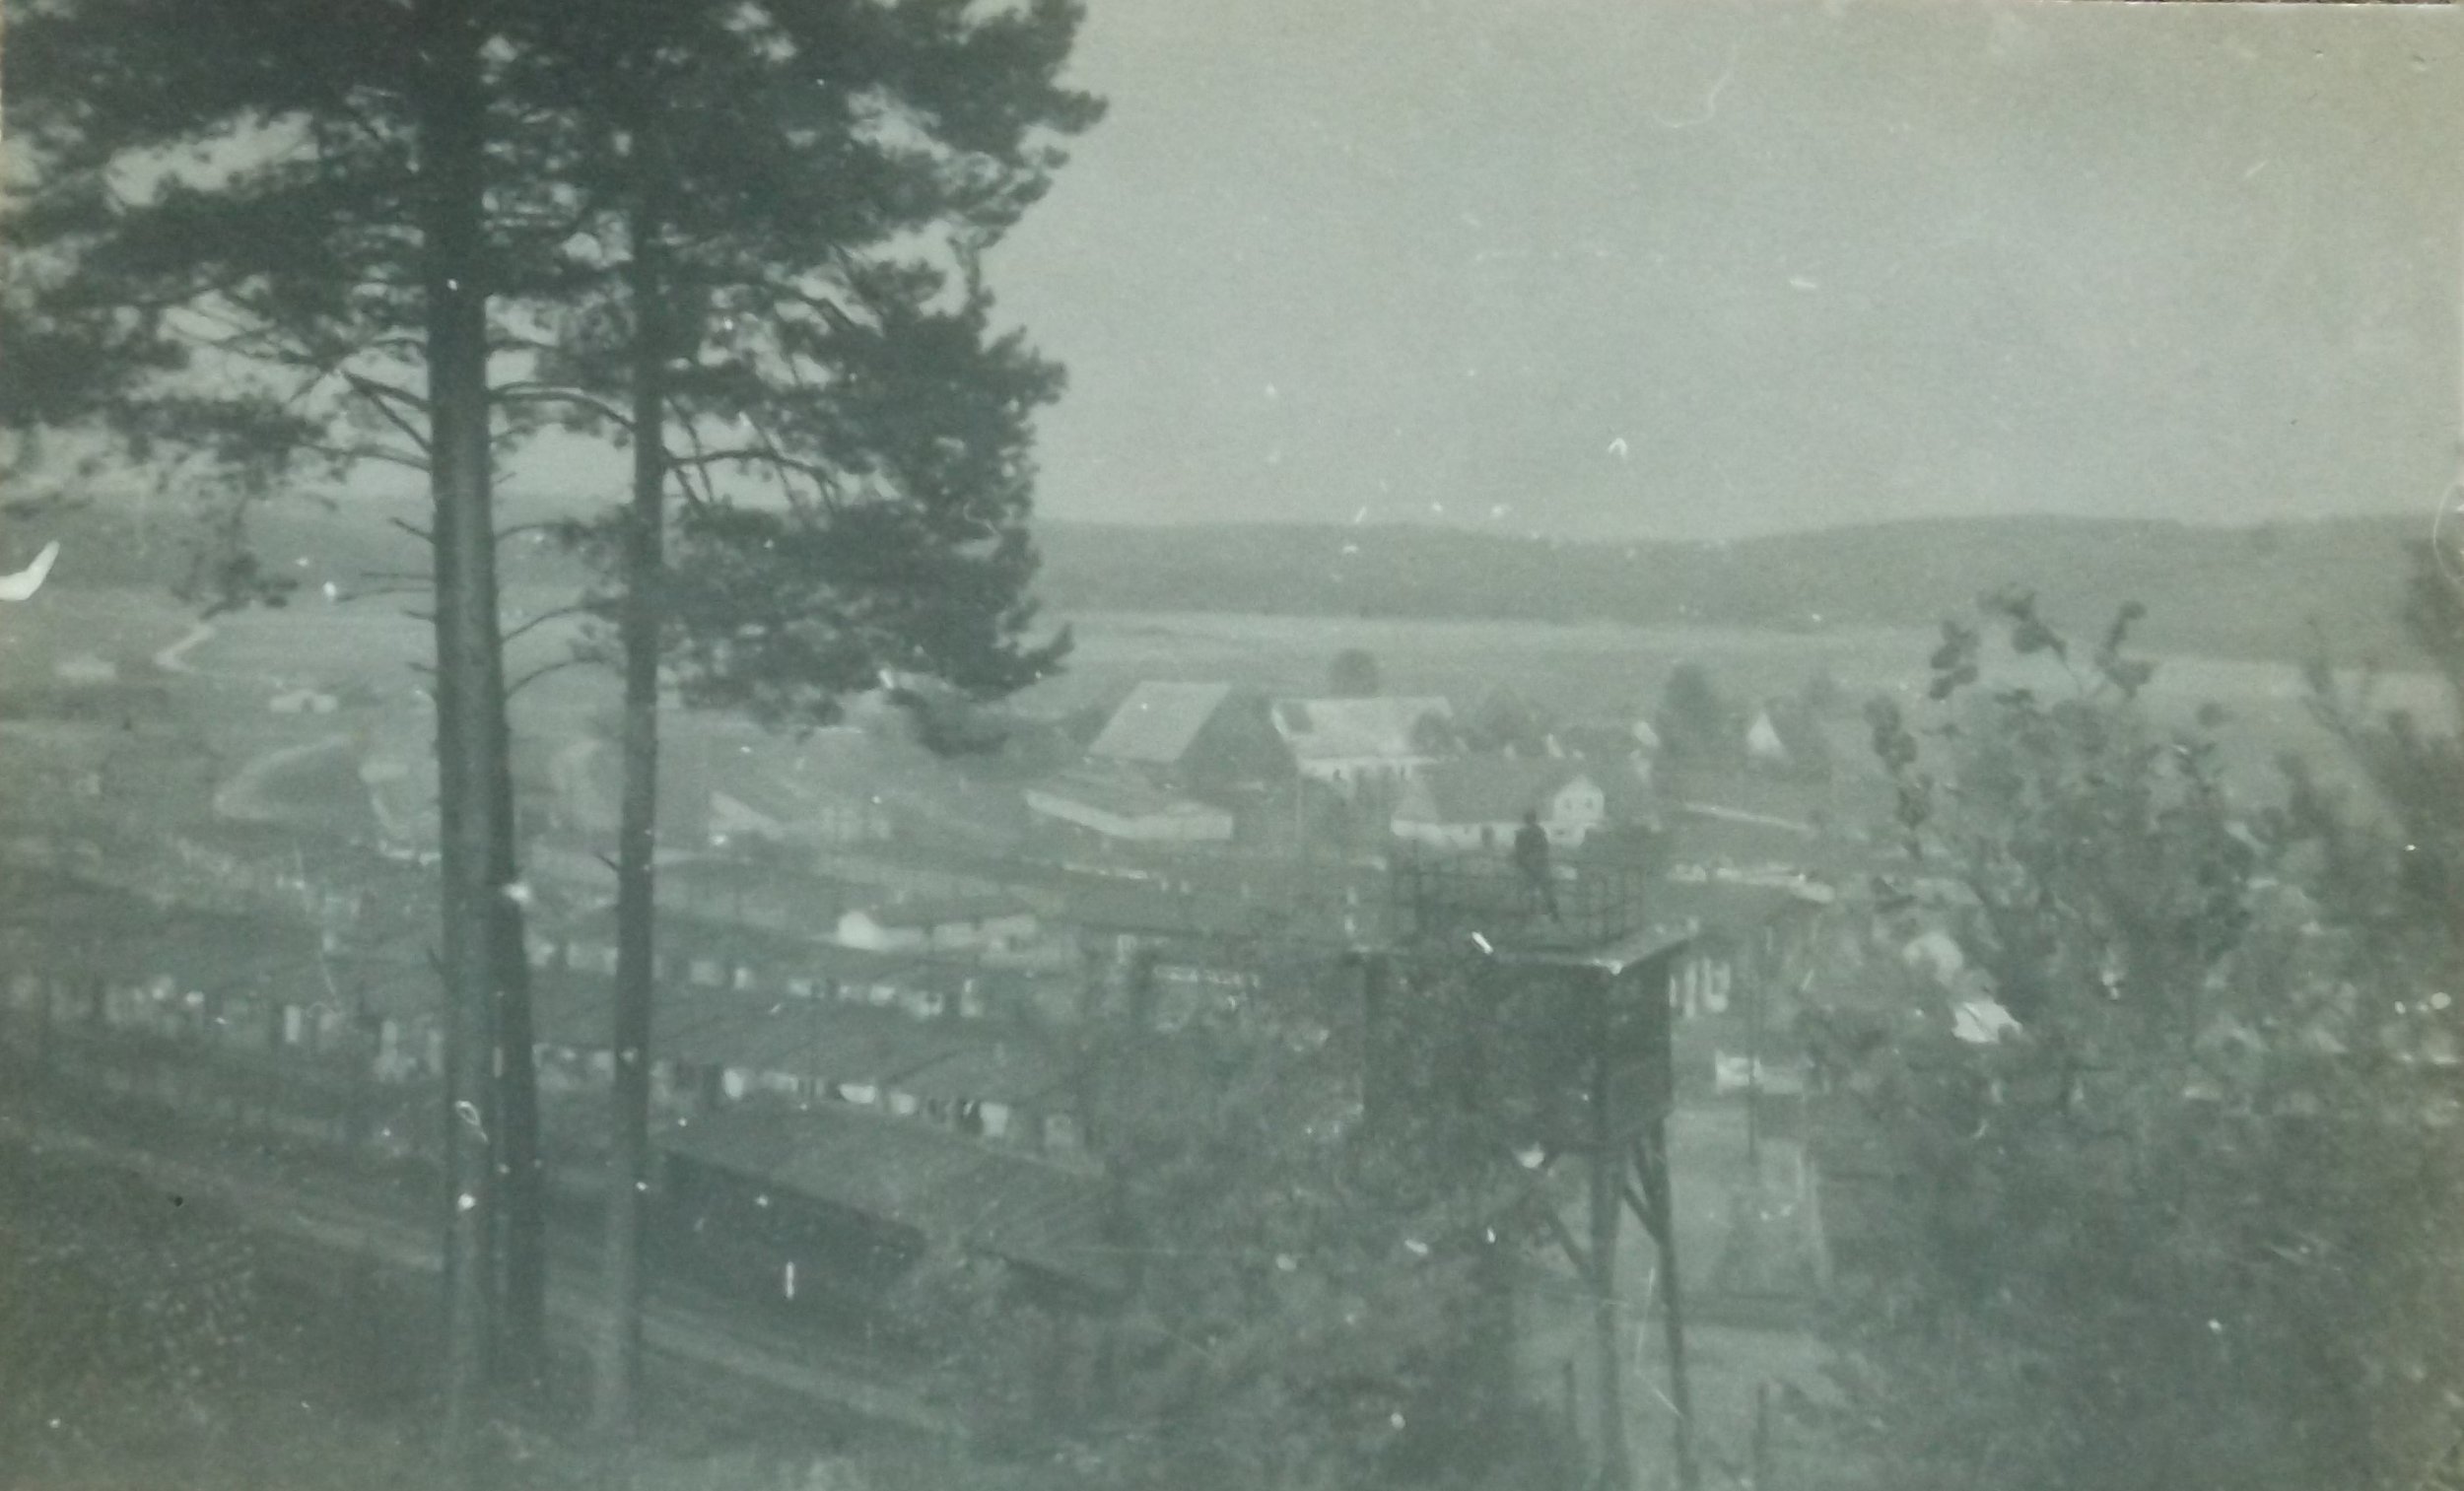
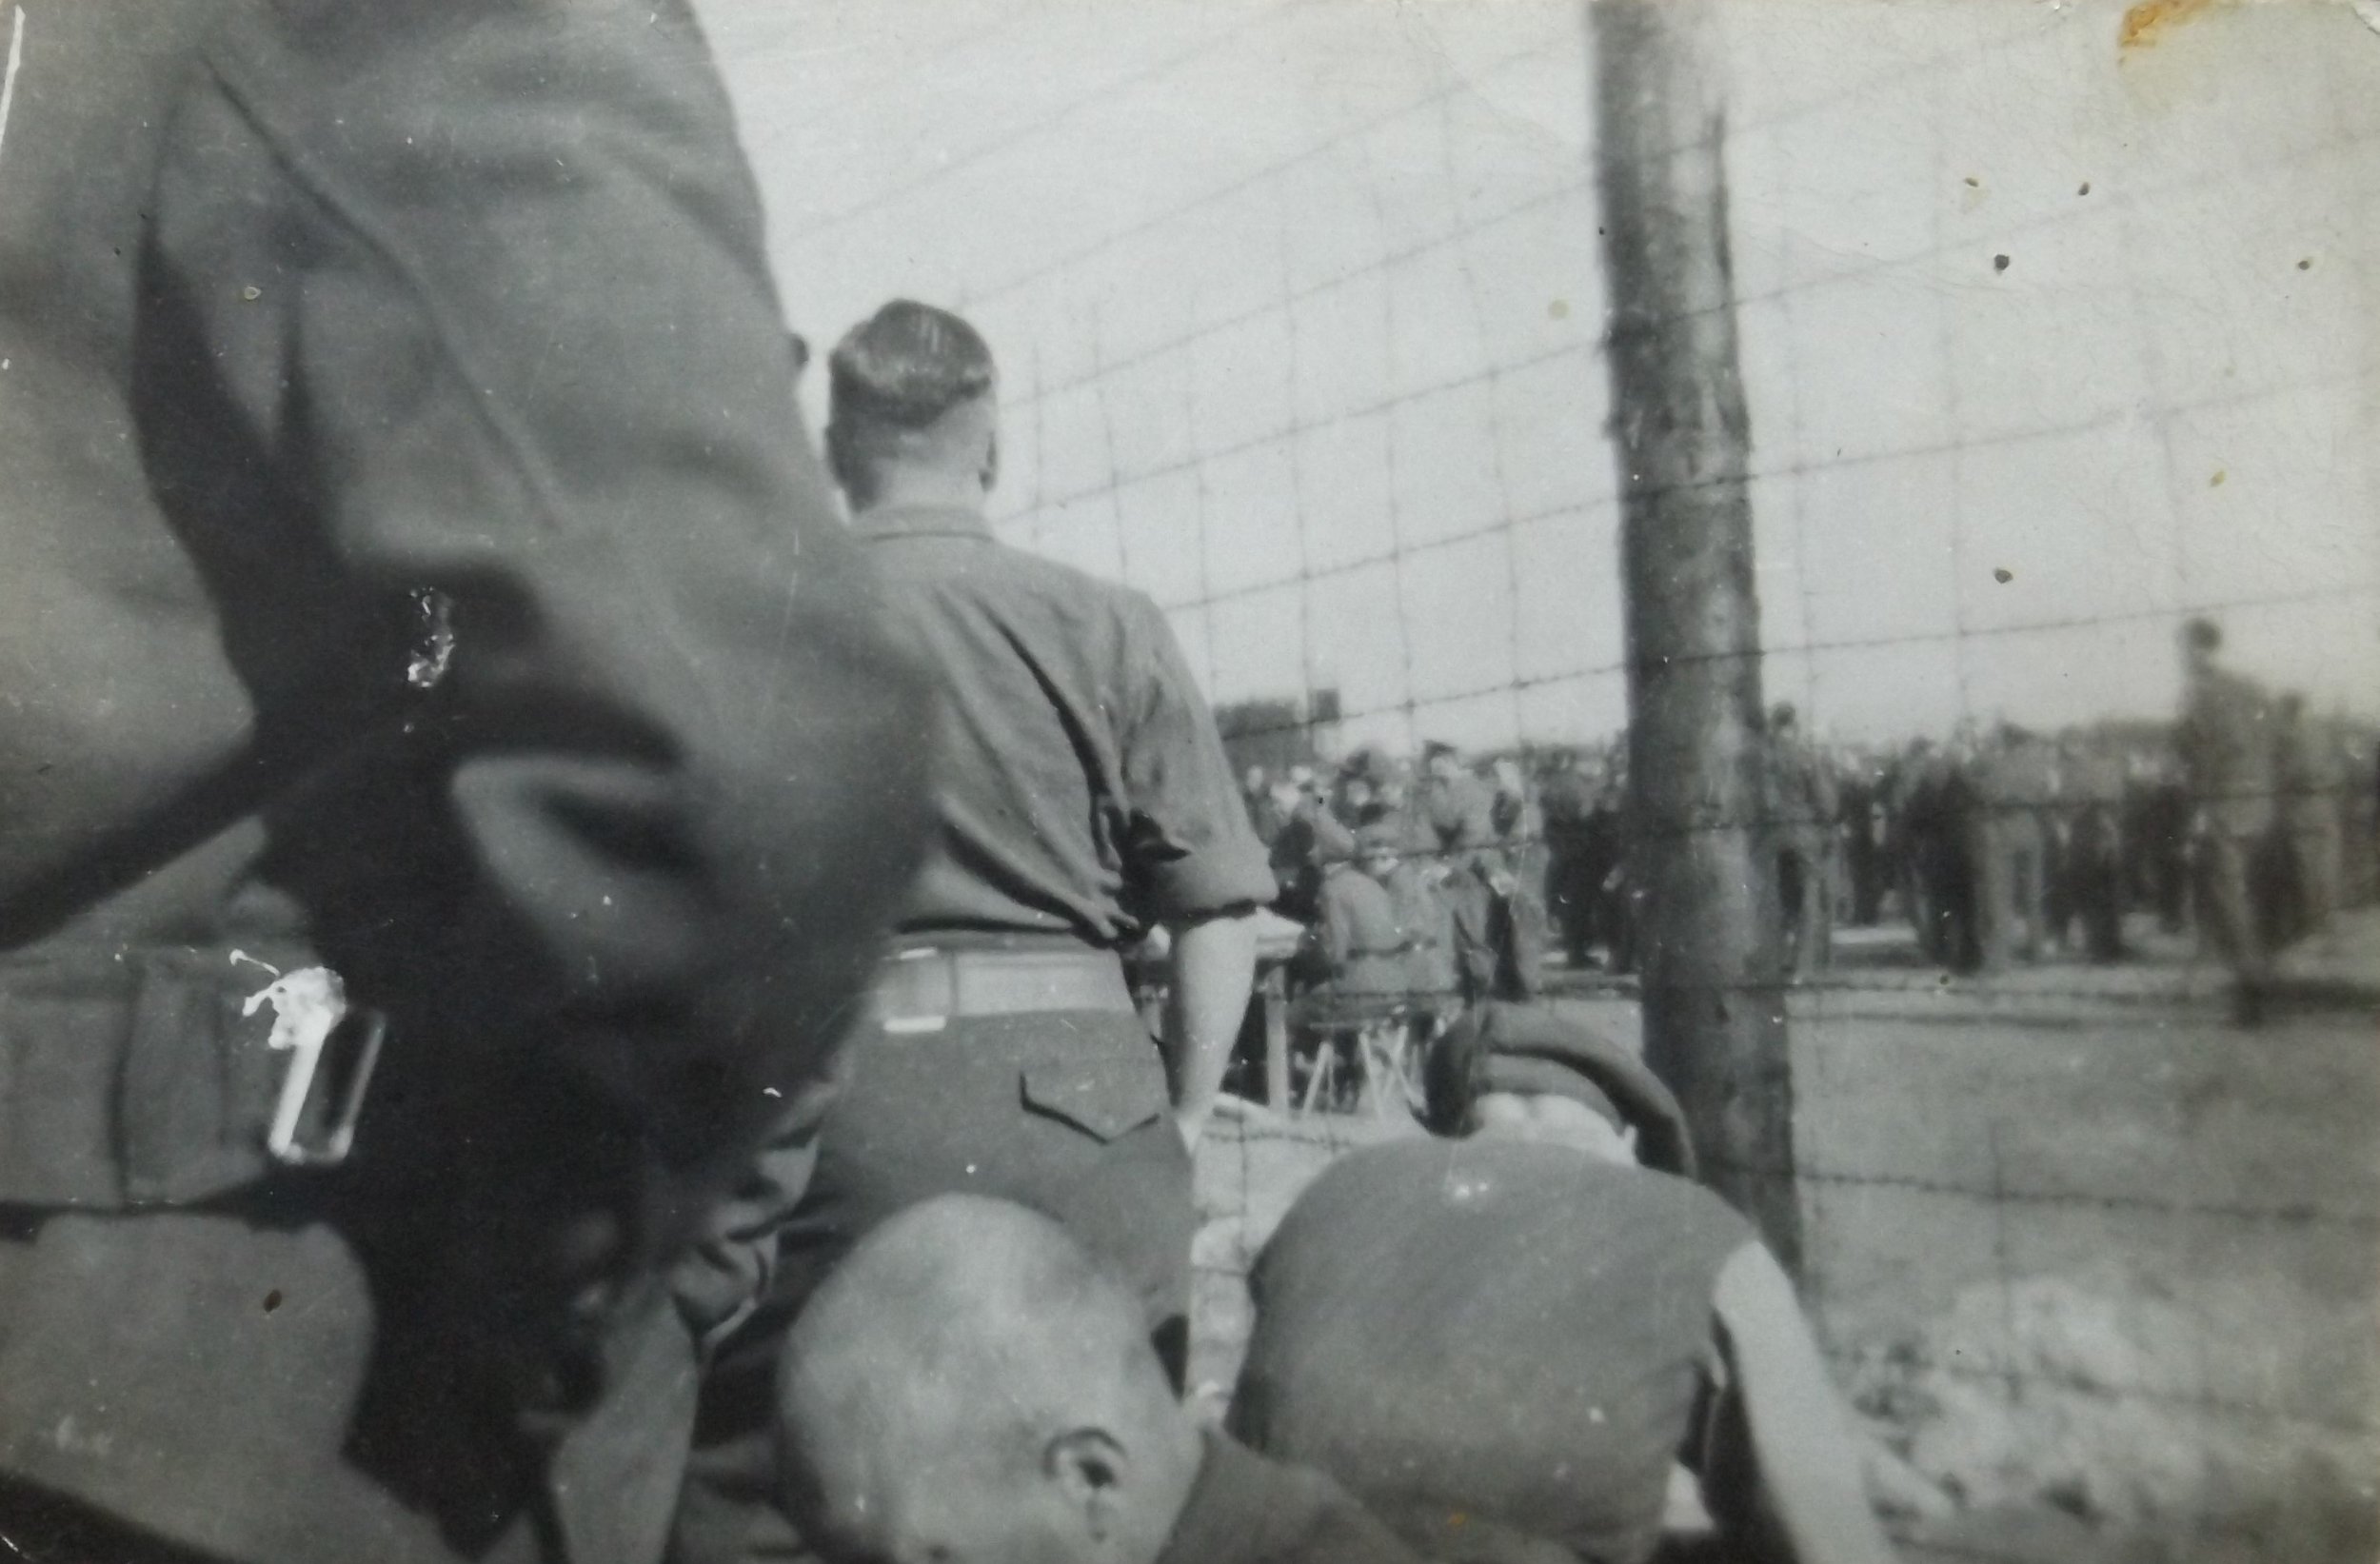
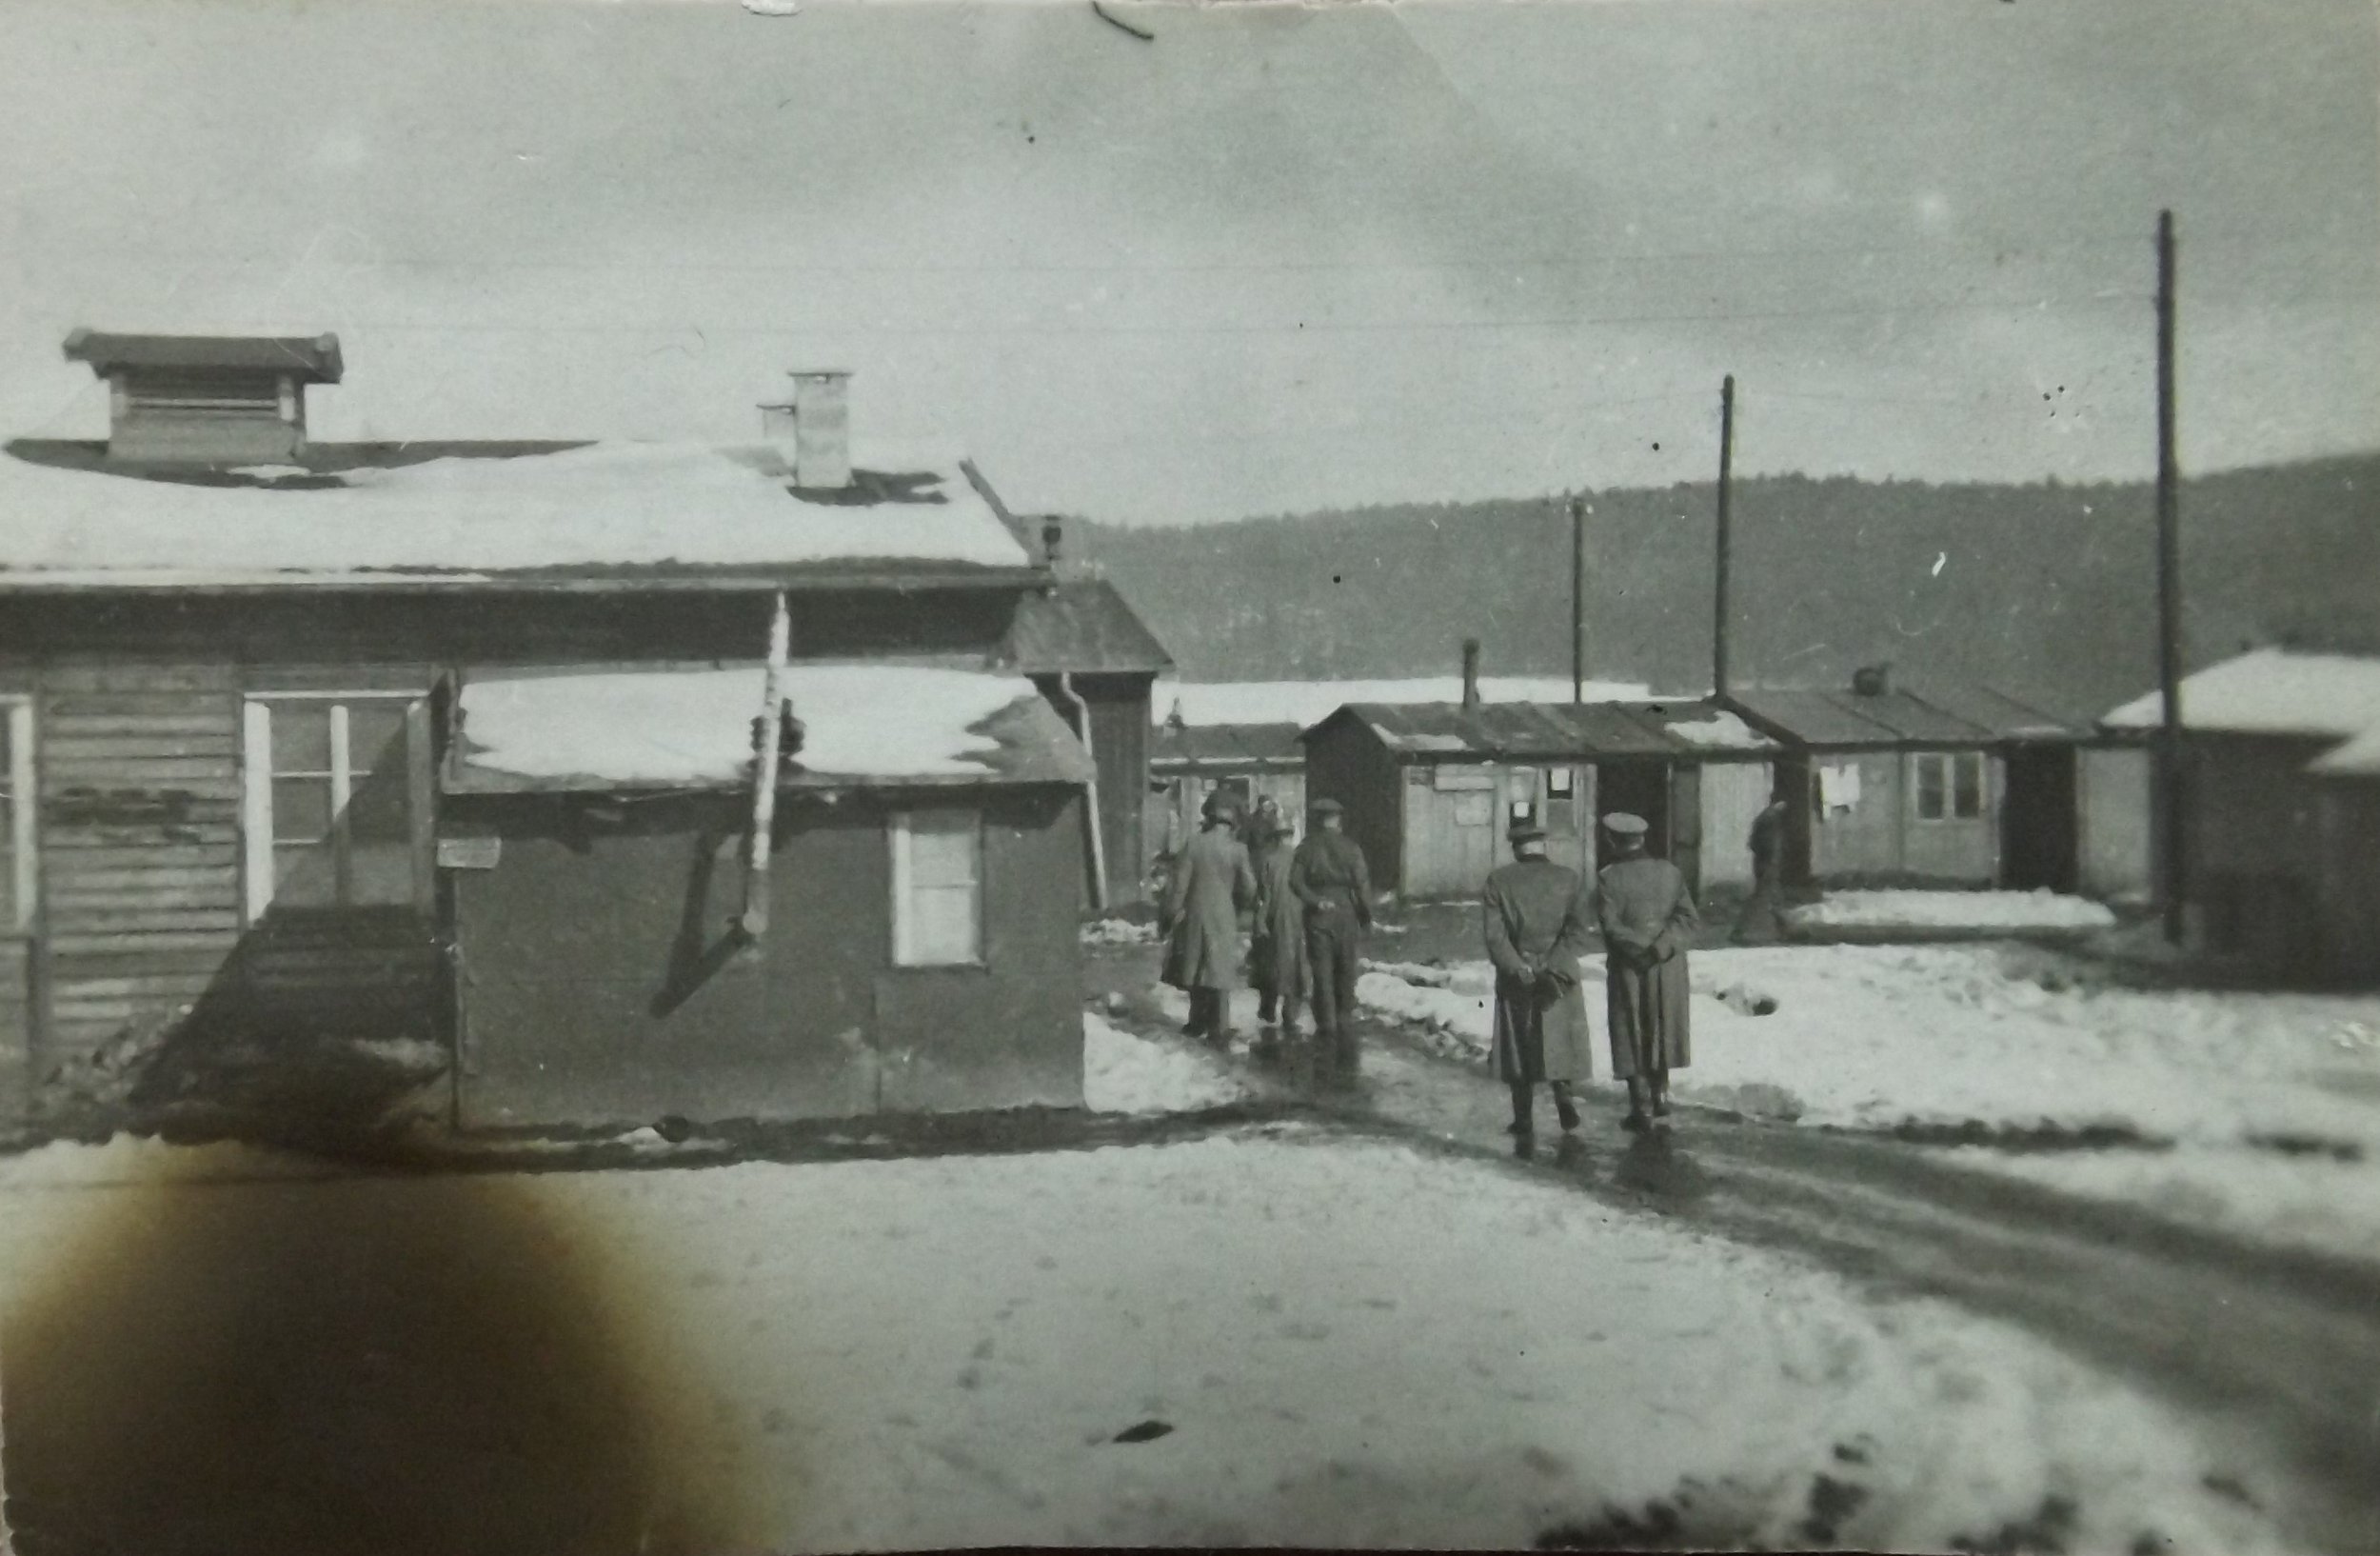
July 1942 – April 1945 – Stalag XXI-A – Oflag III-C later renamed Stalag 383, Hohenfels, Upper Bavaria.
The camp comprised 400 detached accommodation huts, each typically housing 14 men. More were built towards the end of the war as prisoners were moved in from other camps as the Russian front advanced from the east. According to John’s testimony, when the British group arrived at the camp there was around 3,000 prisoners including RAF aircrews. When the camp was evacuated in April 1945 the number of inmates had grown to around 18,000 Allied personnel including Americans, Canadians, ANZACs, South Africans, Palestinians, and men from many other commonwealth nations.
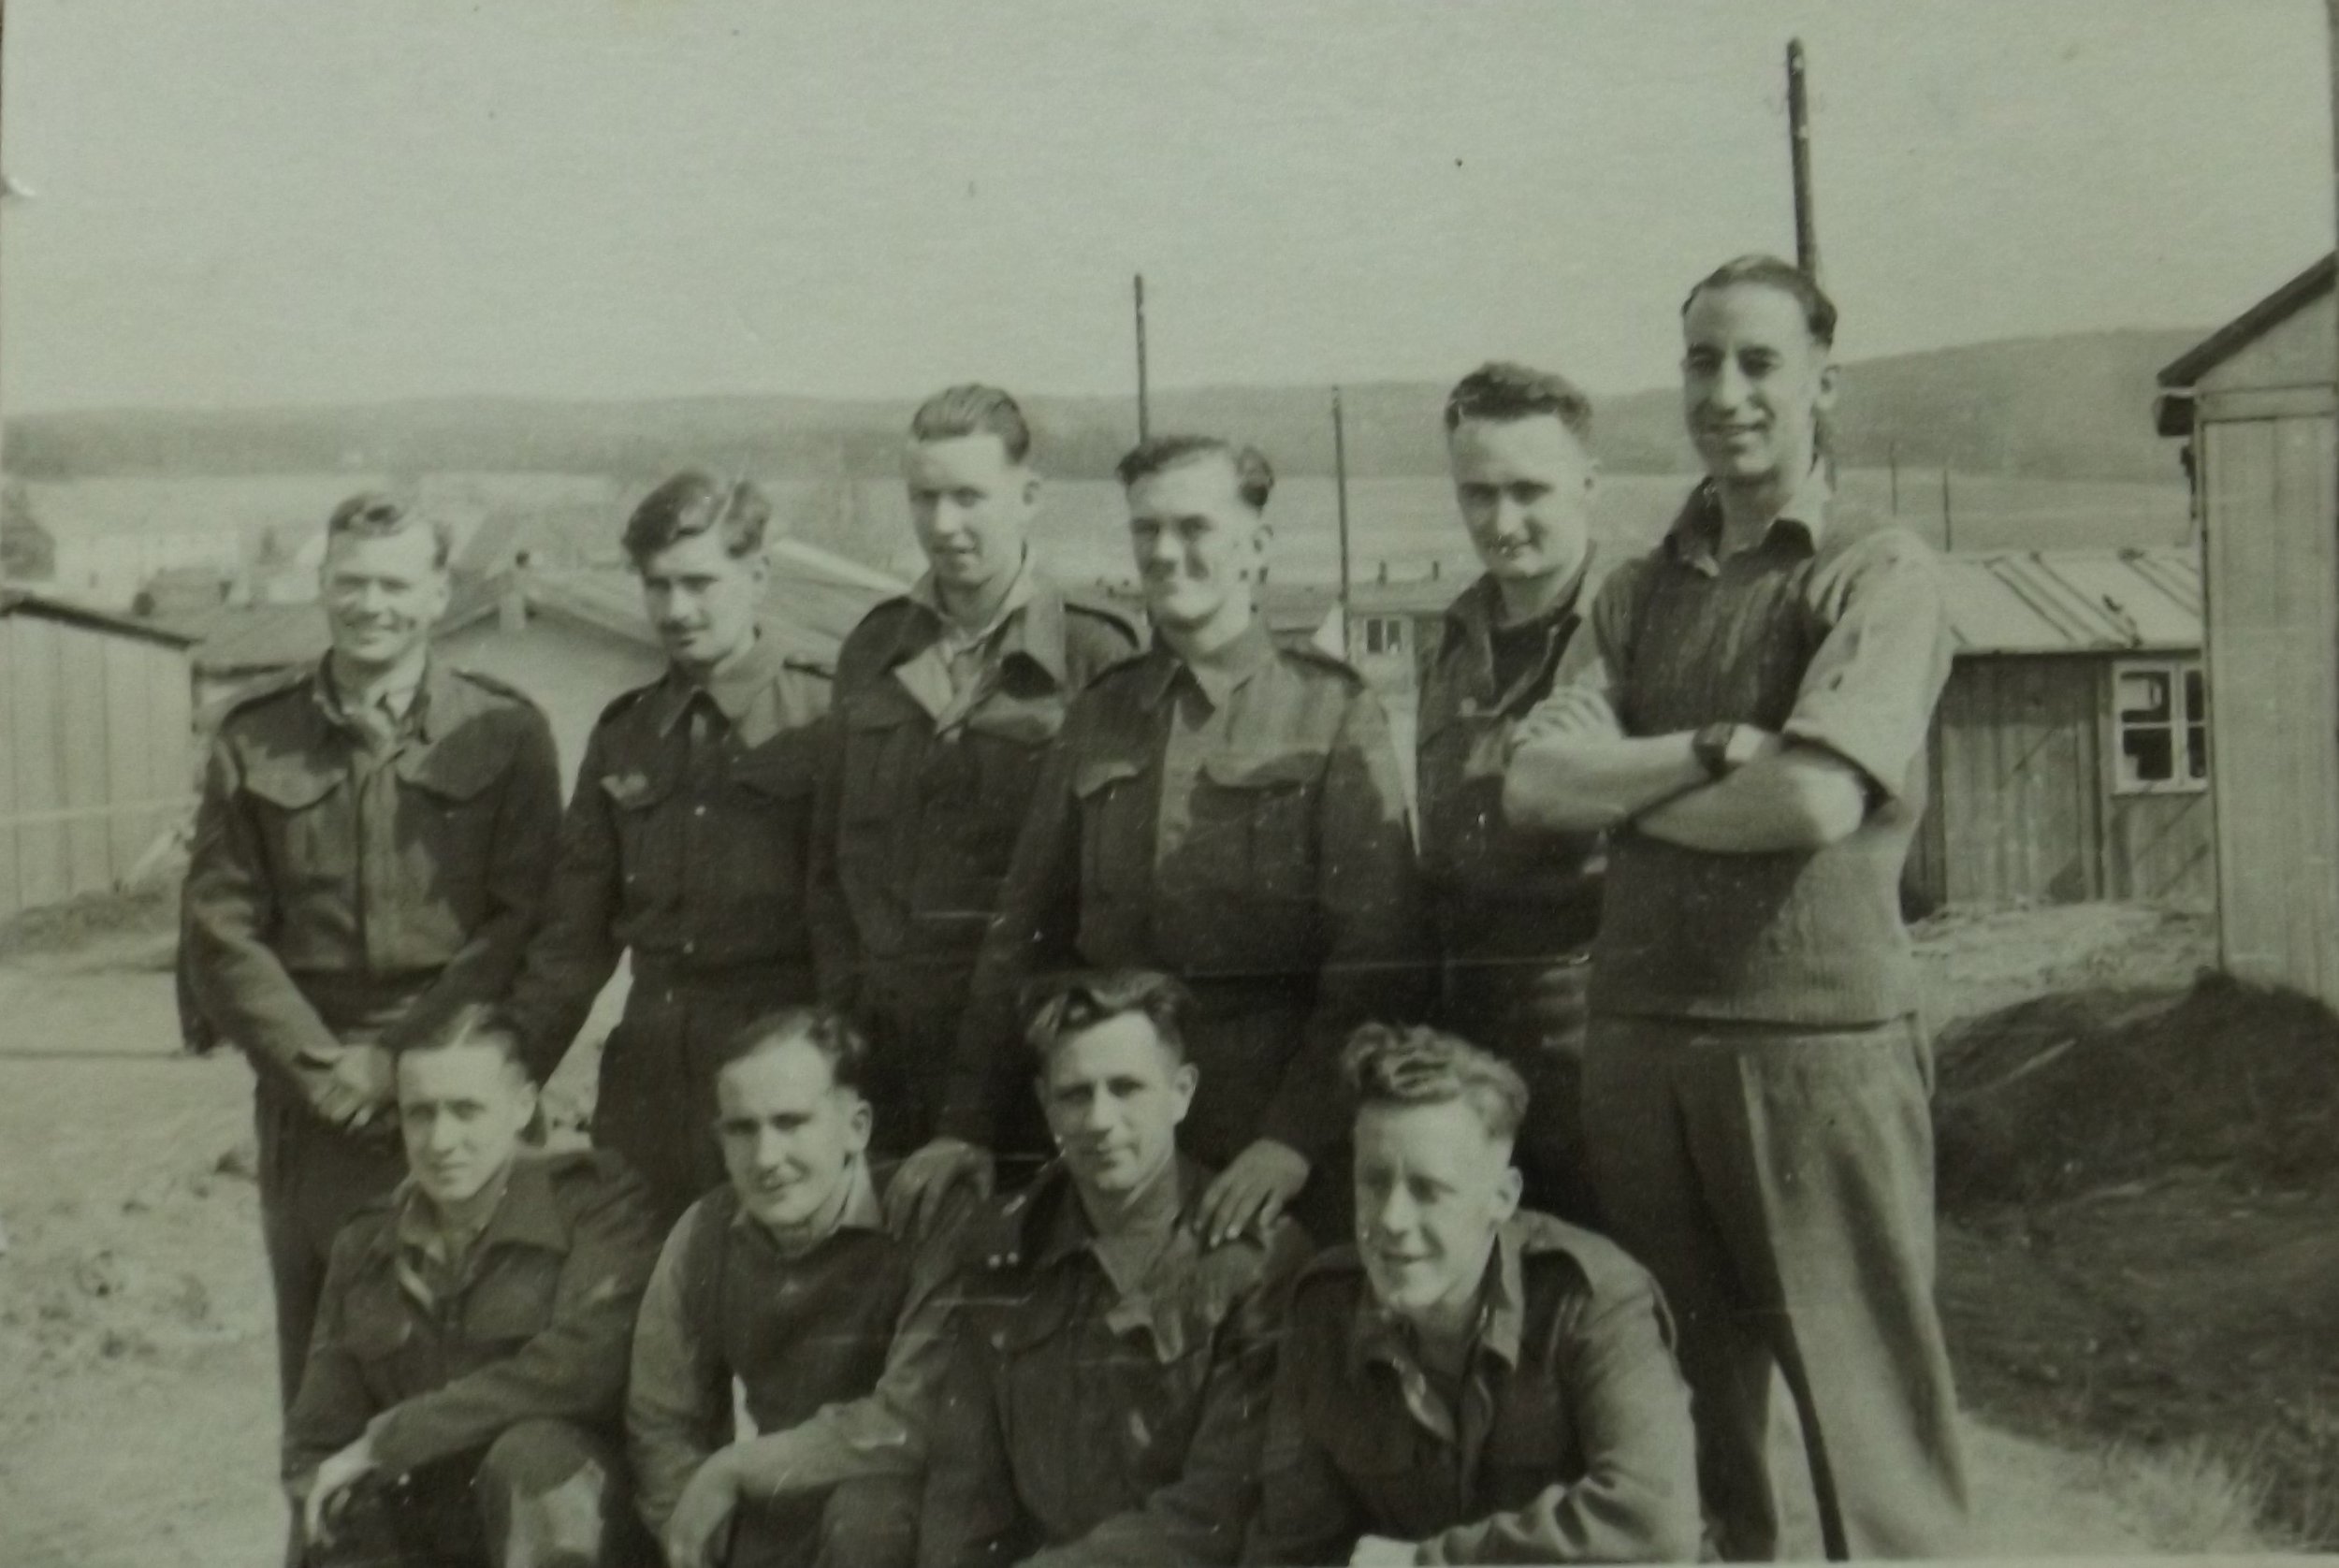
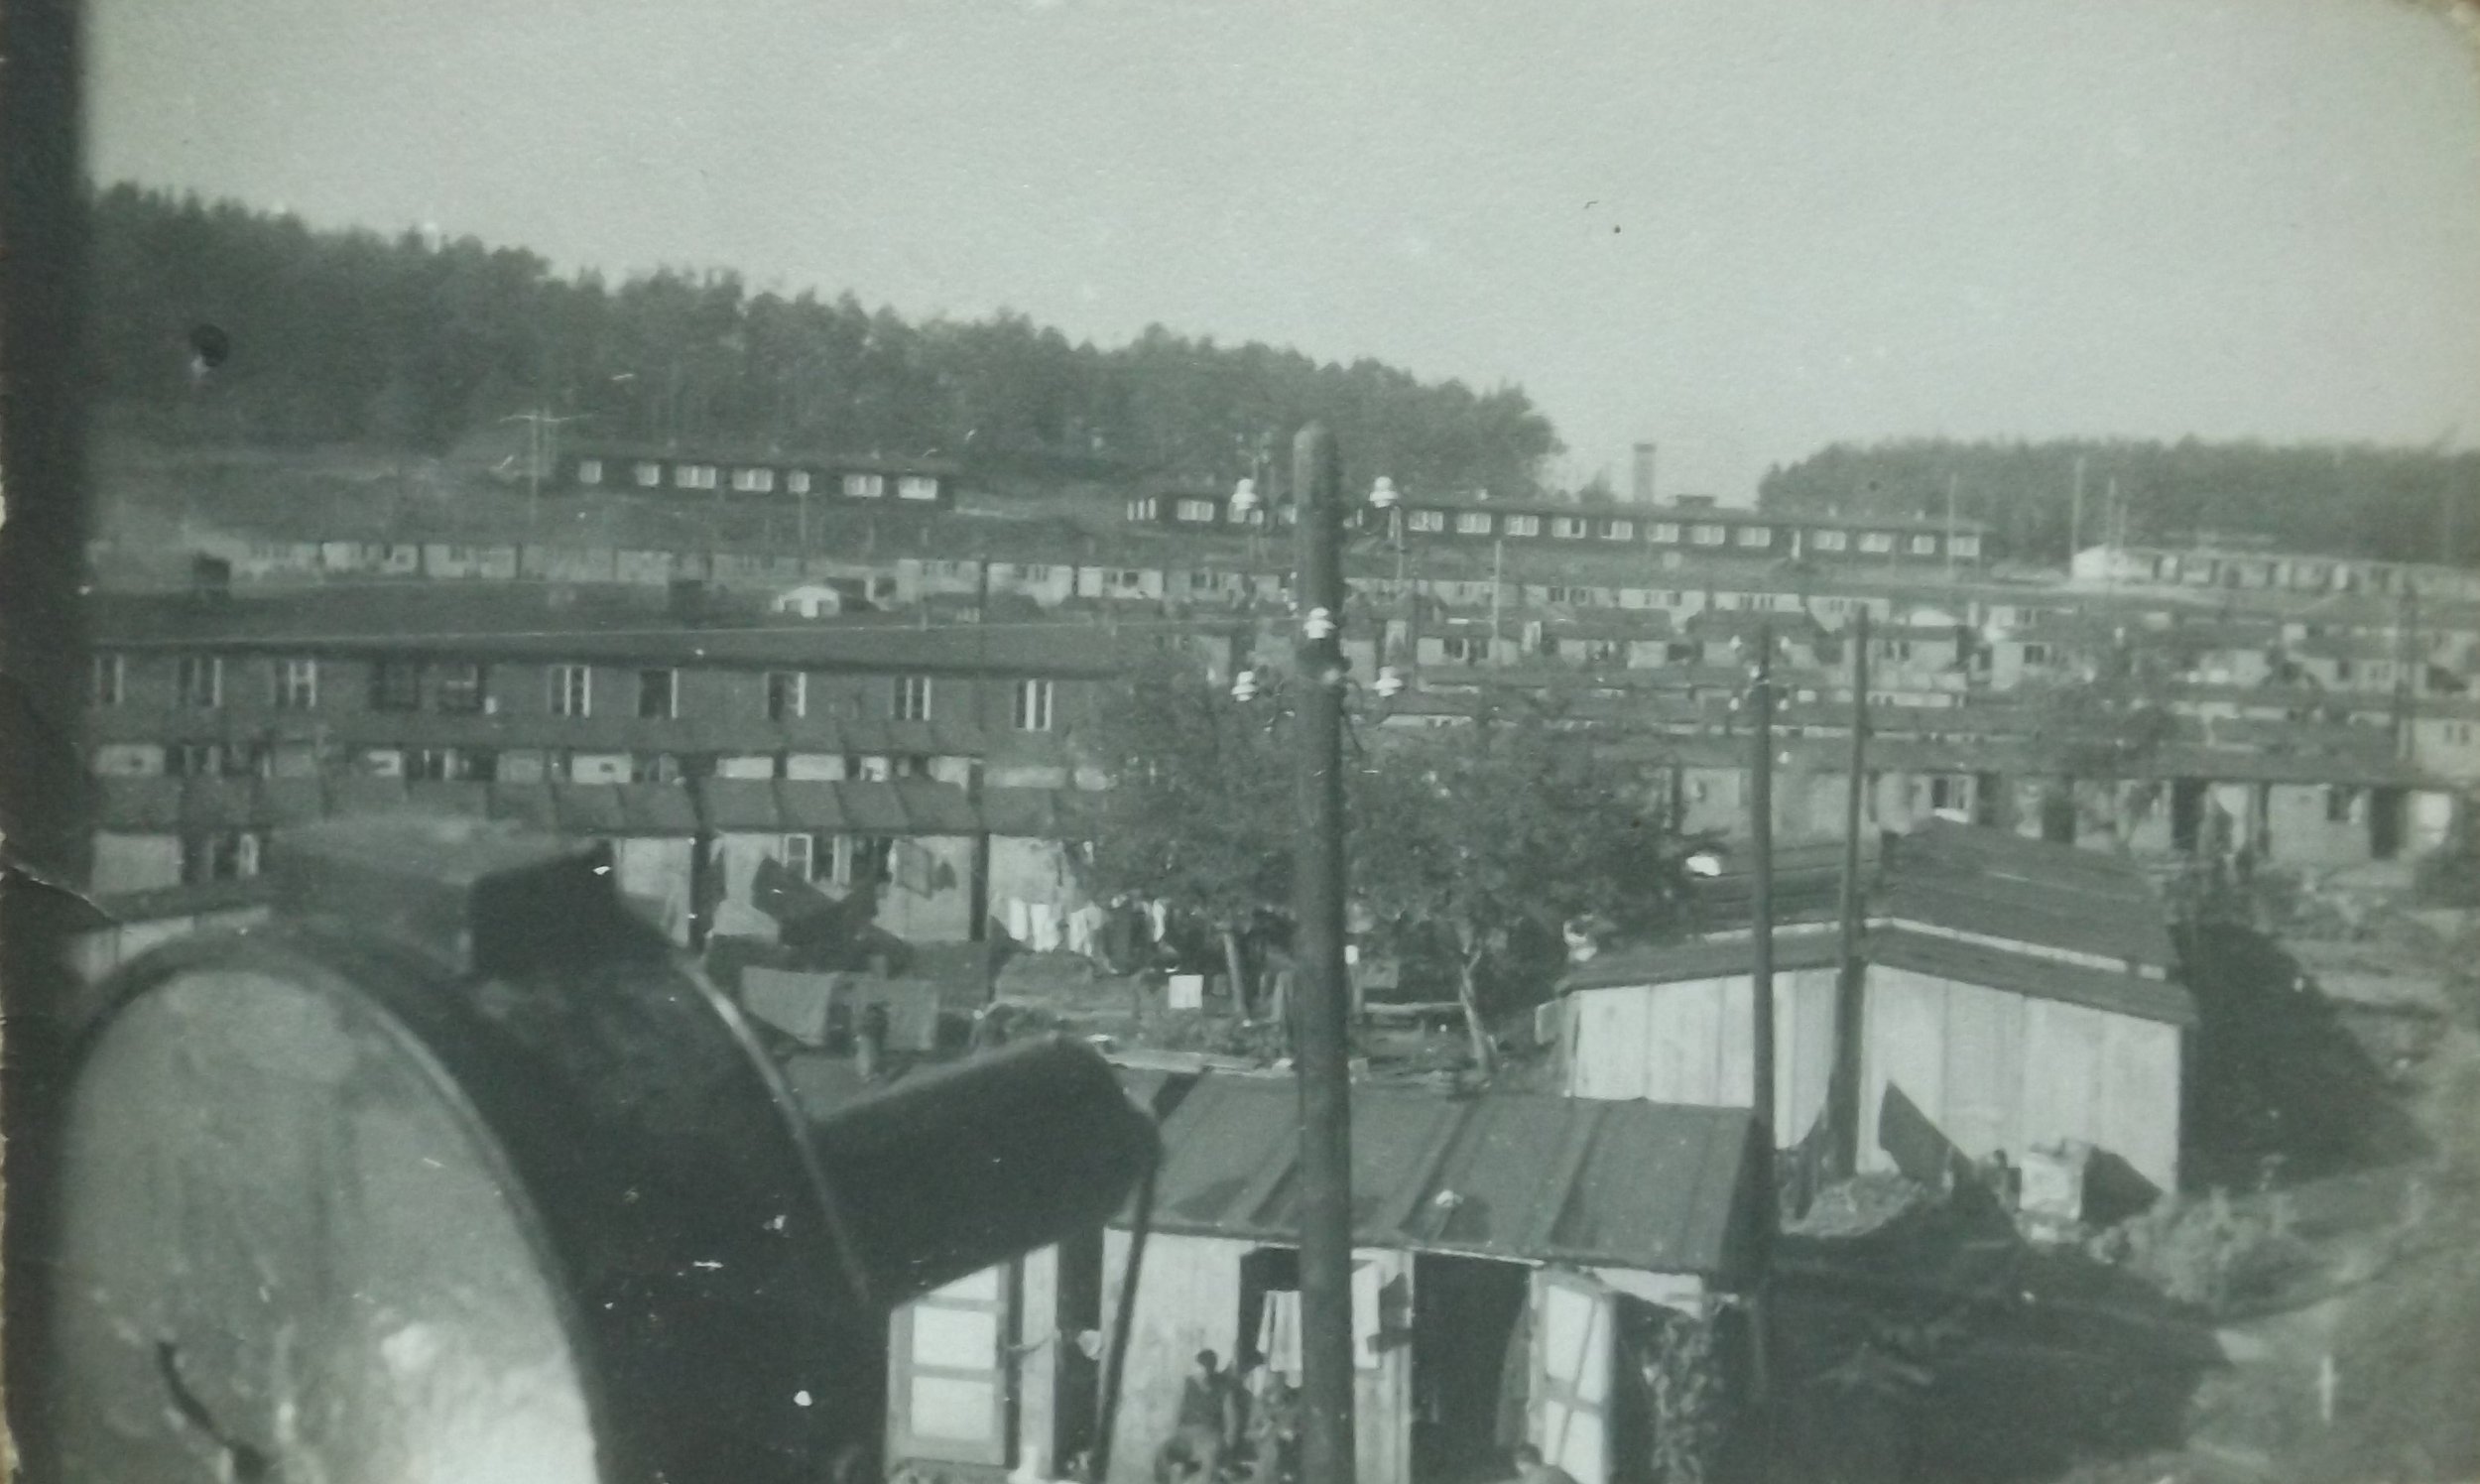
Midge Gillies described Stalag 383 as a drab, miserable shanty town designed specifically to hold Allied NCOs who refused to work. The prisoners retained a great deal of autonomy in the organisation and running of the camp. A German censor at the camp wrote that the British prisoners did not give a damn who owned the camp, they just ran it how they liked – and patronised everybody. One of the PoWs said that the guards assumed the status of attendants at a holiday camp. In truth, the prison was no holiday camp for the inmates.
Mental Stress
The mental stress of incarceration showed itself in different ways in British prisoners of war. The camp inmates of Stalag 383 occasionally went ‘Stalag happy’ and performed the most bizarre and elaborate charades to occupy and entertain one another. Strange behaviours demonstrated by groups and individual inmates included holding a full-scale fox hunt through the camp and the setting up of an imaginary railway service to England. Inmates dressed as the Emperor Napoleon, Admiral Lord Nelson, and a tribe of North American Indians. One prisoner regularly walked an imaginary dog, another herded imaginary sheep while a third rode his imaginary motorcycle around the camp.
The Commandant of Stalag 383 became so concerned with the mental health of the prisoners that he suggested to the Senior British Officer of the camp that some men could take walks under parole outside the camp to alleviate the symptoms of stress.7
Food Scarcity
In 1944, there were about 90,000 British prisoners of war held in Germany or camps in occupied territories. In contravention of the Geneva Convention, which required the Germans to feed prisoners a basic, balanced diet, the men never received proper rations from their captors. The British Red Cross, St. John War Organisation, YMCA, and International Red Cross worked tirelessly to ensure prisoners were able to receive food parcels from home. Instead of luxuries, food parcels became necessities, supplementing the prisoners’ poor, unbalanced diet. However, the Germans were meticulous in the delivery of Red Cross and similar parcels, making them a top priority for the transport system.
Over the course of the Second World War, the British Red Cross sent around twenty million food parcels from the UK to British Prisoners of War scattered around camps in Nazi-occupied Europe and in the Far East. Around 163,000 parcels were packed each week except at the start and toward the end of the war.8
As well as food, the British Red Cross and St. John War Organisation sent clothing, books, musical instruments, games, and many other sundry items to British captives. It’s clear that a certain amount of pilfering was done by the Germans, nevertheless, most items did eventually reach their intended destination. Naturally, lack of food, over-crowded accommodation, inclement weather conditions, and disease all took their toll on the prisoners’ health and mental well-being.9
Prisoner of war food parcel, 1939-1945, British Red Cross, Museum & Archives.
The Rover Scouts
On 15 September 1942 the first British NCOs arrived at Oflag III-C. The British were placed in the camp because they were unwilling to work for the Germans. On arrival at the camp prisoners tended to form into groups based on nationality, branch of service or some common interest. One of the first groups to form in the camp was of people connected with the Scout Movement in civilian life.

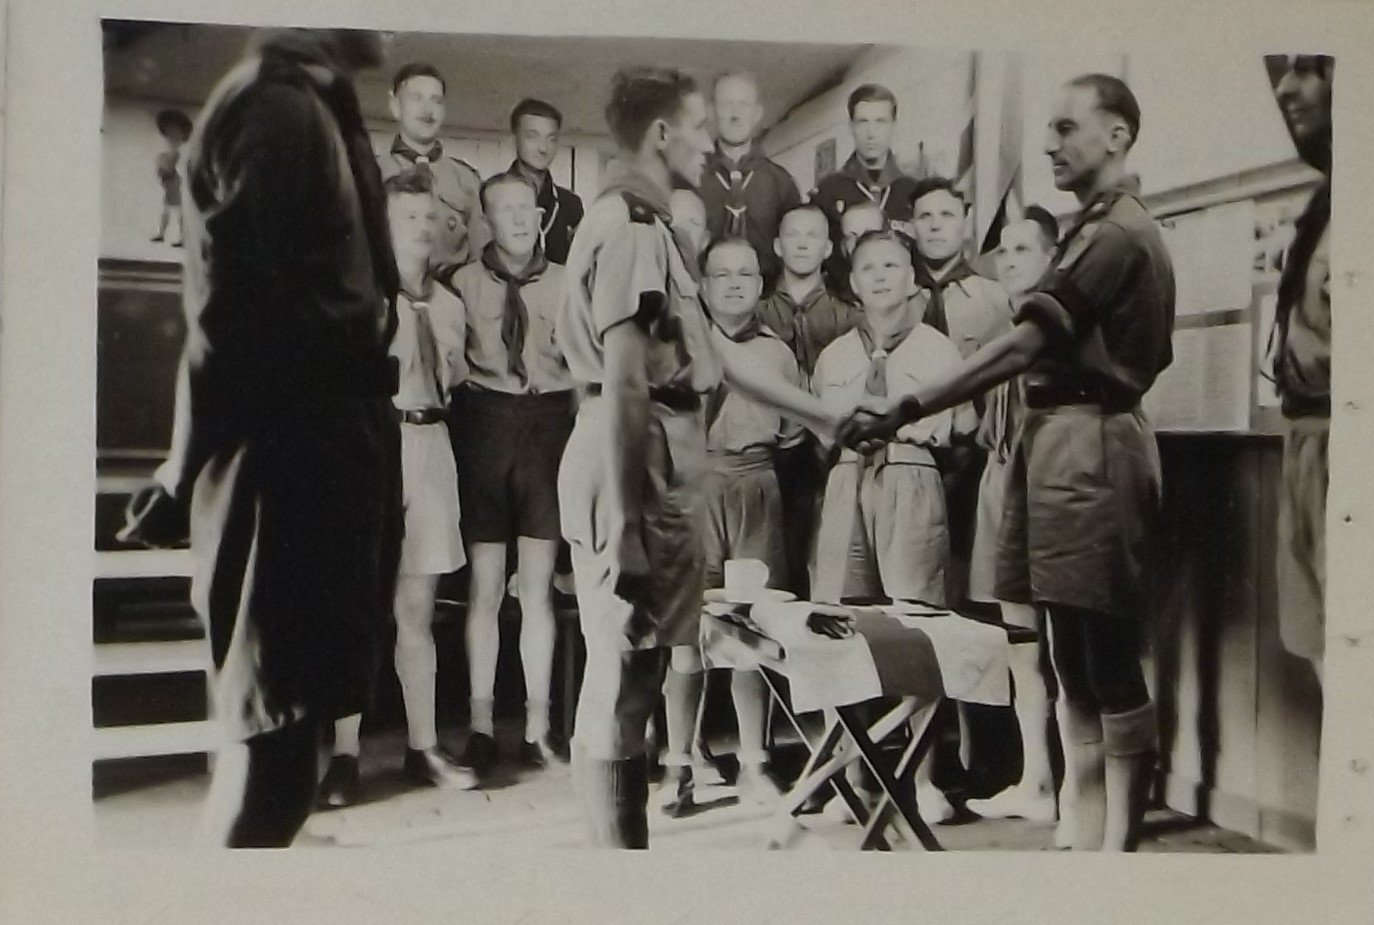
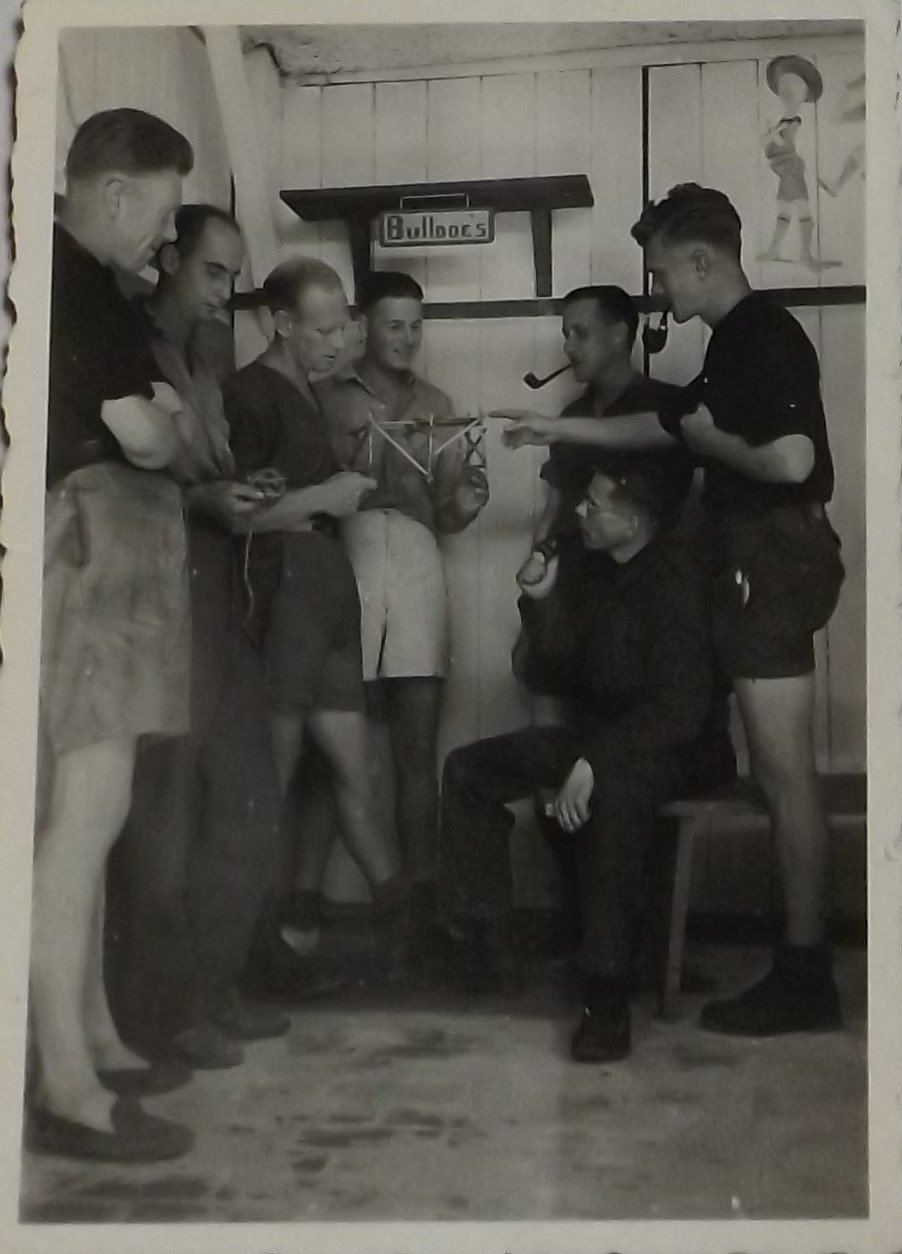
In October 1942, a group of British and commonwealth prisoners decided to form an official Rover Scout Crew, which they named Richard Coeur-de-Lion (Richard the Lion Heart). The Scout Leader was Australian warrant officer Ivan C. Stevens, better known as Steve. John was appointed Quartermaster. The crew was divided into three patrols: the Bulldogs, Nomads and Owls. An old harness room in one of the disused stable blocks became the scout Den and was later used as the camp school room and library. As suitably quiet accommodation for study was extremely limited in the camp, the Den was opened as a ‘quiet room’ for those seeking solitude. A member of the scout crew would always be in attendance when the Den was open.
The scout crew took on many of the mundane chores necessary to keep the camp functioning such as collecting firewood. The scouts organised numerous activities to keep its members and other prisoners busy from debating societies and amateur dramatics to sports and various self-improvement classes. First Aid classes were taught by the scouts until a St. John Ambulance Brigade was formed in the camp. The Brigade performed medical duties at all camp football matches and theatre performances. Members of the scout crew took an active role in the many theatrical productions held at the camp’s National Theatre. The scout crew organised social events such as the annual Christmas party. Holidays like Christmas and New Year could be particularly difficult psychologically for prisoners. Depression could settle on a man; its symptoms so well recognised the prisoners called it ‘barbed-wire disease’.10


John (marked with an X) during the Scouts last Christmas Party in Stalag 383. John in the Scout Den with some of the crew, Christmas 1944.


Click on images to enlarge
Camp Universities
Francis Newman was the first British serviceman to pass a professional examination in a prison camp during the Second World War. For many men, captivity represented an opportunity to gain an education and qualifications that would have otherwise been denied to them in ordinary life.11 Stalag 383, John said the camp contained so many talented people with nothing but time on their hands that a Warrant Officer (WO) from the Royal Army Educational Corps started a Stalag University. The University taught a wide range of subjects and attracted thousands of students.
The Educational Book Section of the British Red Cross PoW Department was responsible for collecting and dispatching books for study to men in the camps. By May 1942 the Educational Book Section had received 15,355 requests for books and study aids and had arranged for over 69,000 educational books and 3,542 study aids to be sent to the camps, regardless of a wartime shortage of paper. The British Red Cross approved 6,091 different exam papers from 136 different examining bodies from Cambridge University to the Beekeepers Association. The Red Cross also sent rulers, mathematical instruments, drawing boards and chalk. Medical students were sent skeletons and other anatomical specimens to help them pass practical biology exams. The Germans would provide tables and chairs for examination rooms. The Educational Section sent 17,000 exam papers to students who sat around 11,000 exams with an average pass rate of 78.5 percent.12
A collection of photos of a Stalag 383 ‘National Theatre’ production of Rope, winter 1944.
September 1942 – April 1945
As the inmates refused to work for the Germans, they had plenty of time to kill. Subsequently, numerous sports were played in the camp. The inmates even managed to transform a large concrete water tank known as the Fire Pool (which provided a central source of water in the event a fire broke out within the camp) into a serviceable swimming pool. John remarked how during hot days the swimming pool was often crowded with inmates until lights-out. Many aquatic sports competitions were held in the pool and each of the fourteen companies fielded a water polo team. John also helped the camp escape committee but gives no details of his activities in his testimony.
Using clandestine radios, the inmates were able to monitor news broadcasts and follow the Allies advance into Germany during the last months of the war. In early April 1945, the prisoners were informed the camp was to be evacuated.
John, standing, right, probably taken in Stalag 383 as all subjects are NCOs.
12 April 1945 – Stalag 383
John wrote that on 12 April 1945 the Red Cross white ladies (army lorries painted white and driven by British military personnel (PoWs) accompanied by German guards and a Red Cross representative) arrived at the camp. Red Cross parcels were handed out, one between four men. Next, the prisoners were moved out of the camp and onto a road. John said that whether the men were march-fit, sick, or disabled, it was all the same to the German doctors. Everyone who could be found was forcibly evacuated from the camp. Apparently, many inmates concealed themselves in various hiding places within the camp to avoid the exodus. There was no motor transport for the inmates and by nightfall men were dropping out along the line of march. At first, John explained, the guards would try to rouse the small groups and get them marching again. But later, no one from the camp administration came along when John and a small group of his comrades dropped out for a rest. They took this opportunity to slip away from the forced march.
13 April 1945
Early the next morning John and his friends cleaned themselves up and then moved off in regulation fashion. John recalled that they looked quite smart as they marched along. However, the group were stopped by a German Field Police (Feldgendarmerie) unit looking for deserters. The Feldgendarmerie turned the British over to a small group of German truck drivers who had lost their vehicles when they had been attacked by Allied fighter-bombers. Together, the little mixed group of Germans and British NCOs marched about ten miles to Hohenberg (unfortunately John is a little vague about the exact location but is probably the town between Stuttgart and Nuremberg). The British were handed over to the civil authorities in Hohenberg, where they were given rations and bedding, and remained there for a few days.
14 April 1945
John wrote that at about midday on 14 April, a French soldier called Rene joined their group. He said he had been picked up outside Regensberg, which is east of Hohenberg, after he had escaped from a PoW camp. John remarked that he seemed pleasant enough and spoke good English.
15 April 1945
John and his comrades were put to work around the town but were not closely supervised. During the afternoon of 15 April, a German military motorcycle came racing through the town pursued by an Allied rocket-firing Typhoon aircraft. To try and evade its pursuer, the motorcycle went over a humpbacked bridge at speed and then turned into a large barn that stood beside the road. At the same moment, the Typhoon pilot fired a salvo of rockets. The rider and passenger either jumped or were thrown clear as the motorcycle crashed into the barn. In the next moment, the rockets hit the barn and it exploded. Unfortunately, the barn housed cows and horses. John explained how the nearby towns people and PoWs rushed to the scene and were able to save about seven or eight of the 15 animals trapped in the inferno.
16 April 1945
The next day, after the episode with the Typhoon and motorcycle, the local Bürgermeister (mayor or chief magistrate) sent for the group of PoWs. The Bürgermeister was concerned that the town’s women would be raped when American troops arrived to occupy the town and asked the men to intercede on the town’s behalf. This fear that the town’s women would be raped was probably due to propaganda and stories of widespread rapes and killings of German civilians by Russian troops in the east of the country.
17 April 1945
John recalled that around breakfast time he heard a commotion downstairs and on investigation found Stan “NAAFI” Henson in a car with a group of chaps, all armed to the teeth, from Stalag 383. Henson informed John that the prison camp had been liberated by the Americans. The German doctor who had insisted that all the sick and disabled prisoners be evacuated from the camp had been shot dead. Henson’s group left John and his comrades with arms and ammunition and told them to roundup any German soldiers left in the town. Next, John says they went to see the Bürgermeister and told him that the town’s folk should hang white bed linen from upstairs windows and public buildings to signify surrender. The British NCOs then went around confiscating weapons from those German troops who remained in the area.
Just after lunchtime an American Jeep arrived in the town square. John and his comrades made themselves known to the American troops. The jeep was the point detail or reconnaissance vehicle for the approaching 4th Armoured Division. An American Private asked John if he would sell him the Luger pistol (P08) he was carrying. These were highly prized souvenirs amonst American troops. John said the Private was overjoyed when he simply handed the pistol over as a gift. As elements of the armoured division started to rumble through the town, John and his comrades sat beside the road while American troops tossed them cartons of cigarettes, C and K-rations as they passed.
At dusk, the group was transported by the Americans to a farmhouse some miles away. The German farmer and his family were relocated to the barn.
18 April 1945
About lunchtime John’s group moved to an American Army encampment. Next, the group moved to Nürnberg (Nuremberg) and were informed that they would be handed over to AMGOT (Allied Military Government of Occupied Territories). AMGOT wanted to move John and his comrades back toward Stalag 383. This arrangement did not suit John, who wanted to move forward, not back. So, John and Rene decided to make their own way home. First, they got a ride in an American Army truck heading northward. However, the truck dropped them in the middle of nowhere. They walked to the nearest village, which was occupied by the Americans. They were taken into custody and interrogated by an American intelligence officer. As John had letters from home and some official documents on his person that substantiated his story, he was eventually released from custody. John was sent to the guardroom where the Military Police made him welcome, but Rene was not released. The commander of the guard kept referring to John’s ‘kraut’ friend (meaning Rene).
Next morning, driving out of the village, John passed a large PoW stockade and one of the prisoners was Rene. John was told that Rene was not a Frenchman, but a German Obergefreiter from a Panzer Grenadier Regiment stationed near Regensburg. When his unit’s camp was about to be overrun by the Americans, Rene had fled and hidden in a nearby forest. Later, he had murdered a French PoW and stolen his identity. John never learned the German soldier’s real name or his fate.
19 April 1945
John was taken to a US airfield where he waited for a flight home. A group of American servicemen took him under their wing and entertained him. While at the airfield, John said he watched the film White Christmas, but he was mistaken as the movie was not released until 1954. He probably watched the film Holiday Inn (1942), which featured Bing Crosby singing the song White Christmas.
20 April 1945
After waiting around all morning on the runway, John and two British officers were told they would be put on a flight to Ghent, Belgium, but due to bad weather the flight was re-routed to Paris, France. The flight landed about 17.00hrs and they were taken to a US Rest Centre nearby.
22 April 1945
Finally, John got a ride on an RAF Transport Command, Handley Page Hampden aircraft to RAF Croydon. Next, John went to Chalfont Saint Giles and then to Worcester. Two days later, he was on a train home. When John left for France in 1940, he weighed 12 stone 8oz. On his return to England, he weighed just 8 stone 3oz, but he was home at last.
A telegram announcing John’s arrival home, which reads: ‘John Stafford arrived yesterday evening without a rag to his back or a penny in pocket. Mother naturally shocked at his appearance but getting over it. Charles.’
Primary sources
John Thorne’s family provided a range of official documents, maps, books, and photograph albums plus 50-pages of handwritten testimony about his wartime experiences and his life in various prisoner of war camps.
Secondary sources
1. Buffs (Royal East Kent Regiment), see: https://en.wikipedia.org/wiki/Buffs_(Royal_East_Kent_Regiment)
2. Destination Dunkirk: The Story of Gort’s Army, Gregory Blaxland, William Kimber & Co. Ltd., 1973, pp. 121-129
3. Commonwealth War Graves: https://www.cwgc.org/find-records/find-war-dead/casualty-details/2279541/john-arthur-lungley/
4. Destination Dunkirk, Blaxland, p. 131
5. Stalag XXA https://en.wikipedia.org/wiki/Stalag_XX-A and Torun Fortress https://en.wikipedia.org/wiki/Toru%C5%84_Fortress
6. Stalag XX-B Marienburg, Danzig https://www.forces-war-records.co.uk/european-camps-british-commonwealth-prisoners-of-war-1939-45
7. The Barbed-Wire University: The Real Lives of Allied Prisoners of War in the Second World War, Midge Gillies, Aurum Press Ltd, London, 2011, pp. 76-83
8. British Red Cross, Museum and Archive, Prisoner of War Food Parcel webpage, accessed 15 May 2022 https://museumandarchives.redcross.org.uk/objects/8944
9. Prisoner of War: The Story of British Prisoners held by the Enemy, Noel Barber, George G. Harrap & Co Ltd, London, 1944, pp. 13-17
10. Glowing Embers, R. Philip Smith, Jarrold and Sons Ltd, Norwich, 1946, pp. 7-19
11. Prisoner of War, Barber, pp. 40-49
12. The Barbed-Wire University, Gillies, pp. 271-288
Additional resources
The Red Cross Museum archive https://museumandarchives.redcross.org.uk/objects/29269
The Museum of St. John https://museumstjohn.org.uk/st-john-during-the-second-world-war/
Stalag 383 Bavaria: A History of the Camp, the Escapes and the Liberation, Stephen Wynn, Pen & Sword Military, 2021.