
Blog
The Second World War resulted in the deaths of around 85 million people. Additionally, tens of millions more people were displaced. However, amid all the carnage, people demonstrated remarkable courage, fortitude, compassion, mercy and sacrifice. We want to honour and celebrate all of those people. In the War Years Blog, we examine the extraordinary experiences of individual service personnel. We also review military history books, events, and museums. We also look at the history of unique World War II artefacts, medals, and anything else of interest.
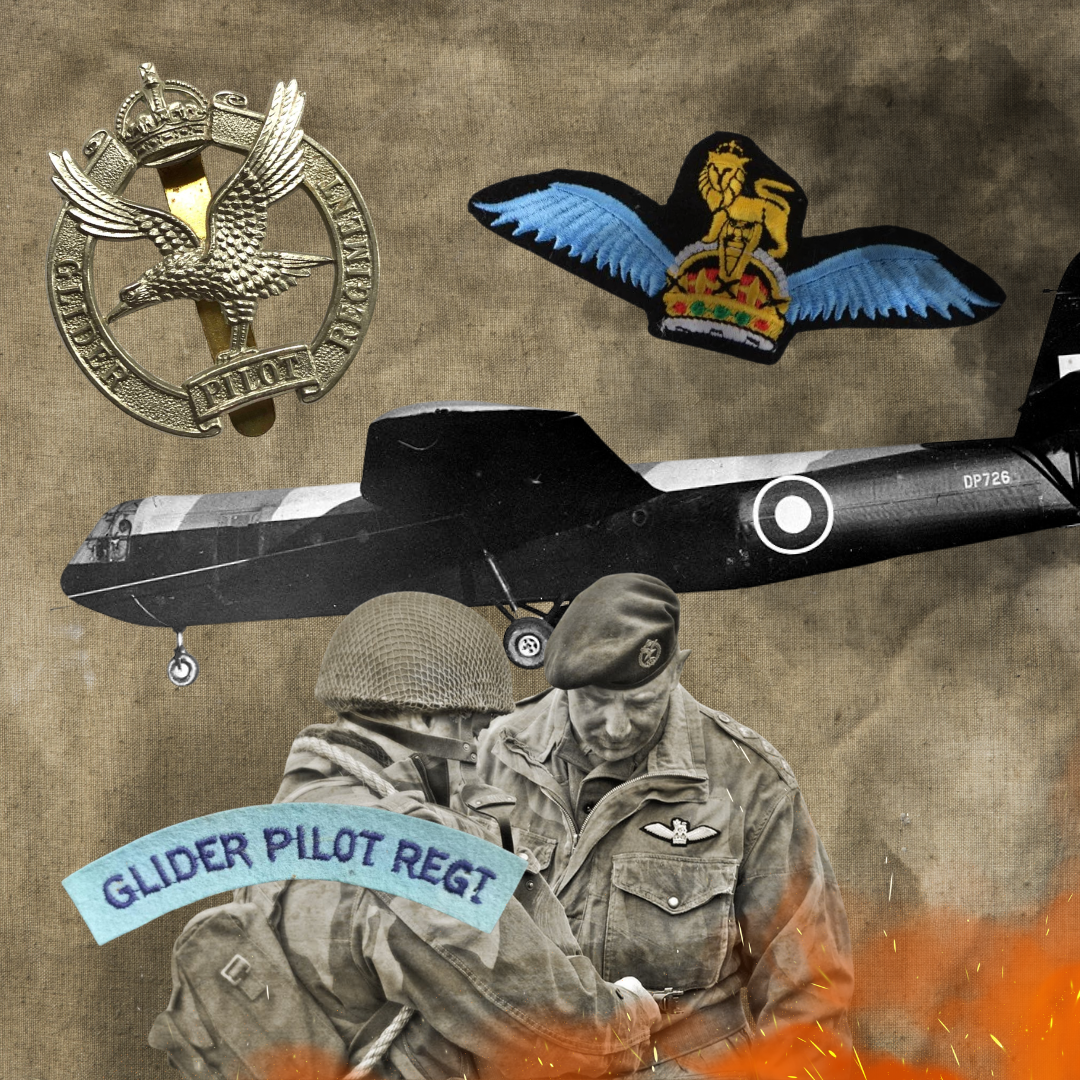
The Glider Pilot Regiment at Operation Market Garden: What Happened to the Men Who Flew Into Arnhem?
Using the story of Sergeant Stanley Edward Platt, reported missing in October 1944, as a starting point, this article explores the little-known role of the Glider Pilot Regiment during Operation Market Garden. It shows how these men not only flew troops and equipment into Arnhem, but then fought on the ground as infantry and helped guide the evacuation from Oosterbeek. This article offers readers a powerful, human perspective on courage, sacrifice and one of the most dramatic battles of the Second World War. It also reveals what happened to the missing Sergeant Platt.
By Charles Richard Trumpess | Military Historian | Author | Associate Fellow, Royal Historical Society
Army Form B.104-83, dated 11 October 1944, notifying the family of Sergeant Stanley Edward Platt that he had been posted missing on 25 September 1944.
Not long ago, I was contacted by a family member who had come across a remarkable wartime document. It was an original Army Form B.104-83, dated 11 October 1944, informing the next of kin that Sergeant Stanley Edward Platt, service number 5340441, of the Army Air Corps, had been posted as missing on 25 September 1944 in North West Europe.
The form is a standard printed letter, filled in by hand. It is brief, carefully worded and, as these things always are, quietly devastating. It notes that being reported missing did not necessarily mean the soldier had been killed, and that he might be a prisoner of war. It asks the family to forward any letters or postcards they might receive directly to the Record Office.
A little research confirmed that Sergeant Platt had indeed survived the war. His German prisoner-of-war record card, held at The National Archives as WO 416/291/464, shows that he was processed at Stalag XIIA at Limburg an der Lahn under POW number 89043. Born on 30 March 1919, he has no entry in the Commonwealth War Graves Commission, which is the clearest possible confirmation that he came home. But as we will learn, before his repatriation, he would have to endure a period of captivity.
The date on his missing notification, 25 September 1944, is immediately significant to any historian of the Second World War. It is the final day of Operation Market Garden and the night of the withdrawal from Arnhem. Sergeant Platt, in all probability a pilot of the Glider Pilot Regiment, was caught up in one of the most dramatic and costly operations in British military history.
This article looks at what men like Sergeant Platt were asked to do at Arnhem, and why the story of the Glider Pilot Regiment deserves to be far better known.
A parachute drop during Operation Market Garden
What was Operation Market Garden?
Proposed by Field Marshal Sir Bernard Montgomery, Operation Market Garden was launched on 17 September 1944. The aim was bold: to drop three Allied airborne divisions up to sixty miles ahead of the front line to capture a series of bridges across the major rivers and canals of the Netherlands, while XXX Corps, spearheaded by the Guards Armoured Division, drove north along a single road to link up with them.
The American 101st Airborne Division would secure the bridges around Eindhoven, the 82nd Airborne Division would take Nijmegen, and the British 1st Airborne Division, supported by the 1st Polish Independent Parachute Brigade and the Glider Pilot Regiment, would seize the northernmost prize: the road bridge over the Lower Rhine at Arnhem.
If it worked, the Allies would bypass Germany's Siegfried Line defences, cross the Rhine and drive into the industrial Ruhr. If it succeeded, some planners believed the war in Europe could be over by Christmas 1944. But the operation did not succeed. What the Allied planners did not know, or chose to discount, was that elements of the II SS Panzer Corps had been sent to the Arnhem area to refit after the Normandy campaign. The British airborne troops who landed on 17 September and thereafter would find themselves fighting not lightly armed garrison troops, old men, invalids and boys, but battle-hardened SS veterans with armoured support.
Operation Market Garden. Map of the Allied Plan by Chaosdruid - CC BY-SA 4.0
What Was the Glider Pilot Regiment, and What Made It Unique?
The Glider Pilot Regiment's motto: Nothing is Impossible.
The Glider Pilot Regiment (GPR) was formed in 1942 and was part of the Army Air Corps, alongside the Parachute Regiment. It was authorised by Royal Warrant on 24 February 1942, and by 1945 it had reached a peak strength of approximately 2,500 pilots.
What set the regiment apart from every other aircrew unit in the British armed forces was the concept of the "Total Soldier." The man behind this idea was Colonel George Chatterton, a charismatic and demanding commander who had been an RAF fighter pilot before transferring to the infantry. In the mid-1930s, Chatterton survived a mid-air collision only to be told at an RAF medical board that if war came, he would spend it flying a desk, so he transferred to the Territorial Army. Ironically, before he joined the Glider Pilot Regiment, he was required to attend another RAF medical board, which found him A1 – fit to fly. His vision was that a glider pilot should be as capable on the ground as he was in the air: trained to fight as infantry, to handle British and German weapons and equipment, and to fill whatever gap appeared in the line. To this end, he employed Drill Sergeants from the Brigade of Guards to oversee a rigorous training regimen that would weed out all but the very best men.
Chatterton's speech to the Regiment in 1942 rather summed up his approach: "We will forge this regiment as a weapon of attack... Not only will we be trained as pilots, but in all we do... I shall be quite ruthless... Only the best will be tolerated. If you do not like it, you can go back whence you came."
In the American airborne forces, glider pilots were generally expected to avoid ground combat after landing to avoid wasting trained specialists. The British took the opposite view. Once their gliders were down, GPR pilots would pick up their weapons and fight alongside the men they had delivered, until they could be withdrawn, rested and used again. The regiment's motto was "Nothing is Impossible."
The men were predominantly non-commissioned officers, mainly sergeants and staff sergeants, selected for intelligence, initiative and physical toughness. They underwent full military training before beginning their flying instruction, and they were expected to master a glider with no engine, no second chance, and no way back once released from its tug. To some, gliders were nothing more than “flying coffins”; every landing was little better than a controlled crash.
IWM BU 1164: HQ of 1st Airlanding Light Regiment, Royal Artillery, unload a jeep and trailer from their Horsa glider at the landing zone near Wolfheze in Holland, 17 September 1944.
The cockpit of an Mk.II Horsa glider, the de Havilland Aircraft Museum, by the author.
How Did the Glider Pilot Regiment Fly Into Arnhem?
For Operation Market Garden, the British element of the airborne assault involved just over 1,200 members of the Glider Pilot Regiment, almost the regiment's entire strength. They flew 667 gliders, primarily Airspeed Horsas, along with some Hamilcars (large gliders designed to carry heavy cargo, such as light tanks) and Hadrians (the British name for the American Waco glider), delivering approximately 4,500 troops, around 600 jeeps and 95 guns to the landing zones west of Arnhem.
The operation was divided into three lifts, spread across three days. The first lift on 17 September was largely unopposed. Glider pilots had no difficulty identifying their landing zones, and the Independent Parachute Company's pathfinders had marked them clearly with Verey lights and smoke candles. Of the 358 combinations that took off for the first lift, the great majority reached their targets.
The second lift on 18 September was more difficult. Of the 297 combinations that took off, 273 reached the landing zone. Twenty-four loads were lost due to engine failure, tow rope breakage, flak damage, and other causes. A third and smaller lift followed on 19 September. By this point, the element of surprise had been entirely lost and German resistance was intensifying rapidly.
In the original planning of the operation, glider pilots would deliver their loads, remain to defend the divisional and brigade headquarters during the initial phase, and then withdraw into reserve, ready to be extracted from the battle and used again. It was a sound plan for a battle that went as expected.
Arnhem did not go as expected.
Troops dug in holding Brigade Headquarters Arnhem 18 September 1944, National Army Museum, NAM image no. 106438.
What Happened on the Ground at Oosterbeek?
By the second day, the 2nd Parachute Battalion under Lieutenant Colonel John Frost had reached the northern end of the Arnhem road bridge and was holding it under increasingly heavy German attack. The rest of the division, however, had been unable to break through to reinforce them. The II SS Panzer Corps had moved quickly to block the roads into Arnhem, and what had been intended as a rapid advance became a grinding, close-quarters battle through the streets and gardens of Oosterbeek.
The plan to withdraw the glider pilots into reserve was abandoned. The situation required every man to fight. GPR pilots were ordered to remain with the 1st Airborne Division and were heavily engaged as infantry, manning sections of the Oosterbeek perimeter alongside parachute troops, engineers and anyone else available. They fought house to house, led mixed groups of infantrymen and medics, conducted anti-sniper patrols and moved to plug gaps in the line as they appeared.
The Oosterbeek perimeter was, by any measure, a desperate place. The division was surrounded on three sides by German forces that included tanks, self-propelled guns, infantry and Waffen-SS. The perimeter shrank day by day. Resupply aircraft, unable to communicate with the men on the ground, dropped their loads into areas already held by the Germans. The wounded filled every available building.
The GPR pilots, trained as "Total Soldiers," proved themselves fully capable of sustained infantry fighting. That came at a heavy price. By the time the battle ended, the regiment had suffered casualties on a scale from which it never fully recovered.
Map of the Oosterbeek perimeter, September 1944 - Battle of Arnhem.com.
Hotel Hartenstein in Oosterbeek, on the outskirts of Arnhem, 1945, photograph by Frank Tomlinson, 74th Field Regiment, Royal Artillery, NAM image no. 2014-08-16-447.
Airborne Museum Hartenstein, June 2025, by the author.
What was the Defence of Oosterbeek like? A Personal Testimony by Gilder Pilot Sidney East
In 1994, 50 years after the events, Sidney East recalled his own experiences of Operation Market Garden as best he could for the Imperial War Museum’s sound archive. Many people believe that memories of violent or stressful events are clear and remain unchanged over time. They assume that when we recall these events confidently, our memories are likely to be accurate. However, research in psychology and neuroscience shows that memory is not infallible. Instead, it is a process of reconstruction, which can lead to errors and distortions in what we remember. As a result, it is highly probable that testimonies from veterans recounted 50 years or more after the events are inaccurate. Nevertheless, Sidney East’s testimony resembles accounts given by veterans in the years immediately following the war.
By the time of Market Garden, East was an experienced NCO having served in North Africa, Sicily, Italy and Normandy. He was a glider pilot with D Squadron, No. 1 Wing, Glider Pilot Regiment. He recalled how he and his co-pilot, Charlie, left England on a beautiful Sunday morning, 17 September, and arrived at their landing zone as part of the first lift against minimal opposition. The only casualty on landing was his flask of coffee, which broke as he exited his glider. His glider was carrying a jeep, two motorcycles and six men of a reconnaissance unit.
Having landed safely, members of D Squadron assembled at the corner of the landing zone and dug in. Next, they moved into the Oosterbeek area, about 5km west of Arnhem, initially taking up residence in a house after evicting the female occupants. After two days of fairly light and sporadic fighting, suddenly, on the morning of the third day, East and his comrades came under sustained mortar and artillery fire. A German tank also made an appearance, but was later knocked out. They abandoned the house after it received a couple of direct hits and dug slit trenches in the front garden. While Charlie, the copilot, was armed with a rifle and successfully sniped at the Germans, East was equipped with a Sten sub-machine gun, which he described as “useless”, and a PIAT anti-tank weapon, but no “bombs” (anti-tank projectiles) to fire.
On the fourth day, East and his comrades were attacked by German troops and nearly overrun, but they managed to repel the enemy. He recalled that food and, most importantly, water were in short supply. On the fifth day, East remembered that the Germans used loudspeakers to call for the airborne forces to surrender. The British troops responded with catcalls, profanity, and hand grenades.
On the sixth day, the Oosterbeek perimeter was continuously tested and bombarded by mortar and artillery fire, which East described as “nerve-shattering.” On the seventh or eighth day, while attempting to make tea with the last of his rations, a sniper fired, knocking over his small stove. Incensed, he jumped out of his trench and ran toward the trees where the shot had come from. Armed with a rifle, he shot the sniper, who was positioned in the branches of one of the trees. As the sniper fell to the ground, East prepared to bayonet him, but discovered that the sniper was already dead. He was shocked to find that the sniper was just a teenager, little more than a boy.
On the ninth day, a runner informed East and his comrades to assemble at the corner of the tennis courts by the Hartenstein Hotel, which served as the 1st Airborne’s Headquarters. They gathered there at around 8 PM and then made their way down to the river, the Lower Rhine. Elements of the Second Army on the opposite bank provided covering fire. Heavy rain also helped conceal their retreat across the river.
Having escaped the Oosterbeek pocket, the glider pilots were transported first to Nijmegen, still under shellfire, and then to Louvain, Belgium. Finally, the survivors were flown back to RAF Keevil in Wiltshire. The airfield hosted the Glider Pilot Regiment's operational and training units, and was used to launch operations and debrief returning crews. Upon his return, East discovered that only four members of his original flight, which had consisted of approximately 50 personnel, had survived. The rest had been killed, wounded, or taken prisoner. East told his interviewers that he didn’t sleep properly for weeks after Market Garden, shocked by the loss of so many comrades.
The John Frost Bridge (John Frostbrug), the infamous road bridge over the Lower Rhine (rebuilt in 1948), is perhaps better known as “A Bridge Too Far”, the ultimate objective of Operation Market Garden. Photographed by the author in June 2025.
How Did the Glider Pilot Regiment Help with the Evacuation from Arnhem?
On 25 September 1944, the ninth day of the battle, as Gilder Pilot Sidney East reported, it was decided to evacuate the remainder of the 1st Airborne before it was overrun. The plan, sardonically codenamed Operation Berlin, was to withdraw across the Lower Rhine that night under cover of darkness and a full artillery fire plan from the south bank.
The surviving glider pilots played a crucial role in the evacuation. Using their navigational skills, they laid white tape through the woods, creating a pathway from the Oosterbeek perimeter to the riverbank for the retreating soldiers to follow in the dark. To muffle their footsteps, the soldiers wrapped cloth around their boots. The heavy rain not only masked the sound of movement but also reduced visibility for the German attackers.
Canadian and British engineers waited on the river with small storm boats and canvas assault craft, ferrying men across the fast, wide Neder-Rijn under constant German machine gun, mortar and artillery fire. The operation began at 22:00 and continued until dawn, when it was forced to stop.
Of the 10,095 men who had landed at Arnhem by parachute and glider, roughly 2,500 remained capable of fighting by the night of 25 September. Of those, 2,163 British troops and 160 Polish paratroopers made it across the Rhine to safety, among them 422 glider pilots. Several hundred more were left on the north bank, where they surrendered to advancing German forces or attempted to evade capture with the help of the Dutch Resistance. The Glider Pilot Regiment suffered horrendous casualties at Arnhem; 1,262 men flew in, of whom 219 were killed and 511 taken prisoner.
Sergeant Stanley Edward Platt was among those who did not cross the river that night. He was captured, processed through Stalag XIIA at Limburg and held as a prisoner of war until liberation in the spring of 1945.
The Arnhem Oosterbeek War Cemetery, or Airborne Cemetery, is a Commonwealth War Graves Commission site in Oosterbeek, Netherlands. Established in 1945, it contains 1,764 graves, mainly of service personnel who died in the battle for Arnhem. Photographed by the author in June 2025, this picture shows the graves of at least 15 members of the Glider Pilot Regiment, probably more.
What Were the Glider Pilot Regiment's Casualties at Arnhem?
The human cost to the Glider Pilot Regiment at Arnhem was the highest it had suffered in any single operation. 219 members of the regiment were killed, giving a fatal casualty rate of around 17.35%, the highest of any formation in the battle. When the wounded and prisoners of war are included, the regiment's overall casualties were devastating, to the point that for the Rhine crossing operation in March 1945, Operation Varsity, a substantial number of RAF pilots had to be seconded to the regiment to make up the numbers.
Those losses reflected not a failure but an extraordinary commitment. The GPR pilots had flown their gliders in, delivered their loads accurately under fire, fought as infantry for nine days in an increasingly hopeless defensive perimeter and, at the end, helped to guide their comrades to the river. They had been asked to be "Total Soldiers", and they had been exactly that, at very great cost.
The regiment was eventually disbanded in 1957, as the era of the military glider came to an end. Its battle honours include Sicily 1943, Normandy 1944, Arnhem 1944, and the Rhine crossing 1945.
War Office Casualty List, Sergeant Platt is recorded as being held at Stalag II-A.
What happened to Sergeant Platt?
The Army Form B.104-83 sent to Sergeant Platt's family in October 1944 is a modest document. It is a printed form with blanks filled in by hand. It runs to fewer than two hundred words. But it represents a moment of profound anxiety for a family who did not know whether the man they loved was alive or dead, and a chapter in one of the most remarkable stories of the Second World War.
After his initial capture and incarceration, Sergeant Platt is listed on an updated War Office casualty list as serving with the 1st Battalion, Parachute Regiment. By 11 June 1945, the list shows that he was reported as a prisoner of war in German hands, but was marked as “Not Prisoner of War”. This means he was no longer officially considered a German POW. The record does not explain how this change occurred, whether he was liberated, as the European war had ended in May, escaped, or repatriated, or whether it was simply a correction of earlier information.
Evidence suggests that Platt was one of the Arnhem prisoners, all non-commissioned officers, sent to Stalag II-A/Camp Fünfeichen near Neubrandenburg. A Red Cross report from 14 November 1944 mentions 200 British non-commissioned officers captured at Arnhem, who arrived at the camp on 12 October 1944. The report describes poor camp conditions, including insufficient food, depleted Red Cross supplies, and shortages of socks, underwear, and shoes. There was no British chaplain, and recreation was very limited.
An oral history by David Arthur Brooks, a veteran of the 2nd Battalion, Parachute Regiment, and a POW at Stalag II-A, offers insights into camp life. He recalled a ten-day train journey to the camp without food, 200 men packed into two cattle trucks. The refusal of Arnhem POWs to work for the Germans and the resulting isolation, as the prisoners’ barrack was fenced off from the rest of the camp. Nevertheless, this didn’t stop some of the British prisoners from slipping under the wire and trading with Serbian prisoners. He talked about rationing and the arrival of Red Cross parcels in December 1944. Some prisoners were marched in from camps farther east, and many of them were in urgent need of medical assistance.
Brooks described the final days of the camp, which were marked by disputes regarding the burial of British prisoners and an attempted burial ceremony. There was also an RAF air drop of food and medical supplies, along with the arrival of Soviet Red Army units. The German guards’ families were entrusted to British POWs, as they feared potential reprisals from the Red Army.
After being liberated by the Russians, the prisoners were left to their own devices until an RAF officer arrived to arrange their transportation. They subsequently marched to Schwerin before returning to Britain aboard Dakota transport aircraft in May 1945. Following their return, Brooks and his comrades (we can only assume that Sergeant Platt was one of them) were moved to a camp near Haywards Heath, where they received new uniforms and £5 in cash, and were permitted to go home on leave the next day. Later in 1945, Stanley Platt got married. He passed away in March 2002, aged 83.
Sergeant Platt survived. Many of his comrades did not. Their names are recorded at the Arnhem-Oosterbeek War Cemetery, where 1,684 Commonwealth servicemen, many of them airborne forces, lie buried, tended by the Commonwealth War Graves Commission and still visited every year by Dutch families who have kept faith with the men who came to liberate them.
The Glider Pilot Regiment may be less well known than the Parachute Regiment battalions with which it served, but the men who wore its Gold Lion with Blue Wings insignia deserve every bit as much to be remembered. If a piece of old paper leads you to ask who they were and what they did, that seems like a worthwhile place to start.
Charles Richard Trumpess is a military historian, author, and an Associate Fellow of the Royal Historical Society. He is the author of “A History of the Guards Armoured Formations 1941-1945” (Pen & Sword Military, 2025) and “The Birth of British Special Forces” (Fonthill Media, 2026).
References and Further Reading
Primary sources
Army Form B.104-83, dated 11 October 1944. Sergeant Stanley Edward Platt, 5340441, Army Air Corps. Family collection.
The National Archives, WO 416/291/464. German prisoner of war record card (Personalkarte), Sergeant Stanley Edward Platt, Stalag XIIA, POW number 89043.
The National Archives, WO 171/1242-1248. War diaries, No. 1 and No. 2 Wing, Glider Pilot Regiment, 1944.
Pegasus Archive, Headquarters Commander Glider Pilots War Diary, Arnhem 1944. Available at: https://www.pegasusarchive.org/arnhem/war_cgp.htm
The Pegasus Archive, Red Cross Reports on the Conditions at German PoW Camp Stalag II-A: https://www.pegasusarchive.org/pow/cSt_2A.htm
IWM Oral History, David Arthur Brooks, served with the 2nd Battalion, the Parachute Regiment, 1st Parachute Brigade, 1st Airborne Division, Interviewed 1999, Catalogue number 18265: https://www.iwm.org.uk/collections/item/object/80017612
Secondary sources and recommended reading
Beevor, A. (2018). Arnhem: The Battle for the Bridges, 1944. Viking. A comprehensive operational history of Market Garden.
Peters, M. and Buist, L. (2010). Glider Pilots at Arnhem. Pen & Sword Aviation. The definitive account of the GPR at Arnhem, drawing on personal testimonies and operational records.
Kershaw, R. (1996). It Never Snows in September: The German View of Market Garden and the Battle of Arnhem, September 1944. Sarpedon.
Urquhart, R.E. (1958). Arnhem. Cassell. Republished by Pen & Sword Military Classics (2008), The divisional commander's own account.
Seth, R. (1955). Lion With Blue Wings: The Story of the Glider Pilot Regiment 1942-1945. Victor Gollancz Ltd.
Online sources
Army Flying Museum. "Operation Market Garden: 80 Years On." Available at: https://armyflying.com/the-collections/archive-blog/operation-market-garden-80-years-on/
WW2 Escape Lines Memorial Society. "The Glider Pilot Regiment." Available at: https://ww2escapelines.co.uk/article/glider-pilot-regiment/
Military History Matters. "Glider Pilots at Arnhem." Available at: https://www.military-history.org/feature/your-mh-glider-pilots-at-arnhem.htm
Wikipedia. "Operation Berlin (Arnhem)." Available at: https://en.wikipedia.org/wiki/Operation_Berlin_(Arnhem)
Airborne Assault Museum (ParaData). Arnhem (Operation Market Garden). Available at: https://paradata.org.uk/content/4634394-arnhem-operation-market-garden
Commonwealth War Graves Commission. Arnhem-Oosterbeek War Cemetery. Available at: https://www.cwgc.org/visit-us/find-cemeteries-memorials/cemetery-details/2063800/arnhem-oosterbeek-war-cemetery/
Glider Pilot Regiment Society. Available at: https://www.gliderpilotregiment.org.uk

Operation Anthropoid: Heroes Who Refused to Surrender
This article recounts Operation Anthropoid, the 1942 assassination of Nazi leader Reinhard Heydrich by Czech resistance fighters Jozef Gabčík and Jan Kubiš. Despite brutal Nazi reprisals including the destruction of Lidice, the mission proved that resistance continued and helped secure international support for post-war Czechoslovakia. The piece draws parallels between the Munich Agreement's betrayal and contemporary geopolitical situations.
Authors: Martina Gregorcová, Art of Your Travel, and Charlie Trumpess, The War Years
On 30 September 1938, British Prime Minister Neville Chamberlain returned to Heston Aerodrome brandishing a piece of paper and declaring he had achieved “peace for our time.” This followed the Munich Crisis, when the leader of Nazi Germany, Adolph Hitler, threatened to invade Czechoslovakia. Chamberlain visited Germany three times in an attempt to avert war. The resulting Munich Agreement, signed by Germany, Britain, France, and Italy, gave Hitler the Sudetenland, a border region of Czechoslovakia containing about three million ethnic Germans.
British Prime Minister Neville Chamberlain, after landing at Heston Aerodrome following his meeting with Adolf Hitler and the signing of the infamous Munich Agreement. This photograph , D 2239, comes from the collections of the Imperial War Museums.
The agreement represented the climax of Britain’s appeasement policy, which sought to avoid war by making territorial concessions to Nazi Germany. Czechoslovakia was entirely betrayed in this process, with Czech diplomats excluded from the negotiations and barred from the conference room at Hitler's insistence.
Czech leader Edvard Beneš warned that losing the heavily fortified Sudetenland would leave his nation defenceless. Nevertheless, Britain and France forced Czechoslovakia to choose between resisting Germany alone or submitting to territorial dismemberment. Hitler claimed the Sudetenland was his “last territorial demand in Europe,” but these promises proved worthless.
On 15 March 1939, Nazi Germany violated the Munich Agreement and occupied the remainder of Czechoslovakia, establishing the Protectorates of Bohemia and Moravia. Slovakia became a puppet state under the leadership of pro-Nazi Jozef Gašpar Tiso. Britain’s appeasement policy had disastrously failed, and a full-scale European war began when Germany invaded Poland.
Into Exile
On 5 October 1938, Beneš was forced to resign. He went into exile in Britain, where he organised the Czechoslovak National Liberation Committee, which declared itself the Provisional Government of Czechoslovakia the following year. In July 1940, the UK officially recognised the Czechoslovak government-in-exile, with Jan Šrámek as prime minister and Beneš as president. Beneš started working with British military intelligence in return for concessions to his government-in-exile.
In 1941, Edvard Beneš and František Moravec, working with MI6 and the Special Operations Executive (SOE), planned Operation Anthropoid to assassinate Reinhard Heydrich, the Deputy Reich Protector of Bohemia and Moravia.
Three Parachute Drops, One Priority: Payback
On 29 December 1941, a freezing night over occupied Bohemia and Moravia, three parachute teams dropped from a Halifax bomber toward their homeland. Operations Silver A and Silver B were tasked with restoring underground communications, supporting the resistance and sabotage. A third team carried the top-priority mission, Operation Anthropoid, a direct strike at Reinhard Heydrich, Hitler’s executioner in Prague. The brief was brutal and clear: payback for Nazi terror.
Reinhard Heydrich in the uniform of an SS-Gruppenführer ca. 1940/1941 by Heinrich Hoffmann. Bundesarchiv Bild 146-1969-054-16, recoloured.
The Target
On 28 September 1941, Reinhard Heydrich arrived at Prague Castle. He was replacing Konstantin von Neurath, whom Hitler and Himmler agreed had been too lenient in his approach to the Czechs. Within five days of his arrival, Heydrich proclaimed martial law and ordered the execution of 142 people. Known by various nicknames such as the “Blonde Beast” and “Butcher of Prague”, SS-General Reinhard Heydrich ruled the Protectorate through a calculated campaign of fear. Backed by Hitler, he moved to crush the Czech resistance, decapitate the leadership, and break the nation’s spirit. He banned the Sokol movement and sent its leaders to the Mauthausen concentration camp.
The Sokol movement was a popular gymnastics movement that promoted health and well-being, and it was also linked to the promotion of Czech patriotism and nationalism. The movement was brutally suppressed and later banned during the Nazi occupation. According to Heydrich: “Czechs need to know who is the boss here… Those who adapt will be Germanised; those who won’t will be sent to concentration camps.” Anthropoid set out to end the experiment.
A Mission to Live in History
From London, the operation’s planners demanded more than an assassination; they wanted to make a statement that would resound in history. The Munich Agreement remained in effect, and the exiled government needed dramatic action to prove that the Czechs and Slovaks were contributing to the Allied cause. The operation had to break the perception of Czech passivity and defeatism and show the world that resistance continued. More crucially, it aimed to make it politically impossible for Britain to forge another peace deal with Germany and betray Czech interests once again.
Jan Kubiš and Jozef Gabčík in Britain, 1941—photographed before deployment on Operation Anthropoid.
A Belated Christmas Gift
After being dropped by parachute into occupied Bohemia, the SEO trained Jozef Gabčík and Jan Kubiš moved to Prague. In preparation for their attack, weeks of surveillance were conducted: routes were timed, corners were measured, and rehearsals were repeated. The local resistance opened safe houses, passed messages, forged papers and whispered, with pride, that the paratroopers were a “belated Christmas gift that fell from the sky.” Hope had returned to a beaten city.
Heydrich’s Mercedes 320 Cabriolet after the blast at Libeň—shattered windscreen and torn bodywork from the 27 May 1942 Anthropoid attack.
Heydrich’s Curve
On the morning of 27 May 1942, Heydrich started his daily commute to his headquarters at Prague Castle. During the journey, Heydrich’s open-topped Mercedes 320 Cabriolet had to slow down at the tight bend in Libeň, known today as Heydrich’s Curve. Jozef Gabčík stepped into the road with a Sten submachine gun. At point-blank range, Gabčík could not miss, but when he squeezed the trigger, the weapon jammed and failed to fire. Rather than accelerate out of danger, Heydrich ordered his driver to stop. As Heydrich drew his pistol, Jan Kubiš hurled a hand grenade, which exploded by the rear wheel. The blast sent shards of metal and horsehair fibres from the car’s upholstery into Heydrich’s body. As shots cracked across the cobbles, driver Johannes Klein chased Gabčík on foot, leaving his mortally wounded boss prone in the street. The assassins slipped away. Despite the odds, the mission had succeeded.
A City Under the Jack Boot
Prague slammed shut, raids, curfews, and mass arrests swept the streets. The parachutists reached the Church of Saints Cyril and Methodius and took refuge in the crypt, a stone chamber with a single vent. On 4 June, Heydrich, after appearing to recover, suddenly died from infection and trauma. The men who had struck at the head of the Nazi oppression still lived for now.
10 June 1942 — Lidice
To terrorise the nation, the occupiers erased Lidice, a village with no connection to the assassination. One hundred seventy-three men were executed by firing squad. Most women were deported to the Ravensbrück concentration camp. Children were torn from their families; 82 were murdered in gas vans at Chełmno, while a few were selected for Germanisation. Homes were burned and bulldozed, the rubble scattered. The Nazis intended the name of Lidice to vanish forever. Instead, it became a worldwide rallying cry against Nazi tyranny.


The Last Stand in the Crypt
On 18 June 1942, the church was surrounded by German troops. Karel Čurda betrayed the network for Nazi blood money. At dawn, about seven hundred SS and Wehrmacht troops sealed off Resslova Street and launched their assault. Seven men stood ready inside the church. Upstairs, Adolf Opálka, Jan Kubiš, and Josef Bublík defended the nave and choir loft until two lay dying, and the last took his own life rather than surrender.
Down in the crypt, Jozef Gabčík, Josef Valčík, Jaroslav Švarc, and Jan Hrubý fought in near-total darkness as fire hoses flooded the chamber and tear gas choked the air. After seven hours of battle, with ammunition exhausted and water rising around them, they faced their final choice. They chose death over surrender. Witnesses would remember their defiant cry echoing from the stone chamber: “We are Czechs! We will never surrender!”
Why History Matters
This courage cost many lives; the alternative would have cost a nation’s future. Had Heydrich lived, terror in Prague would have tightened and resignation spread. Instead, Lidice showed the world the regime’s true face. Public outrage in Britain mounted; Britain terminated the Munich Agreement, France followed, and the revival of Czechoslovakia after the war moved from hope to commitment.
Operation Anthropoid still echoes at Heydrich’s Curve, at Lidice, and in the crypt on Resslova Street where, when reason said “submit,” seven men chose to stand for what they believed.
Historical Amnesia
Spanish philosopher George Santayana famously said, “Those who cannot remember the past are condemned to repeat it.” Just a week ago, US President Donald Trump and Russian President Vladimir Putin met to discuss a possible settlement of the Russian invasion of Ukraine. Ukrainian President Volodymyr Zelenskyy was not invited to the summit. In an echo of the Munich Betrayal, it seems Ukraine might be forced to trade territory for a peace agreement that no one expects Russia to respect.
Today, we see that despite widespread knowledge of Munich's consequences, historical awareness alone is not enough to prevent conflict. Each generation must actively choose to learn from the past or be doomed to repeat it.
Martina Gregorcová and Operation Anthropoid Tours
This guest blog was co-authored by Martina Gregorcová, Managing Director at Art of Your Travel agency, and a tour guide. Czechoslovak Resistance Tours, part of Art of Your Travel, is a specialised tour company that focuses exclusively on Czechoslovak World War II resistance history, notably the 1942 assassination of Reinhard Heydrich. The company offers private, custom-made historical tours throughout Prague and the surrounding areas, including significant sites like Lidice, Ležáky, Pardubice, and Terezín.
The company’s tours follow the actual footsteps of the resistance fighters involved in Operation Anthropoid and related missions, providing immersive historical experiences with expert local guides. The company positions itself around telling the “untold truth” of these resistance efforts, covering everything from the planning and execution of the assassination to the brutal Nazi reprisals and the lasting legacy of these acts of defiance. To learn more, visit the company’s website:
References:
BBC: Chamberlain returns from Munich
IWM: How Britain Hoped To Avoid War With Germany In The 1930s
Radio Prague International: Anthropoid: Czechoslovakia’s greatest resistance story
Radio Prague International: How the Sokol movement helped Operation Anthropoid succeed
Further Reading:
You’ll Be Hearing From Us!: Operation Anthropoid - the assassination of SS-Obergruppenführer Reinhard Heydrich and its consequences (2019), by Niall Cherry (Author), Tony Moseley (Contributor), Jonathan Saunders (Contributor), John Howes (Contributor)
The Assassination of Reinhard Heydrich: The True Story Behind Operation Anthropoid (2007) by Callum Macdonald
Images in order of appearance:
British Prime Minister Neville Chamberlain, after landing at Heston Aerodrome following his meeting with Adolf Hitler and the signing of the infamous Munich Agreement. Ministry of Information official photographer. This photograph, D 2239, comes from the collections of the Imperial War Museums.
Heydrich, Reinhard: as a SS-Gruppenführer, Leiter des SD, Chef des Reichssicherheitshauptamtes (RSHA), Deutschland. Author: Hoffmann, Heinrich. Bundesarchiv Bild 146-1969-054-16, Recoloured.
Jan Kubiš and Jozef Gabčík in Britain, 1941—photographed before deployment on Operation Anthropoid.
Heydrich’s Mercedes 320 Cabriolet after the blast at Libeň—shattered windscreen and torn bodywork from the 27 May 1942 Anthropoid attack.
Gallery
Libeň’s “Heydrich Curve” — the bend where, on 27 May 1942, his Mercedes slowed and Gabčík and Kubiš struck.
Orthodox Cathedral of Saints Cyril and Methodius (Prague). Author: Yair Haklai
National Monument to the Heroes of the Heydrich Terror, underground crypt of the Baroque Church of Sts Cyril and Methodius. The refuge of the Czechoslovak parachutists from 27 May to 18 June 1942 after the attack on Reinhard Heydrich.
Busts of Josef Gabčík and Jan Kubiš in the National Memorial of the Heroes of the Heydrichiada (Prague, Czechia). Author: Ondřej Žváček.
Kobylisy memorial—the 1942 execution ground where hundreds of Czech patriots were shot; a quiet lawn that holds a besieged city’s memory.

Ysselsteyn German War Cemetery: A Complex Memorial Site
In this blog article, discover Ysselsteyn - the Netherlands' only German WWII cemetery holding 32,000+ graves, including Wehrmacht soldiers, SS officers, and war criminals who terrorized occupied Holland.
The Ysselsteyn German War Cemetery in the Netherlands is the largest Second World War German cemetery and the only German military cemetery in the country. Located near Venray (the area saw bitter fighting during Operation Aintree between the end of September and into October 1944) in Limburg province, this 28-hectare (69-acre) cemetery was established in 1946 by the Dutch war graves commission (Nederlandse Gravendienst) following the German occupation of the Netherlands from May 1940 to May 1945.
Who is Buried Here?
The cemetery contains over 32,000 burials from around 25 different nationalities, including:
87 German soldiers from the First World War whose bodies floated down rivers to the Netherlands
Approximately 32,000 Second World War casualties
Wehrmacht and SS soldiers, Dutch collaborators, supporters from other nations, and civilians, including women and children
Over 5,000 unknown burials marked as "Ein Deutscher Soldat" (A German Soldier)
Ysselsteyn: Netherlands' only German WWII cemetery.
The Dark Reality
According to a plaque at the site, recent research reveals that approximately 2,000 to 3,000 of those buried were actively involved in war crimes, including the systematic persecution and murder of 102,000 Jews (mostly Dutch), as well as Sinti and Roma people. About 3,000 of the burials were soldiers detailed to occupation duties, including razzias, deportations, illegal incarceration, and Jew-hunting. Notable among the buried is Julius Dettmann, an SS officer who deported Anne Frank and her family from their hiding place in Amsterdam.
Modern Management and Purpose
In 1976, the Dutch government transferred administration of the cemetery to the German War Graves Commission (Volksbund Deutsche Kriegsgräberfürsorge). Today, the site serves as an international education centre that promotes peace and mutual understanding, complete with a visitor centre and youth meeting centre.


The Konstantin Benzien Story
In December 1943, German fighter pilot Unteroffizier Konstantin Benzien crashed his Messerschmitt Bf 109 into a butcher's shop in Opeinde, Friesland, after aerial combat with American bombers. For 79 years, his identity remained unknown, and his remains were buried in an unnamed grave at Ysselsteyn cemetery. Researchers from the Missing Airmen Memorial Foundation finally solved the mystery using DNA extracted from envelope glue that his sister had licked decades earlier when sending letters. The DNA from the glue matched samples from the pilot's recovered bones, allowing German authorities to officially identify him and give his grave a proper headstone with his name.
Ongoing Controversy
The cemetery remains controversial, with protests from groups like the Dutch Anti-Fascists' League and Jewish organisations opposing commemorative events. The site occasionally receives visits from neo-Nazis, highlighting the ongoing tension between remembrance and the glorification of those who committed atrocities.
This cemetery represents a complex memorial site that serves both as a final resting place and a stark reminder of the atrocities of war, emphasising the importance of learning from history. Sadly, with war raging in Ukraine and across the globe, it seems some lessons remain outside human comprehension.
References:
Youth and Educational Meeting Centre Ysselsteyn

FROM HILDE, WITH LOVE: The Quiet Heroism of Nazi Resistance
Discover the true story behind "From Hilde, With Love" - how Hilde Coppi and the Red Orchestra resistance group fought against Nazi tyranny in 1940s Berlin. In UK cinemas 27 June 2025.
When Picturehouse Entertainment asked me to share information about their new film "From Hilde, With Love," I was eager to learn more about this story of courage during one of history's darkest periods. The film, directed by Andreas Dresen, will be released in UK cinemas on 27 June. I haven't seen the movie yet, so this is not a personal recommendation but an introduction to a piece of WWII history that is worthy of attention.


Hans and Hilde CoppiThe Real Story Behind the Film
"From Hilde, With Love" tells the true story of Hilde and Hans Coppi, members of an anti-Nazi resistance group known as the "Red Orchestra" (Die Rote Kapelle). Set in Berlin in 1942, the film follows shy Hilde as she falls in love with Hans and finds her place within this resistance network.
The Red Orchestra wasn't a formal organisation, as the name suggests. The term was coined by the Gestapo, who referred to resistance radio operators as "pianists," their transmitters as "pianos," and their supervisors as "conductors." This disparate network consisted of over 150 Berlin Nazi opponents from various backgrounds - artists, scientists, workers, and students - united by their rejection of National Socialism.
Hilde Coppi (née Rake) was born to a working-class family in Berlin on 30 May 1909. She met Hans Coppi, seven years her junior, through Communist resistance circles. Together, they engaged in acts of defiance that might seem small but required immense courage: distributing anti-Nazi leaflets, posting resistance messages on walls, and perhaps most dangerous of all, listening to Soviet radio broadcasts.
One of their important activities was listening to Moscow Radio for messages from German prisoners of war and forwarding them to their families in Germany. This directly countered Nazi propaganda claiming that Soviet forces didn't take prisoners but killed all German soldiers who surrendered.
In September 1942, the Gestapo arrested the couple. Hans was executed on 22 December 1942. Hilde, who was pregnant at the time of her arrest, gave birth to their son Hans in prison on 27 November 1942. Despite petitions for clemency, Hitler personally refused, and Hilde was beheaded at Plötzensee Prison on 5 August 1943, after being allowed to nurse her baby for several months.
Their son, Hans Coppi Jr., survived and was raised by his paternal grandparents. He went on to become a historian dedicated to researching the Red Orchestra and preserving the memory of German resistance to the Nazi regime.


The Film Adaptation
Director Andreas Dresen, who grew up in East Germany, deliberately avoids portraying the Red Orchestra members as superheroes or making them symbols of any political ideology. Instead, he presents them as ordinary young people with a conscience, making their story more relatable and their bravery more profound.
"From Hilde, With Love" stars Liv Lisa Fries (known from "Babylon Berlin") as Hilde and Johannes Hegemann as Hans. The film alternates between scenes of their summer romance and Hilde's time in prison, creating a powerful contrast between moments of joy and the brutal reality of living under a totalitarian regime.
The film premiered in Competition at the 74th Berlin International Film Festival in February 2024 and received strong reviews. Writing in Variety, Catherine Bray praised Fries for her "subtle but layered performance." She highlighted how cinematographer Judith Kaufmann's work effectively contrasts the "sylvan charms" of the resistance group's summer hangouts with the stark prison environment. Bray concluded that although "From Hilde, with Love" is set almost eighty years ago, "the themes explored seem destined to remain eternally urgent and relevant."
Variety's review also touches on a poignant historical detail. Despite the group's efforts and risks, only one of their messages to Moscow ever made it through, and it simply said, "We wish our friends the very best." This underscores the human dimension of their resistance rather than its tactical impact.
Historical Context: The Red Orchestra
The history of the Red Orchestra was misrepresented for decades. During the Cold War, West German narratives often portrayed them as Soviet spies and traitors, while East Germany elevated them to the status of Communist heroes.
In reality, the group was more complex and diverse. While some members had Communist sympathies, others were conservative nationalists, Catholics, or simply individuals opposed to the Nazi regime. Their activities included distributing leaflets, documenting Nazi crimes, helping Jews escape, and, yes, transmitting military intelligence to the Allies.
By 1942, the Gestapo had infiltrated the network, leading to over 120 arrests. More than fifty members were executed, including the Coppis. Despite the ultimate tragic fate of many members, their courage in standing against tyranny reminds us that resistance is possible even in the most dangerous circumstances.
Does This Film Matter Today?
At a time when extremism and authoritarianism are on the rise globally, stories like Hilde and Hans Coppi's remind us of the importance of moral courage and the power of individual conscience. Their story shows that resistance does not always come in dramatic forms, but sometimes in small acts of defiance and quiet integrity.
"From Hilde, With Love" is a historical drama that explores love, resistance, and the strength of the human spirit in the face of oppression.
Sources: Historical information gathered from Wikipedia articles on Hans Coppi, Hilde Coppi, and the Red Orchestra; the German Resistance Memorial Centre website; The History Learning Site; Encyclopedia.com; and various film reviews from Variety, The Hollywood Reporter, and Reuters.

Strategic Insights from the Battle for Crete
Operation Mercury - the Battle for Crete in 1941 - was a ground-breaking airborne invasion. This historic event offers modern organisations valuable lessons in strategy, leadership, and adaptability. By examining the successes and failures of this battle, we can gain insights into effective decision-making and resilience in today’s competitive business world.
In May 1941, the idyllic Mediterranean island of Crete, a strategic location for controlling the region, became the stage for one of the Second World War’s most daring and innovative military operations. Operation Mercury, Nazi Germany's airborne invasion of Crete, marked a turning point in military tactics and offers valuable lessons for modern business leaders. This blog post explores why the German forces succeeded against British and Commonwealth defenders, and what today's organisations can learn from this historic battle.
The German Gambit for Crete: Innovation and Risk
The brainchild of Luftwaffe General Kurt Student, Operation Mercury represented a huge gamble by the German high command. Prior to this operation, no military force had ever tried to capture a whole island mainly through airborne assault. According to one of his closest aides, Student possessed the unusual ability to combine his inclination for the new, unconventional and adventurous with a working method based on meticulous staff work and precise attention to detail. As Mark Bathurst notes in his article for New Zealand Geographic, “Operation Mercury - the invasion of Crete by Nazi Germany - began on 20 May 1941, when gliders and paratroops (Fallschirmjäger) swooped through the dust and smoke thrown up by Luftwaffe bombs and cannon”. The Germans employed innovative tactics such as using silent gliders to land troops behind enemy lines, catching the defenders off guard.
This innovative approach surprised the Allied defenders, despite their superior numbers and defensive positions. The Germans’ willingness to embrace new tactics and technologies paid off, albeit at a high cost in casualties. Between 20 May and 1 June 1941, the Germans suffered 3,352 casualties. However, we must not forget the immense human cost paid by the Cretans during the Nazi occupation, resulting in the deaths of more than 3,400 individuals.
For business leaders, this underscores the potential rewards of innovation and calculated risk-taking. Companies that dare to challenge conventional wisdom and pioneer new approaches, such as adopting disruptive technologies or entering untapped markets, often gain a significant competitive advantage. However, it is crucial to balance innovation with proven methods and have contingency plans in place, as the high casualty rate among German paratroopers demonstrates.
Allied Failures: The Perils of Poor Communication and Complacency
Despite having advance knowledge of the German invasion plans through Ultra intercepts (signals intelligence), the Allies failed to mount an effective defence. This failure stemmed from several factors, including poor communication, complacency, and ineffective leadership.
As one historical account points out, “The Allied forces on Crete were a mix of British, Australian, New Zealand, and Greek troops, with unclear command structures and poor coordination”. This lack of clear leadership and communication channels severely hampered the defenders’ ability to respond effectively to the German assault.
Moreover, Allied commanders, including New Zealand’s General Bernard Freyberg, seemed overly concerned about a potential seaborne invasion, diverting crucial resources away from the defence of key airfields. This misallocation of forces proved disastrous when the Germans seized control of the Maleme airfield, allowing them to fly in reinforcements and ultimately secure victory.
For businesses, this serves as a stark reminder of the importance of clear communication, effective leadership, and the dangers of complacency. Even with superior resources or market intelligence, companies can fail if they do not have systems in place to act on information quickly and decisively. Leaders must ensure that all team members are aligned with strategic priorities and can adapt swiftly to changing circumstances.
The Power of Seizing Opportunities
Despite heavy initial losses, the German forces managed to capture the critical Maleme airfield, west of Chania. This success allowed them to fly in reinforcements and ultimately turn the tide of the battle. As Johann Stadler, a German veteran, recalled, “I was very proud. It was the first time in war history an island was conquered from the air”.
This aspect of the battle highlights the importance of rapidly capitalising on opportunities, even in the face of setbacks. In business, the ability to quickly identify and exploit key opportunities, such as emerging market gaps or shifting customer preferences, can make the difference between success and failure. Leaders must cultivate a culture of agility and empower their teams to seize chances when they arise.
Adapting to Changing Circumstances
The battle for Crete also demonstrates the critical importance of adaptability. The Germans had to adjust their plans on the fly when they encountered stronger-than-expected resistance. Conversely, the Allies’ rigid adherence to their initial defensive plans, despite changing circumstances, contributed to their defeat.
For business leaders, this underscores the need for agility and the ability to rapidly adjust strategies when market realities do not align with expectations. Successful companies are those that can pivot quickly in response to unexpected challenges or opportunities, such as technological disruptions or shifts in consumer behaviour. Building a flexible, responsive organisation is key to navigating today’s fast-paced business landscape.
The Cost of Victory: Long-term Strategic Implications
While Operation Mercury was ultimately successful, it came at a high cost. The heavy casualties suffered by the German paratroopers led Hitler to prohibit future large-scale airborne operations, effectively wasting this specialised resource.
This outcome offers a valuable lesson for businesses about the importance of considering long-term strategic implications when pursuing high-risk, high-reward strategies. Short-term successes that come at too high a cost can ultimately prove detrimental to long-term goals and capabilities. Leaders must carefully weigh the potential benefits of bold moves against their potential downsides and opportunity costs.
Learning from Failure and Setbacks
Although the Allies lost the Battle of Crete, they learned valuable lessons that they applied to later amphibious invasions, such as the landings in Sicily and Normandy. Their ability to adapt and improve their tactics based on the hard-won experience at Crete ultimately contributed to their success in the war. However, it can be argued that the Allies learned some of the wrong lessons from the German victory on Crete. As the war progressed, the Allies amassed considerable airborne forces, but their deployment was infrequent and not always successful. In 1944, Britain was chronically short of infantrymen while thousands of ‘special service’ troops like paratroopers were held in reserve for airborne operations that were frequently postponed or cancelled.
Similarly, businesses must learn to treat failures and setbacks as opportunities for growth and improvement. By conducting thorough post-mortems, identifying root causes, and implementing corrective actions, companies can emerge stronger and more resilient. Leaders who encourage a culture of continuous learning and improvement will have better preparation to face the inevitable challenges of the business world.
Applying Historical Lessons to Modern Business
The Battle for Crete offers a wealth of insights for today's business leaders:
Innovation and calculated risk-taking can provide a competitive edge but must be balanced with proven methods and contingency planning.
Clear communication, effective leadership, and avoiding complacency are crucial, even when you seem to have an advantage.
The ability to quickly seize opportunities and adapt to changing circumstances can be the difference between success and failure.
It is essential to consider the long-term strategic implications of high-risk actions, not just short-term gains.
Failures and setbacks should be treated as valuable learning opportunities for continuous improvement.
By studying historical events like Operation Mercury, business leaders can gain valuable insights on strategy, tactics, leadership, and communication. These lessons, drawn from one of military history’s most daring operations, remain remarkably relevant in today’s fast-paced, competitive business environment. As modern leaders navigate the challenges and opportunities of the 21st century, they would do well to remember the hard-fought lessons of Crete and apply them to their own strategic decisions.
References:
Bathurst, M. (2005). Operation Mercury: The Battle of Crete. New Zealand Geographic, Issue 073. https://www.nzgeo.com/stories/crete/
Bell, K. (2006). Battle of Crete: It Began with Germany’s Airborne Invasion—Operation Mercury. Historynet. https://www.historynet.com/battle-of-crete-it-began-with-germanys-airborne-invasion-operation-mercury/
MacDonald, C. (1995). The Lost Battle – Crete 1941.
Rehman, I. (2024). Britain’s Strange Defeat: The 1941 Fall of Crete and Its Lessons for Taiwan. War on the Rocks: https://warontherocks.com/2024/05/britains-strange-defeat-the-1941-fall-of-crete-and-its-lessons-for-taiwan/
The defence and loss of Crete, 1940-1941 (Part 1). (2020). The National Archives. https://blog.nationalarchives.gov.uk/the-defence-and-loss-of-crete-1940-1941-part-1/
The defence and loss of Crete, 1940-1941 (Part 2). (2020). The National Archives. https://blog.nationalarchives.gov.uk/the-defence-and-loss-of-crete-1940-1941-part-2/

From Battlefields to Boardrooms: How World War II Tactics Can Revolutionise Your Business Strategy
In our latest article, we delve into the contrasting tactics used by the British and German armies during WWII and extract practical advice for today’s business leaders. Discover how the British Army’s centralised command structure often led to slower response times and missed opportunities, and learn how you can avoid these pitfalls in your own organisation.
A Light Tank Mk.VIA of the 3rd King's Own Hussars. By British Army photographer. - This photograph ARMY TRAINING comes from the collections of the Imperial War Museums (collection no. 4700-101), Public Domain, https://commons.wikimedia.org/w/index.php?curid=2113928
In the high-stakes arena of modern business, leaders are constantly seeking innovative ways to stay ahead of the competition. Surprisingly, some of the most valuable lessons in organisational agility and decision-making can be drawn from an unexpected source: Second World War military tactics. In this article, we will briefly explore the contrasting tactics used by the British and German armies in WWII and provide some practical advice for today's business leaders.
The British Approach: Centralised Command and Its Pitfalls
During World War II, the British and German armies employed starkly different tactical approaches, which had significant impacts on their battlefield effectiveness. The British Army, particularly its infantry, often found itself at a disadvantage due to its rigid command structure. This system was characterised by centralised decision-making, strict adherence to hierarchy, and limited autonomy for lower-ranking officers and soldiers.
As a result, British units frequently had to await orders from higher up the chain of command before adapting to new situations. This led to slower response times, missed opportunities, and loss of initiative on the battlefield. The inflexibility of the British system often left them struggling to keep pace with rapidly changing circumstances.
The German Strategy: Auftragstaktik and Decentralised Decision-Making
In contrast, the German army embraced a philosophy known as “Auftragstaktik” or mission-type tactics. Decentralised decision-making and empowerment of junior officers and non-commissioned officers marked this approach. It allowed for greater flexibility to adapt to changing battlefield conditions.
The German approach fostered initiative and adaptability at all levels, enabling their forces to react quickly to evolving threats and exploit unexpected weaknesses. This agility gave them a significant advantage in maintaining a high level of operational tempo and seizing opportunities as they arose.
StuG´s of the SS-Kampfgruppe “Harzer” of the 9th SS-Panzer-Division “Hohenstaufen” during the battle of Arnhem, Operation Market Garden 1944.
In Aaron Bates’ book, The Last German Victory (2021) he highlights the stark contrast between German and British military tactics during the ill-fated Operation Market Garden of September 1944. The German army’s doctrine emphasised individual initiative and aggression, allowing their forces to quickly adapt and respond to unexpected situations. This approach, coupled with their reliance on self-contained infantry units with substantial organic firepower, provided a significant tactical advantage. In contrast, the British Army’s strategy was heavily dependent on indirect firepower (artillery) and rigid planning, which proved less effective in the fast-paced, airborne assault environment of Market Garden. Bates argues that these doctrinal differences were pivotal in shaping the battle’s outcome, displaying the Germans’ ability to leverage their strengths against the Allies’ more rigid and less adaptable tactics.
StuG´s of the SS-Kampfgruppe “Harzer” of the 9th SS-Panzer-Division “Hohenstaufen” with British prisoners during the battle of Arnhem, Operation Market Garden 1944.
Translating Military Tactics to Business Strategy
The historical example of these contrasting military tactics holds valuable lessons for today's business leaders. Companies that allow employees to make decisions within the framework of overall organisational goals are likely to be more agile and responsive to market changes. Encouraging initiative at all levels can lead to innovation and improved problem-solving.
A decentralised approach can significantly reduce the time it takes to react to new challenges or opportunities. In a fast-paced business environment, the ability to quickly adapt to changing circumstances is crucial for success. While maintaining strategic oversight is important, creating a culture of empowerment allows for better tactical execution.
Implementing Mission-Type Tactics in the Corporate World
Clear Communication of Goals
To apply these lessons in a business context, leaders should focus on clear communication of goals. It is essential that all employees understand the company’s overall mission and objectives. This shared understanding provides a framework within which individuals can make decisions confidently.
Trust and Empowerment
Trusting and empowering employees is crucial. Micromanaging employees can stifle creativity, erode trust, and lead to decreased productivity and job satisfaction, ultimately resulting in higher turnover rates and a toxic work environment. Give team members the authority to make decisions within their areas of responsibility. This trust fosters a sense of ownership and accountability, often leading to more innovative solutions and improved performance.
Encouraging Calculated Risk-Taking
Creating an environment where reasonable risks are accepted and learned from is also important. Encourage calculated risk-taking and view failures as learning opportunities rather than reasons for punishment. This approach can drive innovation and help the organisation stay ahead of competitors.
Lessons from British Army Evolution: Investing in Training and Equipment
The importance of comprehensive training and proper equipment is starkly illustrated by the British Army’s experience in World War II. In the early years of the war, British forces often found themselves at a disadvantage due to inadequate training and outdated equipment. This deficiency contributed to several setbacks and defeats, particularly in the North African campaign.
British infantry training on an assault course, 1941. Photograph from the archive of the Imperial War Museum (H 12699)
However, the British military, political and industrial leadership recognised these shortcomings and acted. From 1941 onwards, there was a concerted effort to improve both training regimens and equipment quality. This included more realistic combat training (battle school), better integration of arms, and the introduction of more effective weapons and vehicles. The results of these improvements became evident in later campaigns, with British forces showing increased effectiveness and adaptability on the battlefield.
This historical example offers valuable lessons for modern businesses. Like the British Army of the early 1940s, many organisations today may find themselves ill-equipped to face rapidly changing market conditions. The solution lies in a commitment to ongoing training and investment in the right tools.
In a business context, comprehensive training should focus on developing both hard and soft skills. This includes technical training specific to job roles, as well as leadership development, decision-making workshops, and scenario-based exercises that simulate real-world challenges. By exposing employees to a wide range of potential situations, companies can build a workforce that’s adaptable and confident in their ability to handle unexpected circumstances.
Equally important is equipping employees with the right tools for the job. Just as the British Army needed modern tanks and aircraft to compete effectively, today’s businesses need cutting-edge software applications and technology. From project management tools that facilitate collaboration to data analytics platforms that enable informed decision-making, the right software can significantly enhance an employee’s ability to work autonomously and effectively.
Moreover, investing in user-friendly and efficient systems reduces friction in daily operations, allowing employees to focus on higher-level tasks rather than getting bogged down by cumbersome processes. This not only improves productivity but also boosts morale as employees feel the company is invested in their success. Without a doubt, cutting corners on equipment can produce the opposite result, causing bottlenecks in the workflow, decreased productivity, more mistakes, and unhappy employees.
The combination of comprehensive training and the right equipment pays off in increased confidence and competence across the organisation. When team members feel well-equipped, both in terms of skills and tools, they are more likely to take initiative, make informed decisions, and contribute meaningfully to the company’s success. This empowerment aligns perfectly with the principles of mission-type tactics, fostering a workforce that can adapt quickly to changing circumstances and seize opportunities as they arise.
Furthermore, this investment sends a clear message that the organisation values its employees and is committed to their growth and success. This can lead to improved job satisfaction, higher retention rates, and a more positive company culture overall.
By learning from the British Army’s evolution during World War II, modern businesses can understand the critical importance of continually updating their training methods and tools. In doing so, they can transform their workforce from one that struggles with outdated practices to one that excels in the face of new challenges.
Promoting Open Communication
Promoting open communication is essential for a decentralised approach to work effectively. Encourage the free flow of information across all levels of the organisation. This transparency helps ensure that decisions are made with the best available information and that lessons learned are quickly disseminated.
The Power of Decentralisation in Modern Business
By adopting a more decentralised approach, like the German military’s mission-type tactics, businesses can foster innovation, improve response times, and better adapt to the fast-paced, ever-changing modern business environment. This does not mean abandoning strategic oversight, but rather creating a culture where employees at all levels feel empowered to act in the best interests of the company’s mission.
Lessons from the Past, Strategies for the Future
In the words of General George S. Patton, “Never tell people how to do things. Tell them what to do and they will surprise you with their ingenuity.” By embracing this philosophy, modern businesses can unlock their full potential and outmanoeuvre their competitors in the complex battlefield of the global marketplace.
The lessons from World War II tactics remind us that in both warfare and business, adaptability and empowerment at all levels can be the key to success. As we navigate the uncertainties of the modern business world, it is time to look to the past for inspiration on how to build more resilient, agile, and successful organisations for the future.
Contact us today to discover the ways military history can inform and benefit business strategy, tactics, leadership, communication, motivation, and training.
References:
Dupuy, T. N. (1977). A Genius for War: The German Army and General Staff, 1807-1945. Prentice Hall.
Bates, Aaron (2021). The Last German Victory, Operation Market Garden 1944. Pen & Sword Military.
Van Creveld, M. (1985). Command in War. Harvard University Press.
Note: This article is for educational purposes only. The author acknowledges that while historical examples can provide valuable insights, modern business practices should always be adapted to current ethical standards and legal requirements.