
Blog
The Second World War resulted in the deaths of around 85 million people. Additionally, tens of millions more people were displaced. However, amid all the carnage, people demonstrated remarkable courage, fortitude, compassion, mercy and sacrifice. We want to honour and celebrate all of those people. In the War Years Blog, we examine the extraordinary experiences of individual service personnel. We also review military history books, events, and museums. We also look at the history of unique World War II artefacts, medals, and anything else of interest.
The Glider Pilot Regiment at Operation Market Garden: What Happened to the Men Who Flew Into Arnhem?
Using the story of Sergeant Stanley Edward Platt, reported missing in October 1944, as a starting point, this article explores the little-known role of the Glider Pilot Regiment during Operation Market Garden. It shows how these men not only flew troops and equipment into Arnhem, but then fought on the ground as infantry and helped guide the evacuation from Oosterbeek. This article offers readers a powerful, human perspective on courage, sacrifice and one of the most dramatic battles of the Second World War. It also reveals what happened to the missing Sergeant Platt.
By Charles Richard Trumpess | Military Historian | Author | Associate Fellow, Royal Historical Society
Army Form B.104-83, dated 11 October 1944, notifying the family of Sergeant Stanley Edward Platt that he had been posted missing on 25 September 1944.
Not long ago, I was contacted by a family member who had come across a remarkable wartime document. It was an original Army Form B.104-83, dated 11 October 1944, informing the next of kin that Sergeant Stanley Edward Platt, service number 5340441, of the Army Air Corps, had been posted as missing on 25 September 1944 in North West Europe.
The form is a standard printed letter, filled in by hand. It is brief, carefully worded and, as these things always are, quietly devastating. It notes that being reported missing did not necessarily mean the soldier had been killed, and that he might be a prisoner of war. It asks the family to forward any letters or postcards they might receive directly to the Record Office.
A little research confirmed that Sergeant Platt had indeed survived the war. His German prisoner-of-war record card, held at The National Archives as WO 416/291/464, shows that he was processed at Stalag XIIA at Limburg an der Lahn under POW number 89043. Born on 30 March 1919, he has no entry in the Commonwealth War Graves Commission, which is the clearest possible confirmation that he came home. But as we will learn, before his repatriation, he would have to endure a period of captivity.
The date on his missing notification, 25 September 1944, is immediately significant to any historian of the Second World War. It is the final day of Operation Market Garden and the night of the withdrawal from Arnhem. Sergeant Platt, in all probability a pilot of the Glider Pilot Regiment, was caught up in one of the most dramatic and costly operations in British military history.
This article looks at what men like Sergeant Platt were asked to do at Arnhem, and why the story of the Glider Pilot Regiment deserves to be far better known.
A parachute drop during Operation Market Garden
What was Operation Market Garden?
Proposed by Field Marshal Sir Bernard Montgomery, Operation Market Garden was launched on 17 September 1944. The aim was bold: to drop three Allied airborne divisions up to sixty miles ahead of the front line to capture a series of bridges across the major rivers and canals of the Netherlands, while XXX Corps, spearheaded by the Guards Armoured Division, drove north along a single road to link up with them.
The American 101st Airborne Division would secure the bridges around Eindhoven, the 82nd Airborne Division would take Nijmegen, and the British 1st Airborne Division, supported by the 1st Polish Independent Parachute Brigade and the Glider Pilot Regiment, would seize the northernmost prize: the road bridge over the Lower Rhine at Arnhem.
If it worked, the Allies would bypass Germany's Siegfried Line defences, cross the Rhine and drive into the industrial Ruhr. If it succeeded, some planners believed the war in Europe could be over by Christmas 1944. But the operation did not succeed. What the Allied planners did not know, or chose to discount, was that elements of the II SS Panzer Corps had been sent to the Arnhem area to refit after the Normandy campaign. The British airborne troops who landed on 17 September and thereafter would find themselves fighting not lightly armed garrison troops, old men, invalids and boys, but battle-hardened SS veterans with armoured support.
Operation Market Garden. Map of the Allied Plan by Chaosdruid - CC BY-SA 4.0
What Was the Glider Pilot Regiment, and What Made It Unique?
The Glider Pilot Regiment's motto: Nothing is Impossible.
The Glider Pilot Regiment (GPR) was formed in 1942 and was part of the Army Air Corps, alongside the Parachute Regiment. It was authorised by Royal Warrant on 24 February 1942, and by 1945 it had reached a peak strength of approximately 2,500 pilots.
What set the regiment apart from every other aircrew unit in the British armed forces was the concept of the "Total Soldier." The man behind this idea was Colonel George Chatterton, a charismatic and demanding commander who had been an RAF fighter pilot before transferring to the infantry. In the mid-1930s, Chatterton survived a mid-air collision only to be told at an RAF medical board that if war came, he would spend it flying a desk, so he transferred to the Territorial Army. Ironically, before he joined the Glider Pilot Regiment, he was required to attend another RAF medical board, which found him A1 – fit to fly. His vision was that a glider pilot should be as capable on the ground as he was in the air: trained to fight as infantry, to handle British and German weapons and equipment, and to fill whatever gap appeared in the line. To this end, he employed Drill Sergeants from the Brigade of Guards to oversee a rigorous training regimen that would weed out all but the very best men.
Chatterton's speech to the Regiment in 1942 rather summed up his approach: "We will forge this regiment as a weapon of attack... Not only will we be trained as pilots, but in all we do... I shall be quite ruthless... Only the best will be tolerated. If you do not like it, you can go back whence you came."
In the American airborne forces, glider pilots were generally expected to avoid ground combat after landing to avoid wasting trained specialists. The British took the opposite view. Once their gliders were down, GPR pilots would pick up their weapons and fight alongside the men they had delivered, until they could be withdrawn, rested and used again. The regiment's motto was "Nothing is Impossible."
The men were predominantly non-commissioned officers, mainly sergeants and staff sergeants, selected for intelligence, initiative and physical toughness. They underwent full military training before beginning their flying instruction, and they were expected to master a glider with no engine, no second chance, and no way back once released from its tug. To some, gliders were nothing more than “flying coffins”; every landing was little better than a controlled crash.
IWM BU 1164: HQ of 1st Airlanding Light Regiment, Royal Artillery, unload a jeep and trailer from their Horsa glider at the landing zone near Wolfheze in Holland, 17 September 1944.
The cockpit of an Mk.II Horsa glider, the de Havilland Aircraft Museum, by the author.
How Did the Glider Pilot Regiment Fly Into Arnhem?
For Operation Market Garden, the British element of the airborne assault involved just over 1,200 members of the Glider Pilot Regiment, almost the regiment's entire strength. They flew 667 gliders, primarily Airspeed Horsas, along with some Hamilcars (large gliders designed to carry heavy cargo, such as light tanks) and Hadrians (the British name for the American Waco glider), delivering approximately 4,500 troops, around 600 jeeps and 95 guns to the landing zones west of Arnhem.
The operation was divided into three lifts, spread across three days. The first lift on 17 September was largely unopposed. Glider pilots had no difficulty identifying their landing zones, and the Independent Parachute Company's pathfinders had marked them clearly with Verey lights and smoke candles. Of the 358 combinations that took off for the first lift, the great majority reached their targets.
The second lift on 18 September was more difficult. Of the 297 combinations that took off, 273 reached the landing zone. Twenty-four loads were lost due to engine failure, tow rope breakage, flak damage, and other causes. A third and smaller lift followed on 19 September. By this point, the element of surprise had been entirely lost and German resistance was intensifying rapidly.
In the original planning of the operation, glider pilots would deliver their loads, remain to defend the divisional and brigade headquarters during the initial phase, and then withdraw into reserve, ready to be extracted from the battle and used again. It was a sound plan for a battle that went as expected.
Arnhem did not go as expected.
Troops dug in holding Brigade Headquarters Arnhem 18 September 1944, National Army Museum, NAM image no. 106438.
What Happened on the Ground at Oosterbeek?
By the second day, the 2nd Parachute Battalion under Lieutenant Colonel John Frost had reached the northern end of the Arnhem road bridge and was holding it under increasingly heavy German attack. The rest of the division, however, had been unable to break through to reinforce them. The II SS Panzer Corps had moved quickly to block the roads into Arnhem, and what had been intended as a rapid advance became a grinding, close-quarters battle through the streets and gardens of Oosterbeek.
The plan to withdraw the glider pilots into reserve was abandoned. The situation required every man to fight. GPR pilots were ordered to remain with the 1st Airborne Division and were heavily engaged as infantry, manning sections of the Oosterbeek perimeter alongside parachute troops, engineers and anyone else available. They fought house to house, led mixed groups of infantrymen and medics, conducted anti-sniper patrols and moved to plug gaps in the line as they appeared.
The Oosterbeek perimeter was, by any measure, a desperate place. The division was surrounded on three sides by German forces that included tanks, self-propelled guns, infantry and Waffen-SS. The perimeter shrank day by day. Resupply aircraft, unable to communicate with the men on the ground, dropped their loads into areas already held by the Germans. The wounded filled every available building.
The GPR pilots, trained as "Total Soldiers," proved themselves fully capable of sustained infantry fighting. That came at a heavy price. By the time the battle ended, the regiment had suffered casualties on a scale from which it never fully recovered.
Map of the Oosterbeek perimeter, September 1944 - Battle of Arnhem.com.
Hotel Hartenstein in Oosterbeek, on the outskirts of Arnhem, 1945, photograph by Frank Tomlinson, 74th Field Regiment, Royal Artillery, NAM image no. 2014-08-16-447.
Airborne Museum Hartenstein, June 2025, by the author.
What was the Defence of Oosterbeek like? A Personal Testimony by Gilder Pilot Sidney East
In 1994, 50 years after the events, Sidney East recalled his own experiences of Operation Market Garden as best he could for the Imperial War Museum’s sound archive. Many people believe that memories of violent or stressful events are clear and remain unchanged over time. They assume that when we recall these events confidently, our memories are likely to be accurate. However, research in psychology and neuroscience shows that memory is not infallible. Instead, it is a process of reconstruction, which can lead to errors and distortions in what we remember. As a result, it is highly probable that testimonies from veterans recounted 50 years or more after the events are inaccurate. Nevertheless, Sidney East’s testimony resembles accounts given by veterans in the years immediately following the war.
By the time of Market Garden, East was an experienced NCO having served in North Africa, Sicily, Italy and Normandy. He was a glider pilot with D Squadron, No. 1 Wing, Glider Pilot Regiment. He recalled how he and his co-pilot, Charlie, left England on a beautiful Sunday morning, 17 September, and arrived at their landing zone as part of the first lift against minimal opposition. The only casualty on landing was his flask of coffee, which broke as he exited his glider. His glider was carrying a jeep, two motorcycles and six men of a reconnaissance unit.
Having landed safely, members of D Squadron assembled at the corner of the landing zone and dug in. Next, they moved into the Oosterbeek area, about 5km west of Arnhem, initially taking up residence in a house after evicting the female occupants. After two days of fairly light and sporadic fighting, suddenly, on the morning of the third day, East and his comrades came under sustained mortar and artillery fire. A German tank also made an appearance, but was later knocked out. They abandoned the house after it received a couple of direct hits and dug slit trenches in the front garden. While Charlie, the copilot, was armed with a rifle and successfully sniped at the Germans, East was equipped with a Sten sub-machine gun, which he described as “useless”, and a PIAT anti-tank weapon, but no “bombs” (anti-tank projectiles) to fire.
On the fourth day, East and his comrades were attacked by German troops and nearly overrun, but they managed to repel the enemy. He recalled that food and, most importantly, water were in short supply. On the fifth day, East remembered that the Germans used loudspeakers to call for the airborne forces to surrender. The British troops responded with catcalls, profanity, and hand grenades.
On the sixth day, the Oosterbeek perimeter was continuously tested and bombarded by mortar and artillery fire, which East described as “nerve-shattering.” On the seventh or eighth day, while attempting to make tea with the last of his rations, a sniper fired, knocking over his small stove. Incensed, he jumped out of his trench and ran toward the trees where the shot had come from. Armed with a rifle, he shot the sniper, who was positioned in the branches of one of the trees. As the sniper fell to the ground, East prepared to bayonet him, but discovered that the sniper was already dead. He was shocked to find that the sniper was just a teenager, little more than a boy.
On the ninth day, a runner informed East and his comrades to assemble at the corner of the tennis courts by the Hartenstein Hotel, which served as the 1st Airborne’s Headquarters. They gathered there at around 8 PM and then made their way down to the river, the Lower Rhine. Elements of the Second Army on the opposite bank provided covering fire. Heavy rain also helped conceal their retreat across the river.
Having escaped the Oosterbeek pocket, the glider pilots were transported first to Nijmegen, still under shellfire, and then to Louvain, Belgium. Finally, the survivors were flown back to RAF Keevil in Wiltshire. The airfield hosted the Glider Pilot Regiment's operational and training units, and was used to launch operations and debrief returning crews. Upon his return, East discovered that only four members of his original flight, which had consisted of approximately 50 personnel, had survived. The rest had been killed, wounded, or taken prisoner. East told his interviewers that he didn’t sleep properly for weeks after Market Garden, shocked by the loss of so many comrades.
The John Frost Bridge (John Frostbrug), the infamous road bridge over the Lower Rhine (rebuilt in 1948), is perhaps better known as “A Bridge Too Far”, the ultimate objective of Operation Market Garden. Photographed by the author in June 2025.
How Did the Glider Pilot Regiment Help with the Evacuation from Arnhem?
On 25 September 1944, the ninth day of the battle, as Gilder Pilot Sidney East reported, it was decided to evacuate the remainder of the 1st Airborne before it was overrun. The plan, sardonically codenamed Operation Berlin, was to withdraw across the Lower Rhine that night under cover of darkness and a full artillery fire plan from the south bank.
The surviving glider pilots played a crucial role in the evacuation. Using their navigational skills, they laid white tape through the woods, creating a pathway from the Oosterbeek perimeter to the riverbank for the retreating soldiers to follow in the dark. To muffle their footsteps, the soldiers wrapped cloth around their boots. The heavy rain not only masked the sound of movement but also reduced visibility for the German attackers.
Canadian and British engineers waited on the river with small storm boats and canvas assault craft, ferrying men across the fast, wide Neder-Rijn under constant German machine gun, mortar and artillery fire. The operation began at 22:00 and continued until dawn, when it was forced to stop.
Of the 10,095 men who had landed at Arnhem by parachute and glider, roughly 2,500 remained capable of fighting by the night of 25 September. Of those, 2,163 British troops and 160 Polish paratroopers made it across the Rhine to safety, among them 422 glider pilots. Several hundred more were left on the north bank, where they surrendered to advancing German forces or attempted to evade capture with the help of the Dutch Resistance. The Glider Pilot Regiment suffered horrendous casualties at Arnhem; 1,262 men flew in, of whom 219 were killed and 511 taken prisoner.
Sergeant Stanley Edward Platt was among those who did not cross the river that night. He was captured, processed through Stalag XIIA at Limburg and held as a prisoner of war until liberation in the spring of 1945.
The Arnhem Oosterbeek War Cemetery, or Airborne Cemetery, is a Commonwealth War Graves Commission site in Oosterbeek, Netherlands. Established in 1945, it contains 1,764 graves, mainly of service personnel who died in the battle for Arnhem. Photographed by the author in June 2025, this picture shows the graves of at least 15 members of the Glider Pilot Regiment, probably more.
What Were the Glider Pilot Regiment's Casualties at Arnhem?
The human cost to the Glider Pilot Regiment at Arnhem was the highest it had suffered in any single operation. 219 members of the regiment were killed, giving a fatal casualty rate of around 17.35%, the highest of any formation in the battle. When the wounded and prisoners of war are included, the regiment's overall casualties were devastating, to the point that for the Rhine crossing operation in March 1945, Operation Varsity, a substantial number of RAF pilots had to be seconded to the regiment to make up the numbers.
Those losses reflected not a failure but an extraordinary commitment. The GPR pilots had flown their gliders in, delivered their loads accurately under fire, fought as infantry for nine days in an increasingly hopeless defensive perimeter and, at the end, helped to guide their comrades to the river. They had been asked to be "Total Soldiers", and they had been exactly that, at very great cost.
The regiment was eventually disbanded in 1957, as the era of the military glider came to an end. Its battle honours include Sicily 1943, Normandy 1944, Arnhem 1944, and the Rhine crossing 1945.
War Office Casualty List, Sergeant Platt is recorded as being held at Stalag II-A.
What happened to Sergeant Platt?
The Army Form B.104-83 sent to Sergeant Platt's family in October 1944 is a modest document. It is a printed form with blanks filled in by hand. It runs to fewer than two hundred words. But it represents a moment of profound anxiety for a family who did not know whether the man they loved was alive or dead, and a chapter in one of the most remarkable stories of the Second World War.
After his initial capture and incarceration, Sergeant Platt is listed on an updated War Office casualty list as serving with the 1st Battalion, Parachute Regiment. By 11 June 1945, the list shows that he was reported as a prisoner of war in German hands, but was marked as “Not Prisoner of War”. This means he was no longer officially considered a German POW. The record does not explain how this change occurred, whether he was liberated, as the European war had ended in May, escaped, or repatriated, or whether it was simply a correction of earlier information.
Evidence suggests that Platt was one of the Arnhem prisoners, all non-commissioned officers, sent to Stalag II-A/Camp Fünfeichen near Neubrandenburg. A Red Cross report from 14 November 1944 mentions 200 British non-commissioned officers captured at Arnhem, who arrived at the camp on 12 October 1944. The report describes poor camp conditions, including insufficient food, depleted Red Cross supplies, and shortages of socks, underwear, and shoes. There was no British chaplain, and recreation was very limited.
An oral history by David Arthur Brooks, a veteran of the 2nd Battalion, Parachute Regiment, and a POW at Stalag II-A, offers insights into camp life. He recalled a ten-day train journey to the camp without food, 200 men packed into two cattle trucks. The refusal of Arnhem POWs to work for the Germans and the resulting isolation, as the prisoners’ barrack was fenced off from the rest of the camp. Nevertheless, this didn’t stop some of the British prisoners from slipping under the wire and trading with Serbian prisoners. He talked about rationing and the arrival of Red Cross parcels in December 1944. Some prisoners were marched in from camps farther east, and many of them were in urgent need of medical assistance.
Brooks described the final days of the camp, which were marked by disputes regarding the burial of British prisoners and an attempted burial ceremony. There was also an RAF air drop of food and medical supplies, along with the arrival of Soviet Red Army units. The German guards’ families were entrusted to British POWs, as they feared potential reprisals from the Red Army.
After being liberated by the Russians, the prisoners were left to their own devices until an RAF officer arrived to arrange their transportation. They subsequently marched to Schwerin before returning to Britain aboard Dakota transport aircraft in May 1945. Following their return, Brooks and his comrades (we can only assume that Sergeant Platt was one of them) were moved to a camp near Haywards Heath, where they received new uniforms and £5 in cash, and were permitted to go home on leave the next day. Later in 1945, Stanley Platt got married. He passed away in March 2002, aged 83.
Sergeant Platt survived. Many of his comrades did not. Their names are recorded at the Arnhem-Oosterbeek War Cemetery, where 1,684 Commonwealth servicemen, many of them airborne forces, lie buried, tended by the Commonwealth War Graves Commission and still visited every year by Dutch families who have kept faith with the men who came to liberate them.
The Glider Pilot Regiment may be less well known than the Parachute Regiment battalions with which it served, but the men who wore its Gold Lion with Blue Wings insignia deserve every bit as much to be remembered. If a piece of old paper leads you to ask who they were and what they did, that seems like a worthwhile place to start.
Charles Richard Trumpess is a military historian, author, and an Associate Fellow of the Royal Historical Society. He is the author of “A History of the Guards Armoured Formations 1941-1945” (Pen & Sword Military, 2025) and “The Birth of British Special Forces” (Fonthill Media, 2026).
References and Further Reading
Primary sources
Army Form B.104-83, dated 11 October 1944. Sergeant Stanley Edward Platt, 5340441, Army Air Corps. Family collection.
The National Archives, WO 416/291/464. German prisoner of war record card (Personalkarte), Sergeant Stanley Edward Platt, Stalag XIIA, POW number 89043.
The National Archives, WO 171/1242-1248. War diaries, No. 1 and No. 2 Wing, Glider Pilot Regiment, 1944.
Pegasus Archive, Headquarters Commander Glider Pilots War Diary, Arnhem 1944. Available at: https://www.pegasusarchive.org/arnhem/war_cgp.htm
The Pegasus Archive, Red Cross Reports on the Conditions at German PoW Camp Stalag II-A: https://www.pegasusarchive.org/pow/cSt_2A.htm
IWM Oral History, David Arthur Brooks, served with the 2nd Battalion, the Parachute Regiment, 1st Parachute Brigade, 1st Airborne Division, Interviewed 1999, Catalogue number 18265: https://www.iwm.org.uk/collections/item/object/80017612
Secondary sources and recommended reading
Beevor, A. (2018). Arnhem: The Battle for the Bridges, 1944. Viking. A comprehensive operational history of Market Garden.
Peters, M. and Buist, L. (2010). Glider Pilots at Arnhem. Pen & Sword Aviation. The definitive account of the GPR at Arnhem, drawing on personal testimonies and operational records.
Kershaw, R. (1996). It Never Snows in September: The German View of Market Garden and the Battle of Arnhem, September 1944. Sarpedon.
Urquhart, R.E. (1958). Arnhem. Cassell. Republished by Pen & Sword Military Classics (2008), The divisional commander's own account.
Seth, R. (1955). Lion With Blue Wings: The Story of the Glider Pilot Regiment 1942-1945. Victor Gollancz Ltd.
Online sources
Army Flying Museum. "Operation Market Garden: 80 Years On." Available at: https://armyflying.com/the-collections/archive-blog/operation-market-garden-80-years-on/
WW2 Escape Lines Memorial Society. "The Glider Pilot Regiment." Available at: https://ww2escapelines.co.uk/article/glider-pilot-regiment/
Military History Matters. "Glider Pilots at Arnhem." Available at: https://www.military-history.org/feature/your-mh-glider-pilots-at-arnhem.htm
Wikipedia. "Operation Berlin (Arnhem)." Available at: https://en.wikipedia.org/wiki/Operation_Berlin_(Arnhem)
Airborne Assault Museum (ParaData). Arnhem (Operation Market Garden). Available at: https://paradata.org.uk/content/4634394-arnhem-operation-market-garden
Commonwealth War Graves Commission. Arnhem-Oosterbeek War Cemetery. Available at: https://www.cwgc.org/visit-us/find-cemeteries-memorials/cemetery-details/2063800/arnhem-oosterbeek-war-cemetery/
Glider Pilot Regiment Society. Available at: https://www.gliderpilotregiment.org.uk

War Stories and Myths: Revisiting the Falklands, the Denison Smock, and Arnhem’s Legacy
In this blog article, I bring together reviews of books and documentaries that revisit the Falklands War, unravel the myths of the Denison smock, and challenge long-held beliefs about Arnhem and Operation Market Garden. Join me as I explore how personal accounts and new evidence reshape our understanding of these pivotal moments in military history.
In recent months, I’ve been reading a range of books and viewing a series of documentaries exploring the realities of twentieth-century conflicts. From the windswept battlefields of the Falklands to the airborne drops of Operation Market Garden, these works both in print and on YouTube challenge accepted narratives, expose enduring myths, and offer fresh perspectives on events that continue to shape our understanding of war. In this article, I combine reflections on various military history books and videos to create a narrative about how easily historical facts can become obscured over time.
The Falklands War: Personal Accounts and Broader Perspectives
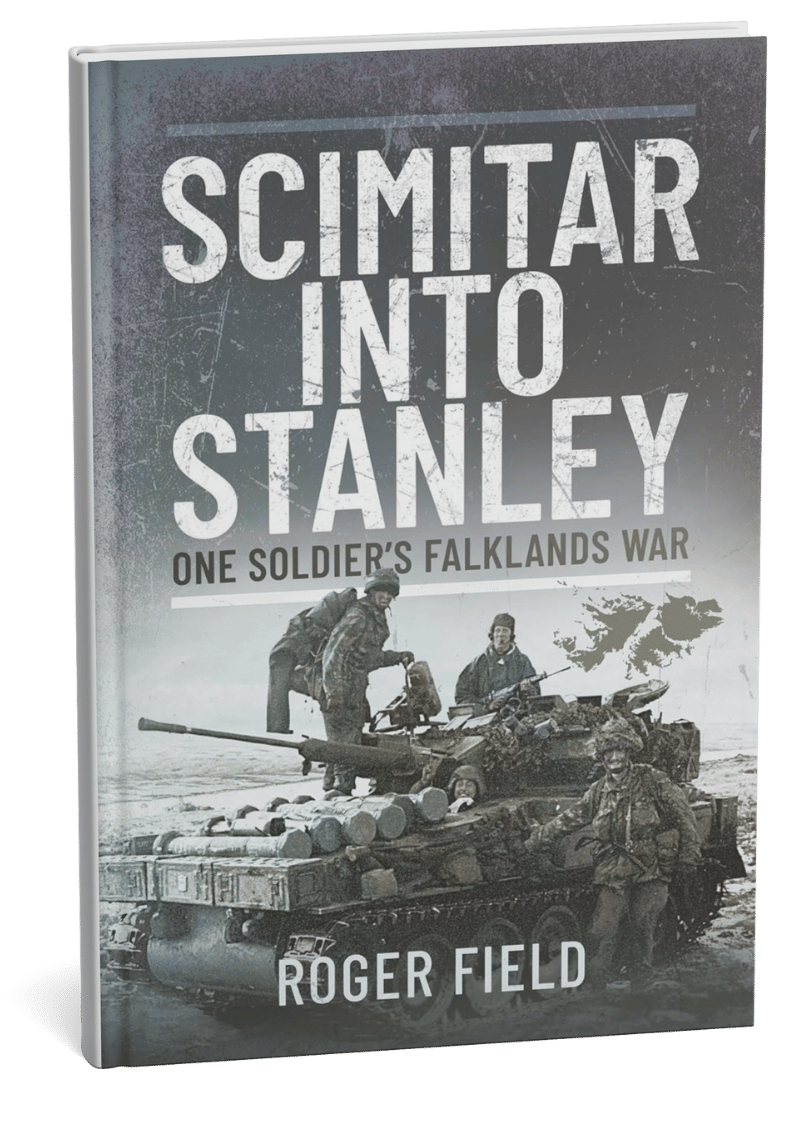
Roger Field’s Scimitar into Stanley (2022) offers a first-hand account of his experiences with the Blues and Royals during the 1982 Falklands War. Initially a staff officer, Field found himself commanding a Scimitar armoured car in battle, famously leading the charge into Port Stanley with journalist Max Hastings clinging to the back of his vehicle. The book is laced with humour, sometimes laugh-out-loud funny, though in today’s climate of political correctness, some may find parts of the text a little too candid. Field doesn’t shy away from naming names or calling out poor leadership, particularly criticising Brigadier Sir Tony Wilson. Yet, he’s equally honest about his own post-war struggles. The result is an open and honest personal account of modern conflict.
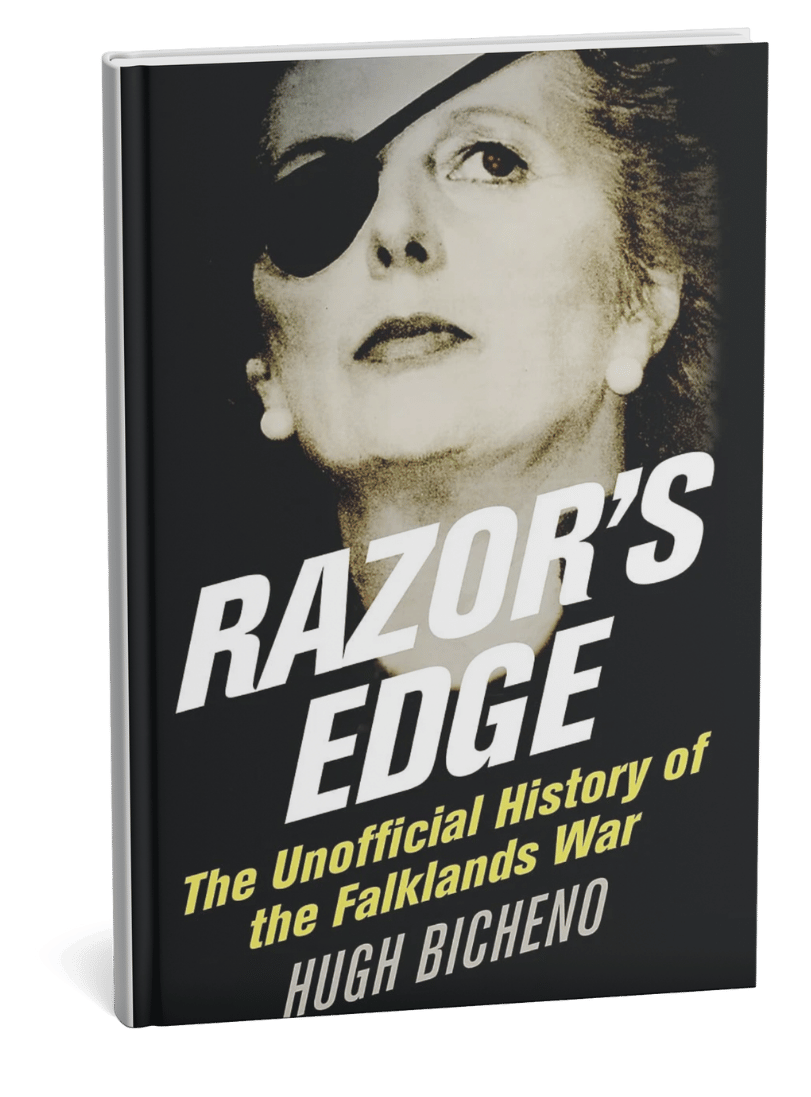
For those seeking a broader view, Hugh Bicheno’s Razor’s Edge (2007) steps back to examine the origins of the conflict. Bicheno, a former British spy in Argentina, foresaw the coming war, but his warnings fell on deaf ears in Whitehall. He spares no one in his critique, lambasting the Foreign Office, Civil Service, and politicians. The book is notable for its inclusion of the Argentine perspective, often overlooked elsewhere, and for its detailed descriptions of the campaign’s battles from both Argentine and Allied viewpoints. Bicheno highlights the role of chance in victory and defeat, and his unsparing criticism is directed at all parties in what he sees as an avoidable conflict. Interestingly, his book is used as a text at Argentina’s war college, a testament, perhaps, to its thoroughness.
If you want the soldier’s view, read Field. For the bigger picture, turn to Bicheno. Both are well worth your time.
Justice Denied: The Welsh Guards and the Sir Galahad Cover-Up
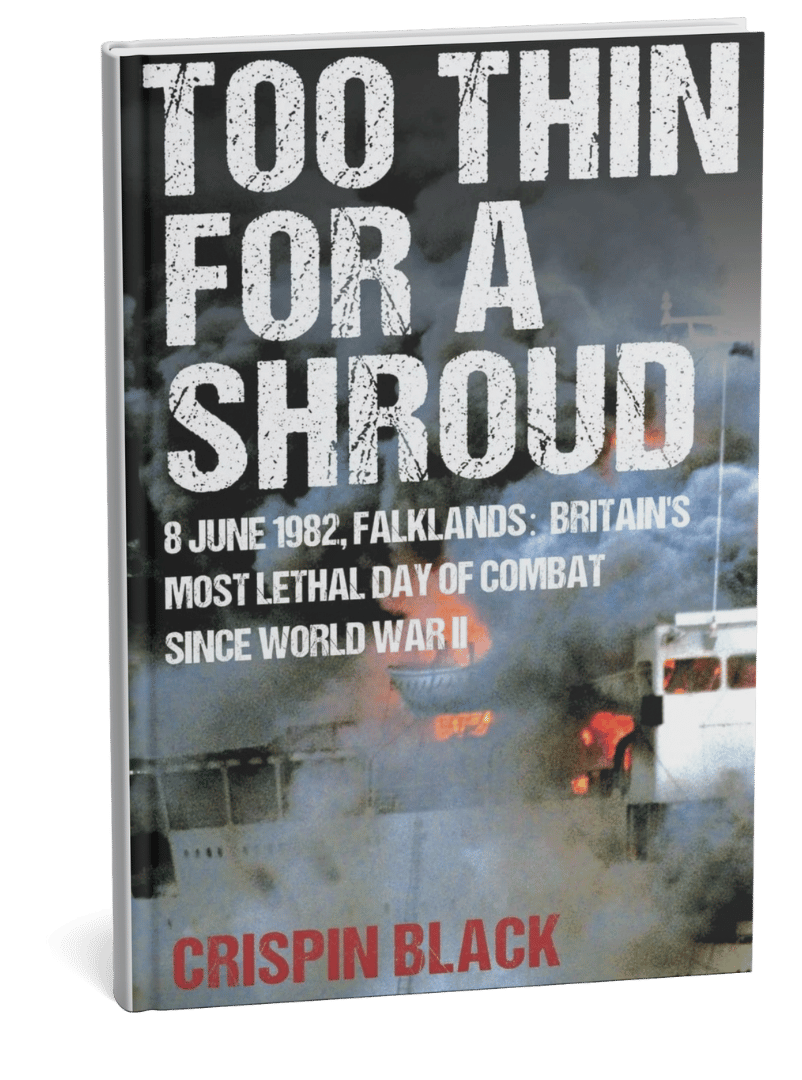
Another recent read, Too Thin for a Shroud by Lieutenant-Colonel Crispin Black (2023), delves into the bombing of the Royal Fleet Auxiliary’s Sir Galahad by the Argentine Air Force on 8 June 1982, the British Army’s deadliest day since 1945.
The Book's Claims
Black documents how 48 men died when Argentine A4 Skyhawks bombed Sir Galahad at Port Pleasant, Fitzroy. The ship was in the wrong location and lacked proper air defence. Packed with Welsh Guardsmen, Sir Galahad sat exposed in broad daylight for over six hours.
Using newly declassified Board of Inquiry documents from The National Archives, Black demonstrates that no direct orders to disembark were given to Major (later Colonel) Guy Sayle and the Welsh Guards. For 40 years, he was wrongly blamed for failing to disembark the troops. The inquiry proves this false. Black argues that senior Royal Navy and Royal Marines commanders made cascading failures: wrong location, defective landing craft, no air defence, and poor communications. The inquiry’s findings were classified until 2065, 83 years after the event.
The declassified files state, “At no time was a direct order to disembark given to Major Sayle by a superior officer.” Colonel Guy Sayle’s daughter has spoken to the media about how her father was made a “scapegoat” for the disaster, and now the Ministry of Defence (MoD) has said it “in no way blames” the Welsh Guards for the losses that day. Colonel Sayle died in 2022. According to Emma Sayle, her father died “haunted and penniless”.
Critical Reception
Unsurprisingly, reviews of Black’s book split sharply along service lines. Welsh Guards veterans and families praised the book as vindication. Royal Navy and Royal Marines personnel frequently criticise it as biased. The conservative Daily Telegraph called it “a repository of damning facts.” The Spectator acknowledged it “shows the Welsh Guards in a new light”, but questioned broader claims. In the court of public opinion, Amazon reviews range from five-star praise for the book's formidable detective work to one-star criticism for an inaccurate rewriting of history.
Senior commanders mounted coordinated rebuttals. RUSI Journal published responses from Major General Julian Thompson, Rear Admiral Jeremy Larken, and other Falklands officers. They challenged Black's interpretations whilst acknowledging errors in the original inquiry. Rear Admiral Larken contacted Black's publisher before reading the book, claiming the Welsh Guards were “unprofessional.” The Mirror reported that Larken claimed the Welsh Guards were an unprofessional and poorly led unit responsible for “pilfering” on his ship. Personally, if true, I think this statement says all we need to know about Larken.
On the flipside, General Sir Michael Rose supported Black's findings, suggesting a “cover-up” on national television.
Political Fallout
The book triggered parliamentary debates. On 25 March 2024, MPs pressed for the release of the documents. Sir Iain Duncan Smith stated: “There is now no question but that some kind of cover-up took place.” Defence Minister Andrew Murrison formally exonerated the Welsh Guards: “The board of inquiry is quite clear...the Welsh Guards were absolutely exonerated.” You can read the full transcript of the House of Commons debate on the Hansard website.
In May 2024, the MoD released 62 pages of previously classified documents. These largely confirmed Black's central claims: no orders were given to the Welsh Guards to disembark, the ship was sent to the wrong location, inadequate landing craft were available to offload the vessel, and no air defence was established.
Luckily for the families of those lost, the wounded and veterans, Black's credentials proved difficult to ignore by the Government, MoD and Navy. After all, he was on board Sir Galahad that fateful day, worked for the Cabinet Office as an intelligence adviser, and received an MBE for his work with the Defence Intelligence Staff during the crisis in the Former Yugoslavia. He is also a frequent contributor to the BBC and major British newspapers on terrorism and intelligence matters.
Crispin Black's book focuses on the bombing of RFA Sir Galahad, the subsequent cover-up, and the release of documents that prove the Welsh Guards were not to blame. He successfully campaigned for the declassification of these documents, which led to the official exoneration of the Welsh Guards after 42 years. While some critics question his interpretation of the events during the Falklands War, they present little counter-evidence. Many fundamental questions remain, and numerous documents will stay classified until 2065. Furthermore, no public inquiry has been announced. Black's work has challenged the previously accepted “official” narrative that unfairly scapegoated the Welsh Guards, turning it into an ongoing controversy.
Unravelling the Myths: The Denison Smock
On a lighter note, my recent purchase of a reproduction 1972-pattern Denison smock led me to a fascinating YouTube video by David Willey, formerly of The Tank Museum: “So you thought you knew about Denison Smocks…” The Denison smock, with its distinctive “brushstroke” camouflage, became iconic among British airborne forces, the SAS, and commandos. Yet, as Willey and Jon Baker (Curator at the Airborne Assault Museum) reveal, much of what we think we know is myth. There’s no evidence the smock was named after Major Denison—indeed, there’s no proof such a person existed. The famous “beaver tail” wasn’t designed to stop the garment riding up during jumps, as is often claimed. Willey’s video is a reminder of how easily repeated stories can become accepted fact.
Market Garden Revisited: Myths and Realities at Arnhem
Turning to Operation Market Garden, I recently watched two videos that challenge established narratives about the battle for Arnhem. The first was Niall Cherry’s Some Arnhem Myths... and a dose of reality! Part 2 on WW2TV, hosted by Paul Woodadge. Cherry, a former Royal Army Medical Corps senior NCO, has written eleven military history books. He is secretary of the Arnhem 1944 Veterans Club, a member of the 23 Parachute Field Ambulance OCA and Secretary of the Arnhem 1944 Fellowship. In the video, Cherry addresses specific myths and misconceptions with documentary evidence. Perhaps one of the most commonly held misconceptions about Market Garden is that because the radio equipment failed, the operation failed. On radios, Cherry explains that the 68 sets had known range limitations in wooded terrain. Tests in North Africa, Sicily, Italy and Normandy confirmed this. Commanders knew the Arnhem operational area exceeded set capabilities. In John Frost’s book, A Drop Too Many, he states that the failure of radio equipment was a perennial problem for Britain’s airborne forces.
Regarding the arming of British medics during the operation, establishment tables indicate that each parachute field ambulance was equipped with 123 pistols, 12 rifles, and 31 Sten guns. Of the 630 medics, only six were conscientious objectors. Photographic evidence confirms that most medics carried sidearms. As for the 21st Independent Parachute Company, the nominal rolls reveal that there were eleven foreign personnel among a total of 886 men, disproving the claim that there was a significant number of German Jews, which has become something of a myth.
In terms of planning failures, Cherry argues the 1st Air Landing Brigade should have seized the bridges at Arnhem. Air landing battalions had 750 men versus 550 in parachute battalions, formed up in seconds rather than forty minutes, and possessed superior firepower with four rifle companies, additional mortars, machine guns and anti-tank weapons. He examines General Browning’s influence on Jim Gavin at Nijmegen, where securing the Groesbeek Heights took priority over the Waal road bridge. Browning subsequently blamed Polish General Stanisław Sosabowski in a damning letter before departing for the Far East. Sosabowski's military career never really recovered from Browning’s unfounded criticisms.
During the WW2TV video, Cherry mentioned a short documentary film produced by Anglia Television on the 25th anniversary of Operation Market Garden in 1969. A quick search of YouTube, I found the programme in question, The Battle of Arnhem, directed by Harry Aldous. The programme is largely a collection of documentary interviews with many of the key protagonists and some local witnesses to events during the fighting for Arnhem and Oosterbeek.
In the documentary, Major General Roy Urquhart explained his 36-hour absence from divisional headquarters. He claimed wireless failures prompted his forward movement on the first afternoon. German opposition then trapped him with Brigadier Lathbury near St Elisabeth's Hospital. Lieutenant Colonel John Frost described reaching the Arnhem bridge intact on Sunday evening with over 500 men. Fewer than 200 remained alive and unwounded when resistance ended on Thursday morning. Brigadier John Hackett recounted arriving on Monday afternoon into active combat. His disagreement with Brigadier Pip Hicks over troop deployment at the Hartenstein reflected command confusion during Urquhart's absence.
Major General Allan Adair, Guards Armoured Division, blamed the terrain for his formation’s slow progress up the central axis of advance. The single-road approach prevented flanking movements, and the marshy Dutch polder land between Nijmegen and Arnhem, an area known as the Island, prohibited armoured manoeuvre.
SS General Wilhelm Bittrich assessed British troops as an “absolute elite” and commented on his troops' respect for their enemies. Housewife and mother, Kate ter Horst, described caring for the many wounded who packed her Oosterbeek home. Casualties filled every room. In the final segment of the programme, General Urquhart read from his 1945 report stating all ranks would willingly undertake similar operations again. Frost believed that most men who served at Arnhem, if asked, would accept another “invitation to the party”.
The Anglia Television documentary is an interesting, if uncritical, oral history filmed before later narratives worked their magic on the public imagination. The inclusion of a German perspective remains unusual for a 1969 British production. Both videos offer valuable source material. Cherry challenges operational assumptions with documented evidence. The Anglia TV program features first-hand accounts from key figures who planned, executed, and fought in the Battle of Arnhem. However, time and concerns about preserving their own reputations likely influenced the accuracy of their memories.
From the windswept South Atlantic to the battlefields of Holland, these books and documentaries reveal the enduring power of personal testimony and the importance of challenging received wisdom. Whether exposing cover-ups, debunking myths, or simply telling it as it was, each work adds a vital thread to the tapestry of military history. In revisiting these stories, we honour the lived experience and also ensure that the lessons, whether bitter or inspiring, are not forgotten.
Amazon Affiliate
This blog contains Amazon affiliate links. If you purchase books through these links, I receive a small commission at no additional cost to you. This helps support the ongoing research and content on The War Years.
References, Justice Denied:
https://www.spectator.co.uk/article/could-the-bombing-of-sir-galahad-have-been-prevented/
https://www.tandfonline.com/doi/full/10.1080/03071847.2024.2444114

Operation Market Garden: Bridges and Cemeteries
Operation Market Garden battlefield tour 2025: From Joe's Bridge to Arnhem, exploring the 64-mile route of Montgomery's ambitious September 1944 plan to end the war by Christmas and its ultimate failure.
In July 2025, I spent four days in a coach full of like-minded individuals as we travelled from Dunkirk to Brussels and then followed the 64-mile route from Joe’s Bridge, Neerpelt, Belgium, to the famous John Frost Bridge at Arnhem, Holland.
Joe’s Bridge was the starting point of our Operation Market Garden tour, just as it had been the start line or centre line of advance for the Guards Armoured Division back in September 1944.
Operation Market Garden promised to end the war by Christmas 1944. Field Marshal Montgomery's audacious plan would drop 35,000 paratroopers (Three airborne divisions: the American 101st Division, the American 82nd Division, and the British 1st Airborne Division) across the Netherlands to capture key bridges. At the same time, British ground forces (30 Corps, spearheaded by the Guards Armoured Division) would advance 64 miles up a single highway, linking up with the airborne forces as they advanced. Furthest north, at the top of what would become known as ‘Hell’s Highway’, was the 1st Airborne Division, dropped and airlanded to the west of Arnhem. The British airborne troops expected to be relieved by the forward elements of 30 Corps within 48 hours of landing. Instead, what unfolded was nine days of desperate fighting that exemplified both the courage of ordinary British soldiers and the brutal, chaotic realities of war.
Joe's Bridge


Our battlefield tour began at Joe's Bridge in Lommel, Belgium, where Lieutenant Colonel John Ormsby Evelyn “J.O.E.” Vandeleur's Irish Guards achieved one of Market Garden's early victories. On 10 September 1944, a full week before the main operation, the 3rd Battalion Irish Guards launched a surprise assault that captured this strategic canal crossing intact.
The German defenders had prepared the wooden pontoon bridge for demolition, with two 88mm anti-tank guns positioned nearby and explosive charges wired for detonation. In his memoir, A Soldier’s Story (1967), J.O.E. Vandeleur recounts what happened:
At Exel, we found an unfinished road running due north to the Escaut Canal. It approached the canal in the shape of a “T”. The left half of the top of the “T” could not be seen from the Escaut Bridge. Halfway down the left half of the “T” stood a tall factory. We hid the head of the column behind the factory and ran upstairs, where we obtained a perfect view of the bridge. Incidentally, a large staff car full of German officers tried to cross us on the way up. We killed them and captured their maps. From the top window of the factory, every detail of the German defences could be clearly seen. At the top left corner of the “T”, there was a ‘jink’ in the road. This ‘jink’ was very important, because it denied the German 88 mm. guns a clear view of us until we were within 100 yards of the bridge. The problem now was, would the Germans blow the bridge or not?
We therefore decided to put it to the test. The plan was a very simple one. David Peel’s squadron was to send one troop of tanks commanded by Duncan Lampard up to the corner of the jink. This was to be accompanied by a platoon of the 3rd Battalion, commanded by John Stanley-Clark. This was to be the assault force with Michael Dudley’s company and the remainder of David Peel’s squadron engaging the enemy with point-blank fire for twenty minutes. It was to be a shooting match of twenty minutes’ duration. If, at the end of the twenty minutes, the bridge had not been blown, John Stanley-Clark and Duncan Lampard were to charge, followed by Hutton (R.E.) and six Guardsmen immediately to remove the explosive charges. We had no artillery support and were fifteen miles north of brigade headquarters, so there was no wireless touch. The signal for the assault was to be a green Very light.
It came off perfectly.
The structure, today known as Joe’s Bridge, was rebuilt after the war. The Irish Guards Memorial is situated on the northern bank and adjacent to Barrier Park.
Advancing up Hell’s Highway


On 17 September 1944, the seven-mile advance from Joe's Bridge to Valkenswaard, became the first test of Operation Market Garden's ambitious timetable.
The Irish Guards faced a brutal tactical reality: advance on a single road through terrain generally unsuitable for tanks. Dense woodland and marshy Dutch polder made deploying tanks off-road extremely difficult, and forced the Irish Guards to advance on a ‘one tank front’. The terrain proved a gift to the German defenders, who prepared a devastating ambush. In just two minutes, nine British Sherman tanks were knocked out.
Once again, J.O.E. Vandeleur describes what happened:
Zero hour was to be at 1435, and the start line was the Escaut Bridge. For this battle, we were supported by 350 guns and eight squadrons of Typhoon fighters of the Royal Air Force, who were to maintain a cab-rank of three aircraft immediately above us, ready to strike. The artillery was to fire a barrage, rolling at a speed of 200 yards a minute. Our tanks were marked with yellow streamers to identify them to the airmen. I was provided with an armoured signal tender for direct communication with the pilots in the sky. We were also given purple smoke shells to fire and identify targets for the airmen.
J.O.E. Vandeleur continues:
At zero hour, Keith Heathcote, commanding the leading tank, gave the order ‘Driver-Advance’ and he drove up to the edge of the barrage. Twenty-five minutes later, the rear half of the leading squadron (Mick O’Cock) and the leading half of No. 2 Squadron were knocked out, leaving Mick isolated and alone on the road. Luckily, Sergeant Cowan knocked out a self-propelled gun which had Mick in its sights. We had an armoured bulldozer high up in the column, ready to push aside knocked-out tanks and to help us cross a ditch just south of Valkenswaard.
No. 2 Squadron then took the lead, and Squadron Sergeant-Major Parkes was immediately killed. Duncan Lampard, who had distinguished himself at the Escaut Bridge, was wounded at the same time. I placed my headquarters behind the 2nd Squadron, which was fortunate on this occasion, as it gave us a ‘cushion’. Previously, we always moved at the tail of the leading squadron. I had a complicated wireless net to deal with. I had to speak to the pilots in the sky, telling them when to come in with their rockets and explaining targets to them. I had to keep my pulse on the artillery plan and call the barrage back when things were going badly. We had to issue orders to both battalions and feed information back. I insisted on the Air Force officer keeping the door of his tender open so that I could speak to him. He had never seen a ground battle before, and the afternoon’s affair must have been an eye-opener for him.
Division asked us how the battle was going. Denis lifted his microphone and merely said ‘Listen’. The noise was as if all hell had been opened; the crash of bursting shells and the screaming of the rockets as they left their cradles in the attacking aircraft.


Walking through Valkenswaard War Cemetery, I found the graves of Squadron Sergeant Major William Parkes and his comrades, men who died in those opening moments of the ground assault. Six unidentified Irish Guards lie within the cemetery. For those unfamiliar with the realities of tank warfare, when a vehicle was hit and caught fire, the crew usually had only seconds to escape the conflagration. Those crewmen who failed to escape were usually burned beyond recognition.
The cemetery, nestled in a pine forest between Valkenswaard and Westerhoven, contains 220 graves. The peaceful setting belies the violence that brought these soldiers to their deaths. Local Dutch families have adopted individual graves through the ‘Foundation Stichting 40-45’ program, decorating headstones and ensuring the soldiers’ sacrifices are not forgotten.
The ambush at Valkenswaard caused the first of many delays in the ‘Garden’ element of the operation. The Guards arrived in town during the evening instead of the planned early afternoon. Had the Irish Guards continued to Eindhoven in darkness, Market Garden’s timetable might have been preserved. Instead, the decision to spend the night in Valkenswaard contributed to delays that ultimately doomed the operation. However, it was a standard operating procedure that tanks ‘harboured’ overnight for maintenance, refuelling and rearming.
According to A History of the Irish Guards in the Second World War (1949), the first day’s fighting cost the 2nd Battalion nine tanks, eight men killed and several wounded. The 3rd Battalion lost seven killed and nineteen wounded. In the little cemetery outside the town are buried S.S.M. Parkes, Lance-Sergeant J. Waters, Guardsmen McD. Ackers, M. Delaney, W. Moore, J. Johnson, N. Malton and T. Watson.
The Day I Met Jackal


Our tour itinerary next took us to the vast German War Cemetery at Ysselsteyn before visiting the impressive Overloon War Museum. Within the museum resides a very special vehicle, an Mk. V Churchill tank of B Squadron, 4th (Tank) Battalion, Coldstream Guards, nicknamed Jackal. The tank was abandoned after hitting a mine during Operation Aintree (Battle of Overloon, 30 September to 18 October 1944). Two of the five crew were killed, Guardsmen Gordon Wright and Robert Silman, who are buried in Overloon War Cemetery, not far from the museum. Bob Dare, the tank’s driver, helped the other two crew members to safety. Bob and Jackal’s story is retold in my book, A History of the Guards Armoured Formations 1941-1945.
The Bridge at Grave


On 17 September, Lieutenant John “Jacko” Thompson of Easy Company, 504th Parachute Infantry Regiment, 82nd Airborne Division achieved one of the operation’s greatest successes when his small group of 16 men captured the strategically vital bridge over the Maas River at Grave. Although his company had been scattered during the parachute drop and landed far from their target, Thompson decided not to wait for reinforcements and immediately stormed the bridge, achieving complete surprise and capturing it undamaged. Thompson was wounded twice during the war and was decorated for his bravery with both the Bronze and Silver Stars. After the war, he returned to a career as a professional baseball player. The bridge remained crucial for Allied logistics throughout the war. In 2004, the crossing was renamed the John S. Thompson Bridge in honour of his decisive leadership and courage.
The Capture of the Nijmegen Road Bridge


For anyone who has seen the film, A Bridge Too Far (1977), you would be forgiven for believing Hollywood star Robert Redford captured the impressive Nijmegen road bridge, almost single-handedly, in the guise of Major Julian Cook. The truth is somewhat different, as any Grenadier Guardsman will happily tell you.
The war diary of the 2nd (Armoured) Battalion, Grenadier Guards for 20 September 1944 recounts the day’s events more prosaically than Director Richard Attenborough’s film:
Plan arranged with AIRBORNE FORCES to clear part of the town near the main road bridge, 1Bn AIRBORNE (AMERICAN) and the Bn Gp. Progress slow but sure and vicinity of bridge eventually reached at 1700 hrs with light casualties mainly through snipers. At 1900 hrs, a Tp of tanks was successfully rushed across the bridge, encountering at least one 88mm and passing through infantry on the far side, losing two tanks, one only temporarily, eventually linking up with AIRBORNE FORCES on the other side. Bridge consolidated by 2200 hrs.
The film is intended as entertainment rather than a historical documentary, so it glosses over the fact that the Americans had not secured either the road or rail crossings at Nijmegen by the time the Guards Armoured Division arrived. As a result, instead of passing over the road bridge and continuing to advance the ten miles to Arnhem, the Guards found themselves embroiled in the intense fighting that was ongoing in the town. In John Frost’s book, A Drop Too Many (1983), he cites the failure to secure the Nijmegen bridge on day one of the operation as perhaps the worst mistake of a tactical plan that was riddled with holes.
Crossing the Waal
The Grenadier Guards’ capture of the bridge required a coordinated attack with American paratroopers in one of the war’s most daring river crossings. Supported by the Irish Guards’ guns, Major Julian Cook’s 3rd Battalion, 504th Parachute Infantry Regiment made a daylight crossing of the 400-yard-wide Waal River in 26 flimsy canvas boats. The first wave suffered over 50 per cent casualties as German machine guns and artillery poured fire into the boats. Major Cook, a devout Catholic, recited “Hail Mary” prayers to encourage his men as they used rifle butts for oars.
Meanwhile, three columns of Grenadier Guards attacked from the south. Lieutenant Colonel Edward Goulburn’s forces coordinated with the Americans in a complex pincer movement. At around 1800 hrs, after the 504th PIR had secured the north end of both bridges, Sergeant Peter Robinson, 2nd Battalion, Grenadier Guards, led four Sherman tanks in a desperate charge across the road bridge. For his bravery, Robinson was awarded the Distinguished Conduct Medal, and, later, a grateful city granted him the Freedom of Nijmegen. Lieutenant Colonel Giles Vandeleur, commanding the 2nd Battalion, Irish Guards, and cousin of J.O.E. Vandeleur, witnessed the ‘Waal Crossing’ and remarked that it was one of the most courageous sights he had ever seen.
Standing on the Nijmegen road bridge today, you can imagine Robinson’s gunner engaging the German 88mm anti-tank gun in a brief but decisive duel. But by the time the bridge was secured, Market Garden was already 36 hours behind schedule. Early the next morning, Lieutenant Colonel John Frost would surrender his hold on the north end of the Arnhem bridge.
Arnhem Oosterbeek Cemetery


On the third day of our tour, we visited some of the Drop Zones and Landing Zones near Arnhem, seeing Ginkel Heath and the memorials there, the Glider Memorial at Wolfheze, and the original Airborne monument at Heelsum. Next, we stopped at the Arnhem Oosterbeek War Cemetery, where the dead from Arnhem are buried.
According to the Commonwealth War Graves Commission website, Arnhem Oosterbeek War Cemetery contains the graves of most of those killed during the September landings, and many of those killed in later fighting in the area.
There are now 1,684 Commonwealth servicemen buried or commemorated in the cemetery. 243 of the burials are unidentified, and special memorials commemorate two casualties. There are also 79 Polish, three Dutch and four non-war (including three former Commission employees) graves in the cemetery.
For Valour
The Victoria Cross (VC) is the highest and most prestigious military decoration awarded to British and Commonwealth personnel for acts of extreme valour. Notably, the cemetery includes the graves of Flight Lieutenant David Lord, Captain Lionel Queripel, and Lieutenant John Grayburn, all of whom were posthumously awarded the Victoria Cross for their bravery during the battle. The cemetery also commemorates Lance Sergeant John Baskeyfield.
While defending the Oosterbeek perimeter three days into the battle, Baskeyfield commanded a pair of anti-tank guns that destroyed several enemy tanks before the crews were killed. Baskeyfield subsequently fired the guns alone before he, too, was killed. His body was not identified after the war, and he has no known grave. The last paragraph of his VC’s citation states:
The superb gallantry of this N.C.O. is beyond praise. During the remaining days at Arnhem, stories of his valour were a constant inspiration to all ranks. He spurned danger, ignored pain and, by his supreme fighting spirit, infected all who witnessed his conduct with the same aggressiveness and dogged devotion to duty which characterised his actions throughout.
Every September, a joint Anglo-Dutch Service of Remembrance is held at the Oosterbeek War Cemetery, where local school children each lay a flower on the grave of a serviceman.
The General is Missing


In the afternoon, we travelled to the Hartenstein Hotel, Airborne Headquarters in 1944. Here we toured the superb museum with its extended displays and life-size recreations of the battle. A handful of us also walked the Oosterbeek defensive perimeter with battlefield guide Andy Ingham. For those not familiar with how the battle unfolded, when the attempt to capture Arnhem Bridge failed, Major General Roy Urquhart, commander of the 1st Airborne Division, ordered his forces into a defensive perimeter around Oosterbeek village, which is located about seven miles west of Arnhem. For six days, the airborne troops held this shrinking perimeter against overwhelming German forces in what became known as “the Cauldron.”
Next, we visited Oosterbeek Church and St Elisabeth’s Hospital. We also walked the nearby streets, retracing the steps taken by the “missing general”. At the start of the Battle of Arnhem, General Urquhart and Brigadier Lathbury went missing for some time. This created a dangerous command vacuum during the critical early stages of the operation, from Monday, 18 September, to the early hours of Tuesday, 19 September. Urquhart left his headquarters and went forward to assess the situation after radio communications failed. Lathbury was wounded, and Urquhart took refuge in the attic of a house near the hospital. As you approach Arnhem from Oosterbeek, the area around the hospital forms a bottleneck with the river and railway lines forming the sides, and where, in 1944, the Germans were quickly able to form blocking lines. The proximity of the railway marshalling yards meant that German reinforcements arriving from the Reich could immediately be fed into the battle. However, John Frost and a composite force of the 2nd and 3rd Parachute Battalions, Reconnaissance and Airborne Engineers made it through to the north end of the Arnhem road bridge before the Germans put a stopper in the bottle.
The John Frost Bridge


Our tour ended at the iconic Arnhem road bridge, or the John Frost Bridge (John Frostbrug) as it is known today. The actual road bridge defended by Frost’s 2nd Parachute Battalion was destroyed by the Allies a month after Operation Market Garden. Initially, the airborne troops held the north end of the bridge into Arnhem town and the surrounding buildings.
For three days and four nights, the lightly equipped airborne troops held off a superior German force that was armed with tanks, heavy artillery, and mortars. Eventually, the defenders' ammunition, food, and water ran low, forcing them to surrender, although some managed to evade capture. Of the 750 men who reached the bridge, 81 were killed, and virtually all the rest were wounded.
In 1977, the bridge was renamed for John Frost, despite his initial reluctance. He felt it was “too much of an honour” since they had lost the battle. Veteran Freddie Gough convinced him the accolade was deserved. Today’s bridge, rebuilt in 1948, closely resembles the original. However, due to urban development in the Arnhem area, the John Frost Bridge was not used in the filming of A Bridge Too Far. The scenes set around the Arnhem bridge were shot in Deventer, northeast of Arnhem.
The Cost of Market Garden


In all, the British 1st Airborne Division took just under 12,000 men into Arnhem. By Monday, 25 September, 1,485 men were dead, and around 6,500 were taken prisoner, and many of them were wounded. The RAF lost 68 aircraft shot down and around 500 aircrew killed. Due to incomplete records, German losses can only be estimated, and numbers vary between 2,500 and 5,000 casualties for the fighting around Arnhem. The evacuation of the Oosterbeek pocket saw 2,398 men escape capture. Around 450 Dutch civilians were also killed during the operation. Another 100,000 Dutch civilians were forcibly evicted from their homes in the Lower Rhine area by the Germans immediately after the fighting concluded. It is estimated that an additional 18,000 Dutch civilians died from malnutrition due to German reprisals, which included cutting the population's rations during what became known as the “Hunger Winter” of 1944/45.
Field Marshal Montgomery claimed that Market Garden was ninety per cent successful. Prince Bernhard of the Netherlands said that his country could ill afford another Montgomery success. In truth, for all the heroics and loss of life, the operation was a strategic failure.
The Irish Guards’ swift capture of Joe’s Bridge, their costly advance along Hell’s Highway, the Grenadier Guards’ seizure of the Nijmegen road bridge, and the doomed but heroic defence at Arnhem represent the finest traditions of British military service.
Final Thoughts
Today, these sites are accessible to anyone seeking to understand pivotal moments in European history. Museums provide context, cemeteries offer reflection, and the surviving bridges and battlefields let visitors walk in the footsteps of a remarkable generation.
The courage of the airborne forces, aircrew, and soldiers of 30 Corps during those nine days in September 1944 deserves to be remembered not just for their tactical achievements but for their embodiment of duty, courage, sacrifice, and camaraderie under the most extreme circumstances.
These historic sites remind us that behind every strategic decision and tactical manoeuvre were ordinary people, many barely out of their teens, who answered their nation’s call and paid the ultimate price in the fight against Nazi tyranny. In visiting these places, we hope to honour their memory and ensure their sacrifices will never be forgotten.
Further Reading
Much ink has been spilt on the subject of Operation Market Garden and the reasons for its failure. Amongst the books I have recently read on the subject are Arnhem by Major General R.E. Urquhart (1958), A Drop Too Many by Major General John Frost (1983), A Tour of the Arnhem Battlefields by John Waddy (1999), Arnhem 1944 by William F. Buckingham (2002), and Arnhem Black Tuesday by Al Murray (2024). I would also recommend It Never Snows in September: The German View of Market-Garden and the Battle of Arnhem September 1944 by Robert Kershaw (2008) and The Last German Victory: Operation Market Garden 1944 by Aaron Bates (2021).
Photographs & Sketches
Items in order of appearance
Gallery 1: Joe’s Bridge
Portrait of Lieutenant Colonel John Ormsby Evelyn “J.O.E.” Vandeleur, Irish Guards.
A Sherman tank of the 2nd (Armoured) Battalion Irish Guards, Guards Armoured Division, crossing the Meuse-Escaut Canal, Neerpelt, during Operation Market Garden, September 1944. George Rodger, Photographer, LIFE Magazine Archives.
Joe’s Bridge, July 20215, by the author.
Irish Guards Group memorial, Joe’s Bridge, July 2025, by the author.
Gallery 2: Hell’s Highway
IWM (Imperial War Museum), BU 925, Sherman tanks of the Irish Guards Group advance past others which were knocked out earlier during Operation 'Market-Garden', 17 September 1944.
IWM, BU 926, A Sherman Firefly tank of the Irish Guards Group advances past Sherman tanks knocked out earlier during Operation 'Market-Garden', 17 September 1944.
Guardsman William Gill Moore died during the ambush of this tank. The Sherman commanded by Lance Sergeant Dave Roper was struck by a Panzerfaust on 17th September 1944 during Operation Market Garden. Copyright “De bevrijding in Beeld" / "Vantilt fragma”.
IWM, BU 927, Squadron Sergeant Major William John Parkes of No. 3 Squadron, 2nd Irish Guards, killed when his Sherman tank was knocked out during the advance towards Eindhoven as part of Operation Market Garden. Photo taken on 17th September 1944 by Sergeant Carpenter, No. 5 Army Film and Photographic Unit.
Front page of The Illustrated London News of September 30, 1944. The village square of Valkenswaard, Sherman tank, “Snow White”, Brigade HQ, 5th Guards (Armoured) Brigade. Nationaal Archief (National Archives of the Netherlands).
Gallery 3: Valkenswaard War Cemetery
Headstones:
Guardsman W. Ackers, Irish Guards
Guardsman, Michael Dee, Irish Guards
L. Cpl. M.J. Delaney, Irish Guards
Squadron Sergeant Major (SSM) William John Parkes, Irish Guards
L. Sgt. John Watters, Irish Guards
Unidentified Irish Guardsman, known only to God.
Irish Guardsmen, Valkenswaard War Cemetery, all photographs by the author.
Gallery 4: Jackal
IWM, B 10809, A Churchill tank of 6th Guards Tank Brigade supporting infantry of 3rd Division attacking Overloon in the Netherlands, 14 October 1944.
IWM, BU 1232, Churchill tanks of the 6th Guards Tank Brigade lay a smokescreen during the advance on Venraij, 17 October 1944.
Charlie Trumpess with Mk. V Churchill tank of B Squadron, 4th (Tank) Battalion, Coldstream Guards, 6th Guards (Tank) Brigade, named Jackal, Overloon War Museum, July 2025, by the author.
British Churchill tank named Jackal formed part of the staff platoon, 2nd Squadron, 4th Battalion, Coldstream Guards, 6th Guards Tank Brigade that supported the infantry attack on Overloon – by the author.
Gallery 5: Grave
VIRIN: 440917-A-ZZ999-791, U.S. Department of War, US Army paratroopers are dropped near Grave, Netherlands, while livestock graze near gliders that landed earlier. Operation Market Garden.
John S. Thompsonbrug over the river Maas at Grave, July 2025, by the author.
Sketch of the Grave Bridge, September 1944, Sergeant Charles Murrell, Welsh Guards. Courtesy of the Welsh Guards.
Cyclists on the John S. Thompsonbrug over the Maas River at Grave, by Havang(nl).
The 82nd Airborne Memorial, beside the John S. Thompson bridge over the Maas River between Grave and Nederasselt, Netherlands, July 2025, by the author.
Gallery 6: Nijmegen Bridge
Cromwell tank of the Welsh Guards, Guard Armoured Division passes the "Schoonoord" corn mill in Alverna, Wijchen municipality near Nijmegen during Operation Market Garden. Nationaal Archief (National Archives of the Netherlands).
American paratroopers advance while being attacked by German anti-aircraft fire. According to the caption, the location is Arnhem, but it is more likely Nijmegen. The photograph is dated 10 September 1944, which must be a mistake. The picture is attributed to the US Army Signal Corps. Nationaal Archief (National Archives of the Netherlands).
IWM, EA 44531, tanks of the 2nd (Armoured) Battalion, Irish Guards, Guards Armoured Division, British XXX Corps cross the road bridge at Nijmegen during its capture. Operation Market Garden.
Battalion crosses the Nijmegen Bridge, 22nd September 1944, sketch by Sergeant Charles Murrell, Welsh Guards. Courtesy of the Welsh Guards.
Two sketches of the Nijmegen Bridge or Grenadiers Bridge by Sergeant Charles Murrell, Welsh Guards, 3rd November 1944. Courtesy of the Welsh Guards.
The Waalbrug or Nijmegen Road Bridge over the River Waal, July 2025, by the author.
Gallery 7: Arnhem Oosterbeek War Cemetery
The memorial on Ginkel Heath, Drop zone “Y”, where the 4th Para Brigade landed on Monday, 18th September 1944, during Operation Market Garden, by the author.
Gravestones of the fallen, Arnhem Oosterbeek War Cemetery, by the author.
In the centre of the photograph, Lt. Col. Sir William Richard De B. Des Voeux, BT, Grenadier Guards, 156th Battalion, 4th Para Brigade. Household Brigade Lodge No 2614 website.
The gravestone of Lt. Col. Sir William Richard De B. Des Voeux, BT, Grenadier Guards, 156th Battalion, 4th Para Brigade, by the author.
John "Jack" Grayburn was posthumously awarded the Victoria Cross for his actions with the 2nd Parachute Battalion at the Arnhem Bridge.
The gravestone of Lieutenant J.H. " Jack" Grayburn, VC, Parachute Regiment, Army Air Corps, by the author.
Lance Sergeant John Daniel Baskeyfield, VC. Gun Commander, 2 Anti-Tank Platoon, Support Company, 2nd (Airborne) Battalion, South Staffordshire Regiment, Battle of Arnhem. His body was never identified. Digitally enhanced portrait by the author.
Gallery 8: The General is Missing
IWM, BU 1136, Major-General Roy Urquhart DSO and Bar, commander of the British 1st Airborne Division during Operation Market Garden, plants the Airborne flag outside his headquarters (Hotel Hartenstein). By Smith, D M (Sgt), Army Film and Photographic Unit.
Rear of the Airborne Museum Hartenstein, Oosterbeek, July 2025, by the author.
A diorama of the 1st Airborne Division HQ and signals featuring a depiction of Major-General Roy Urquhart, Airborne Museum Hartenstein, Oosterbeek, July 2025, by the author.
Original wallpaper from the battle for Arnhem, inscribed “Never Surrender, Fuck the Gerry’s, 1st Airborne Division” and showing a tally of German soldiers killed. The photo also shows a No. 4 Lee Enfield rifle with a telescopic sight. Airborne Museum Hartenstein, Oosterbeek, by the author.
IWM, British paratroopers prepare for yet another attack on the Oosterbeek Perimeter.
Photo of a 3-inch mortar team, 1st Borders, defending the Oosterbeek perimeter, 200m from the Hartenstein Hotel (photo taken on the spot where the original was taken), by the author.
The ter Horst family home, which served as a Regimental Aid Post, inset, a picture of Kate ter Horst and her MBE medal, Oosterbeek. Known to the British as the “Angel of Arnhem”, she famously tended to hundreds of wounded and dying airborne troops during the Battle of Arnhem. By the author.
The Old Church (Oude Kerk) in Oosterbeek dates back to the 10th Century and is possibly the oldest church in the Netherlands. As the Oosterbeek Perimeter shrank, the church became a stronghold for the airborne troops, by the author.
A view of the Arnhem railway bridge from the rear of the Old Church, July 2025, by the author.
Our tour group outside the former St Elizabeth Hospital in Arnhem. The site was used as a military hospital by both sides during the fighting. Famously, Major-General Urquhart became trapped in the attic of No. 14 Zwarteweg, which is located to the rear of the hospital. Our battlefield guide, Andy Ingham, took the photo in July 2025.
Gallery 9: The John Frost Bridge
Girders, the John Frost Bridge, July 2025, by the author.
IWM, MH 2061, aerial view of the bridge over the Neder Rijn, Arnhem; British troops and destroyed German armoured vehicles are visible at the north end of the bridge.
Lieutenant Colonel John Frost led the 2nd Parachute Battalion to capture the northern end of the Arnhem Bridge and was later promoted to the rank of Major General.
IWM, HU 2127, the Arnhem Bridge after Frost's force had been overrun and the road cleared. Notice the destroyed buildings on the right.
Photo of the steps leading down to the riverbank, the north end of the Arnhem road bridge. Battlefield guide, Andy Ingham, holds a picture taken from precisely the same spot after the battle, showing the surrounding devastation. By the author.
Arnhem. War damage 1944/1945. View from the Sabelspoort towards the Grote Kerk (Great Church), 1945, Nationaal Archief (National Archives of the Netherlands).
The destroyed Rhine bridge (Arnhem road bridge) is seen from under the nearby temporary Bailey bridge, 1945, Nationaal Archief (National Archives of the Netherlands).
On 7 October, the Arnhem bridge was bombed and destroyed by B-26 Marauders of the 344th Bomb Group, USAAF. The buildings of Arnhem were bombarded by the Allies over the next few months and suffered further during the Liberation of Arnhem in April 1945.
Aerial view of the devastation in Arnhem's city centre. Above, the Rhine Bridge is under construction; the temporary Bailey Bridge has already been removed. To the left of the church is the town hall, partially preserved, 1946, Nationaal Archief (National Archives of the Netherlands).
The John Frost Bridge from the north bank of the lower Rhine, July 2025, by the author.
Charlie Trumpess standing on the north ramp of the John Frost Bridge, Arnhem, July 2025.
The Bridge, July 2025, by the author.
Gallery 10: The Cost of Market Garden
The temporary graves of two British paratroopers at a kilometre marker with the inscription “Arnhem 6”, 1945, Nationaal Archief (National Archives of the Netherlands).
Commemoration on 17 September at the Airborne Cemetery in Oosterbeek. The graves of the British paratroopers who fell in September 1944 are being specially cared for by Oosterbeek schoolchildren, 15 September 1955, Nationaal Archief (National Archives of the Netherlands).
Since the end of the war, school children in Oosterbeek, specifically primary school children, have participated in what has become an annual tradition of laying flowers at the Arnhem Oosterbeek War Cemetery to honour the heroes of the Battle of Arnhem.
References
Airborne Assault: ParaData - A living history of The Parachute Regiment and Airborne Forces
J.O.E. Vandeleur, A Soldier's Story, privately printed for the author by Gale & Polden, 1967
Major D.J.L. Fitzgerald, History of the Irish Guards In the Second World War, published by Aldershot Gale and Polden Ltd, 1949
National Army Museum, Archive Reference, 2016-10-23-76, Papers of Lt Col Sir James Newton Rodney Moore, War Diary, 2nd (Armoured) Bn Grenadier Guards, 20 September 1944
Major General John Frost, A Drop Too Many, published by Pen & Sword Military, Kindle Edition, 2019
Commonwealth War Graves Commission, 2024, A Visitor's Guide to the Best Arnhem WW2 Sites, URL: https://www.cwgc.org/our-work/blog/a-visitors-guide-to-the-best-arnhem-ww2-sites/, Accessed 15 August 2025
Cornelius Ryan Collection of World War II Papers (Digital), Cornelius Ryan WWII papers, box 115, folder 36: Giles A. Vandeleur, page. 2
Commonwealth War Graves Commission, 2023, Lance Serjeant John Daniel Baskeyfield VC, URL: https://www.cwgc.org/stories/stories/lance-serjeant-john-daniel-baskeyfield-vc/, Accessed 16 August 2025
Imperial War Museum, The Story Of Operation 'Market Garden' In Photos, URL: https://www.iwm.org.uk/history/the-story-of-operation-market-garden-in-photos, Accessed 19 August 2025
WartimeNI, Scott Edgar, Operation Market Garden: A Bridge Too Far, URL: https://archives.wartimeni.com/article/operation-market-garden-a-bridge-too-far/, Accessed 12 September 2025

Ysselsteyn German War Cemetery: A Complex Memorial Site
In this blog article, discover Ysselsteyn - the Netherlands' only German WWII cemetery holding 32,000+ graves, including Wehrmacht soldiers, SS officers, and war criminals who terrorized occupied Holland.
The Ysselsteyn German War Cemetery in the Netherlands is the largest Second World War German cemetery and the only German military cemetery in the country. Located near Venray (the area saw bitter fighting during Operation Aintree between the end of September and into October 1944) in Limburg province, this 28-hectare (69-acre) cemetery was established in 1946 by the Dutch war graves commission (Nederlandse Gravendienst) following the German occupation of the Netherlands from May 1940 to May 1945.
Who is Buried Here?
The cemetery contains over 32,000 burials from around 25 different nationalities, including:
87 German soldiers from the First World War whose bodies floated down rivers to the Netherlands
Approximately 32,000 Second World War casualties
Wehrmacht and SS soldiers, Dutch collaborators, supporters from other nations, and civilians, including women and children
Over 5,000 unknown burials marked as "Ein Deutscher Soldat" (A German Soldier)
Ysselsteyn: Netherlands' only German WWII cemetery.
The Dark Reality
According to a plaque at the site, recent research reveals that approximately 2,000 to 3,000 of those buried were actively involved in war crimes, including the systematic persecution and murder of 102,000 Jews (mostly Dutch), as well as Sinti and Roma people. About 3,000 of the burials were soldiers detailed to occupation duties, including razzias, deportations, illegal incarceration, and Jew-hunting. Notable among the buried is Julius Dettmann, an SS officer who deported Anne Frank and her family from their hiding place in Amsterdam.
Modern Management and Purpose
In 1976, the Dutch government transferred administration of the cemetery to the German War Graves Commission (Volksbund Deutsche Kriegsgräberfürsorge). Today, the site serves as an international education centre that promotes peace and mutual understanding, complete with a visitor centre and youth meeting centre.


The Konstantin Benzien Story
In December 1943, German fighter pilot Unteroffizier Konstantin Benzien crashed his Messerschmitt Bf 109 into a butcher's shop in Opeinde, Friesland, after aerial combat with American bombers. For 79 years, his identity remained unknown, and his remains were buried in an unnamed grave at Ysselsteyn cemetery. Researchers from the Missing Airmen Memorial Foundation finally solved the mystery using DNA extracted from envelope glue that his sister had licked decades earlier when sending letters. The DNA from the glue matched samples from the pilot's recovered bones, allowing German authorities to officially identify him and give his grave a proper headstone with his name.
Ongoing Controversy
The cemetery remains controversial, with protests from groups like the Dutch Anti-Fascists' League and Jewish organisations opposing commemorative events. The site occasionally receives visits from neo-Nazis, highlighting the ongoing tension between remembrance and the glorification of those who committed atrocities.
This cemetery represents a complex memorial site that serves both as a final resting place and a stark reminder of the atrocities of war, emphasising the importance of learning from history. Sadly, with war raging in Ukraine and across the globe, it seems some lessons remain outside human comprehension.
References:
Youth and Educational Meeting Centre Ysselsteyn

The Silent Disaster: How Communication Failures Helped Doom Operation Market Garden
As we commemorate Operation Market Garden this September, it's worth reflecting on one of the most ambitious - and ultimately ill-fated - military operations of World War II. Launched in September 1944, Operation Market Garden aimed to secure a series of nine bridges in the Netherlands, potentially paving the way for a swift advance into Germany. It was a massive undertaking, involving over 34,000 airborne troops and 50,000 ground forces. Yet, what began with high hopes ended in a costly failure, partly because of a communications breakdown.
Operation Market Garden: 17 to 25 September 1944
As we commemorate Operation Market Garden this September, it's worth reflecting on one of the most ambitious - and ultimately ill-fated - military operations of World War II. Launched in September 1944, Operation Market Garden aimed to secure a series of nine bridges in the Netherlands, potentially paving the way for a swift advance into Germany. It was a massive undertaking, involving over 34,000 airborne troops and 50,000 ground forces. Yet, what began with high hopes ended in a costly failure, partly because of a communications breakdown.
At the heart of Market Garden's communication crisis was the inadequacy of the radio equipment. The British Army's standard radio set, the Wireless Set No. 22, proved insufficient for the task at hand. These radios had a maximum range of around six miles under ideal conditions, yet the Corps Headquarters was positioned a distant 15 miles away. To compound matters, the terrain around Arnhem presented additional challenges that the planners had failed to fully account for. The Arnhem area was characterised by woodland and urban buildings. These physical obstacles severely interfered with radio transmissions, further diminishing the already limited range of the No.22 sets. As a result, what should have been a vital lifeline for the paratroopers of the 1st Airborne Division fighting desperately to hold the north side of the bridge at Arnhem became a silent witness to their isolation and eventual defeat.
Interestingly, a potential solution to these communication problems was literally at hand. The Netherlands boasted an extensive and sophisticated telephone network, largely intact despite years of German occupation. This network was remarkably resilient, comprising three interconnected systems: the national Ryks Telefoon system, the Gelderland Provincial Electricity Board's private network, and a clandestine network operated by Resistance technicians. Even when key exchanges were disrupted, the Dutch were still able to communicate using alternative routings.
Yet, astonishingly, Allied planners failed to fully leverage this resource. This oversight raises profound questions about the rigidity of military thinking. Why did the Allied command, known for its adaptability in other areas, fail to pivot to this seemingly obvious solution? The answer likely lies in a combination of factors: overconfidence in existing systems, security concerns, lack of familiarity with local infrastructure, the fast-paced nature of the operation, and a wariness of the Dutch Resistance.
British XXX Corps cross the road bridge at Nijmegen
The consequences of this failure were dire. While some units made limited use of the phone system, the 1st Airborne Division at Arnhem - where the need was most critical - did not. They made no attempt to convey their urgent need for supplies or relief via the phone system to the corps headquarters. Ironically, Dutch agents inside the 82nd Airborne's landing area used the phone system early on D+1 to inform the 82nd that “the Germans are winning over the British at Arnhem” - the first indication that the 1st Airborne was in serious trouble.
In the face of radio failures, the Allied forces resorted to various other communication methods, each with its own limitations. Carrier pigeons proved unreliable, with many birds failing to deliver messages. Traditional forms of communication like land lines, runners, and dispatch riders were vulnerable to enemy fire and the chaos of battle. The artillery net ended up being one of the more reliable communication methods, allowing for effective artillery support and occasional relay of messages to higher command.
The communication failures during Operation Market Garden offer valuable insights into military organisational thinking. They underscore the importance of flexibility, the need to understand and potentially leverage local infrastructure, the crucial role of contingency planning, and the necessity of fostering a culture that encourages quick problem-solving and innovative thinking at all levels of command.
It's worth noting the contrast between the German military's mission-type tactics (Auftragstaktik), which emphasized flexibility and initiative, and the British Army's reliance on detailed orders and strict adherence to commands. This difference in command styles meant that German forces could often exploit opportunities more rapidly, while British forces maintained tighter control but at the cost of agility.
As we reflect on the events of eighty years ago, it's clear that the lessons learned extend far beyond the realm of military strategy. In any high-stakes endeavour, the ability to communicate effectively - and to adapt when primary methods fail - can mean the difference between success and catastrophic failure. The underutilisation of the Dutch phone system stands as a poignant example of how overlooking available resources can have far-reaching consequences.
The story of Operation Market Garden serves as a stark reminder of the critical role that effective communication plays not just in military operations, but in any complex undertaking. It's a lesson that remains relevant today, in fields ranging from business to disaster response. As we face our own challenges in an increasingly connected world, let's not forget the silent disaster that unfolded in Holland eighty years ago - and the valuable lessons it still has to teach us.
References
1. Middlebrook, M. (1994). Arnhem 1944: The Airborne Battle. Westview Press.
2. Ryan, C. (1974). A Bridge Too Far. Simon & Schuster.
3. Kershaw, R. (1990). It Never Snows in September: The German View of Market-Garden and the Battle of Arnhem, September 1944. Ian Allan Publishing.
4. Buckley, J. (2013). Monty's Men: The British Army and the Liberation of Europe. Yale University Press.
5. Beevor, A. (2018). The Battle of Arnhem: The Deadliest Airborne Operation of World War II. Viking.
6. Powell, G. (1992). The Devil's Birthday: The Bridges to Arnhem 1944. Leo Cooper.
7. Badsey, S. (1993). Arnhem 1944: Operation Market Garden. Osprey Publishing.
8. Hastings, M. (2004). Armageddon: The Battle for Germany, 1944-1945. Alfred A. Knopf.
9. Zaloga, S. J. (2014). Operation Market-Garden 1944 (1): The American Airborne Missions. Osprey Publishing.
10. Clark, L. (2008). Arnhem: Operation Market Garden, September 1944. Sutton Publishing.
11. MacDonald, C. B. (1963). The Siegfried Line Campaign. Center of Military History, United States Army.
12. Bennett, D. (2007). Airborne Communications in Market Garden, September 1944. Canadian Military History, 16(1), 41-42.
13. Greenacre, J. W. (2004). Assessing the Reasons for Failure: 1st British Airborne Division Signal Communications during Operation 'Market Garden'. Defence Studies, 4(3), 283-308. https://www.tandfonline.com/doi/full/10.1080/1470243042000344777#d1e290