
Blog
The Second World War resulted in the deaths of around 85 million people. Additionally, tens of millions more people were displaced. However, amid all the carnage, people demonstrated remarkable courage, fortitude, compassion, mercy and sacrifice. We want to honour and celebrate all of those people. In the War Years Blog, we examine the extraordinary experiences of individual service personnel. We also review military history books, events, and museums. We also look at the history of unique World War II artefacts, medals, and anything else of interest.

Operation Market Garden: Bridges and Cemeteries
Operation Market Garden battlefield tour 2025: From Joe's Bridge to Arnhem, exploring the 64-mile route of Montgomery's ambitious September 1944 plan to end the war by Christmas and its ultimate failure.
In July 2025, I spent four days in a coach full of like-minded individuals as we travelled from Dunkirk to Brussels and then followed the 64-mile route from Joe’s Bridge, Neerpelt, Belgium, to the famous John Frost Bridge at Arnhem, Holland.
Joe’s Bridge was the starting point of our Operation Market Garden tour, just as it had been the start line or centre line of advance for the Guards Armoured Division back in September 1944.
Operation Market Garden promised to end the war by Christmas 1944. Field Marshal Montgomery's audacious plan would drop 35,000 paratroopers (Three airborne divisions: the American 101st Division, the American 82nd Division, and the British 1st Airborne Division) across the Netherlands to capture key bridges. At the same time, British ground forces (30 Corps, spearheaded by the Guards Armoured Division) would advance 64 miles up a single highway, linking up with the airborne forces as they advanced. Furthest north, at the top of what would become known as ‘Hell’s Highway’, was the 1st Airborne Division, dropped and airlanded to the west of Arnhem. The British airborne troops expected to be relieved by the forward elements of 30 Corps within 48 hours of landing. Instead, what unfolded was nine days of desperate fighting that exemplified both the courage of ordinary British soldiers and the brutal, chaotic realities of war.
Joe's Bridge


Our battlefield tour began at Joe's Bridge in Lommel, Belgium, where Lieutenant Colonel John Ormsby Evelyn “J.O.E.” Vandeleur's Irish Guards achieved one of Market Garden's early victories. On 10 September 1944, a full week before the main operation, the 3rd Battalion Irish Guards launched a surprise assault that captured this strategic canal crossing intact.
The German defenders had prepared the wooden pontoon bridge for demolition, with two 88mm anti-tank guns positioned nearby and explosive charges wired for detonation. In his memoir, A Soldier’s Story (1967), J.O.E. Vandeleur recounts what happened:
At Exel, we found an unfinished road running due north to the Escaut Canal. It approached the canal in the shape of a “T”. The left half of the top of the “T” could not be seen from the Escaut Bridge. Halfway down the left half of the “T” stood a tall factory. We hid the head of the column behind the factory and ran upstairs, where we obtained a perfect view of the bridge. Incidentally, a large staff car full of German officers tried to cross us on the way up. We killed them and captured their maps. From the top window of the factory, every detail of the German defences could be clearly seen. At the top left corner of the “T”, there was a ‘jink’ in the road. This ‘jink’ was very important, because it denied the German 88 mm. guns a clear view of us until we were within 100 yards of the bridge. The problem now was, would the Germans blow the bridge or not?
We therefore decided to put it to the test. The plan was a very simple one. David Peel’s squadron was to send one troop of tanks commanded by Duncan Lampard up to the corner of the jink. This was to be accompanied by a platoon of the 3rd Battalion, commanded by John Stanley-Clark. This was to be the assault force with Michael Dudley’s company and the remainder of David Peel’s squadron engaging the enemy with point-blank fire for twenty minutes. It was to be a shooting match of twenty minutes’ duration. If, at the end of the twenty minutes, the bridge had not been blown, John Stanley-Clark and Duncan Lampard were to charge, followed by Hutton (R.E.) and six Guardsmen immediately to remove the explosive charges. We had no artillery support and were fifteen miles north of brigade headquarters, so there was no wireless touch. The signal for the assault was to be a green Very light.
It came off perfectly.
The structure, today known as Joe’s Bridge, was rebuilt after the war. The Irish Guards Memorial is situated on the northern bank and adjacent to Barrier Park.
Advancing up Hell’s Highway


On 17 September 1944, the seven-mile advance from Joe's Bridge to Valkenswaard, became the first test of Operation Market Garden's ambitious timetable.
The Irish Guards faced a brutal tactical reality: advance on a single road through terrain generally unsuitable for tanks. Dense woodland and marshy Dutch polder made deploying tanks off-road extremely difficult, and forced the Irish Guards to advance on a ‘one tank front’. The terrain proved a gift to the German defenders, who prepared a devastating ambush. In just two minutes, nine British Sherman tanks were knocked out.
Once again, J.O.E. Vandeleur describes what happened:
Zero hour was to be at 1435, and the start line was the Escaut Bridge. For this battle, we were supported by 350 guns and eight squadrons of Typhoon fighters of the Royal Air Force, who were to maintain a cab-rank of three aircraft immediately above us, ready to strike. The artillery was to fire a barrage, rolling at a speed of 200 yards a minute. Our tanks were marked with yellow streamers to identify them to the airmen. I was provided with an armoured signal tender for direct communication with the pilots in the sky. We were also given purple smoke shells to fire and identify targets for the airmen.
J.O.E. Vandeleur continues:
At zero hour, Keith Heathcote, commanding the leading tank, gave the order ‘Driver-Advance’ and he drove up to the edge of the barrage. Twenty-five minutes later, the rear half of the leading squadron (Mick O’Cock) and the leading half of No. 2 Squadron were knocked out, leaving Mick isolated and alone on the road. Luckily, Sergeant Cowan knocked out a self-propelled gun which had Mick in its sights. We had an armoured bulldozer high up in the column, ready to push aside knocked-out tanks and to help us cross a ditch just south of Valkenswaard.
No. 2 Squadron then took the lead, and Squadron Sergeant-Major Parkes was immediately killed. Duncan Lampard, who had distinguished himself at the Escaut Bridge, was wounded at the same time. I placed my headquarters behind the 2nd Squadron, which was fortunate on this occasion, as it gave us a ‘cushion’. Previously, we always moved at the tail of the leading squadron. I had a complicated wireless net to deal with. I had to speak to the pilots in the sky, telling them when to come in with their rockets and explaining targets to them. I had to keep my pulse on the artillery plan and call the barrage back when things were going badly. We had to issue orders to both battalions and feed information back. I insisted on the Air Force officer keeping the door of his tender open so that I could speak to him. He had never seen a ground battle before, and the afternoon’s affair must have been an eye-opener for him.
Division asked us how the battle was going. Denis lifted his microphone and merely said ‘Listen’. The noise was as if all hell had been opened; the crash of bursting shells and the screaming of the rockets as they left their cradles in the attacking aircraft.


Walking through Valkenswaard War Cemetery, I found the graves of Squadron Sergeant Major William Parkes and his comrades, men who died in those opening moments of the ground assault. Six unidentified Irish Guards lie within the cemetery. For those unfamiliar with the realities of tank warfare, when a vehicle was hit and caught fire, the crew usually had only seconds to escape the conflagration. Those crewmen who failed to escape were usually burned beyond recognition.
The cemetery, nestled in a pine forest between Valkenswaard and Westerhoven, contains 220 graves. The peaceful setting belies the violence that brought these soldiers to their deaths. Local Dutch families have adopted individual graves through the ‘Foundation Stichting 40-45’ program, decorating headstones and ensuring the soldiers’ sacrifices are not forgotten.
The ambush at Valkenswaard caused the first of many delays in the ‘Garden’ element of the operation. The Guards arrived in town during the evening instead of the planned early afternoon. Had the Irish Guards continued to Eindhoven in darkness, Market Garden’s timetable might have been preserved. Instead, the decision to spend the night in Valkenswaard contributed to delays that ultimately doomed the operation. However, it was a standard operating procedure that tanks ‘harboured’ overnight for maintenance, refuelling and rearming.
According to A History of the Irish Guards in the Second World War (1949), the first day’s fighting cost the 2nd Battalion nine tanks, eight men killed and several wounded. The 3rd Battalion lost seven killed and nineteen wounded. In the little cemetery outside the town are buried S.S.M. Parkes, Lance-Sergeant J. Waters, Guardsmen McD. Ackers, M. Delaney, W. Moore, J. Johnson, N. Malton and T. Watson.
The Day I Met Jackal


Our tour itinerary next took us to the vast German War Cemetery at Ysselsteyn before visiting the impressive Overloon War Museum. Within the museum resides a very special vehicle, an Mk. V Churchill tank of B Squadron, 4th (Tank) Battalion, Coldstream Guards, nicknamed Jackal. The tank was abandoned after hitting a mine during Operation Aintree (Battle of Overloon, 30 September to 18 October 1944). Two of the five crew were killed, Guardsmen Gordon Wright and Robert Silman, who are buried in Overloon War Cemetery, not far from the museum. Bob Dare, the tank’s driver, helped the other two crew members to safety. Bob and Jackal’s story is retold in my book, A History of the Guards Armoured Formations 1941-1945.
The Bridge at Grave


On 17 September, Lieutenant John “Jacko” Thompson of Easy Company, 504th Parachute Infantry Regiment, 82nd Airborne Division achieved one of the operation’s greatest successes when his small group of 16 men captured the strategically vital bridge over the Maas River at Grave. Although his company had been scattered during the parachute drop and landed far from their target, Thompson decided not to wait for reinforcements and immediately stormed the bridge, achieving complete surprise and capturing it undamaged. Thompson was wounded twice during the war and was decorated for his bravery with both the Bronze and Silver Stars. After the war, he returned to a career as a professional baseball player. The bridge remained crucial for Allied logistics throughout the war. In 2004, the crossing was renamed the John S. Thompson Bridge in honour of his decisive leadership and courage.
The Capture of the Nijmegen Road Bridge


For anyone who has seen the film, A Bridge Too Far (1977), you would be forgiven for believing Hollywood star Robert Redford captured the impressive Nijmegen road bridge, almost single-handedly, in the guise of Major Julian Cook. The truth is somewhat different, as any Grenadier Guardsman will happily tell you.
The war diary of the 2nd (Armoured) Battalion, Grenadier Guards for 20 September 1944 recounts the day’s events more prosaically than Director Richard Attenborough’s film:
Plan arranged with AIRBORNE FORCES to clear part of the town near the main road bridge, 1Bn AIRBORNE (AMERICAN) and the Bn Gp. Progress slow but sure and vicinity of bridge eventually reached at 1700 hrs with light casualties mainly through snipers. At 1900 hrs, a Tp of tanks was successfully rushed across the bridge, encountering at least one 88mm and passing through infantry on the far side, losing two tanks, one only temporarily, eventually linking up with AIRBORNE FORCES on the other side. Bridge consolidated by 2200 hrs.
The film is intended as entertainment rather than a historical documentary, so it glosses over the fact that the Americans had not secured either the road or rail crossings at Nijmegen by the time the Guards Armoured Division arrived. As a result, instead of passing over the road bridge and continuing to advance the ten miles to Arnhem, the Guards found themselves embroiled in the intense fighting that was ongoing in the town. In John Frost’s book, A Drop Too Many (1983), he cites the failure to secure the Nijmegen bridge on day one of the operation as perhaps the worst mistake of a tactical plan that was riddled with holes.
Crossing the Waal
The Grenadier Guards’ capture of the bridge required a coordinated attack with American paratroopers in one of the war’s most daring river crossings. Supported by the Irish Guards’ guns, Major Julian Cook’s 3rd Battalion, 504th Parachute Infantry Regiment made a daylight crossing of the 400-yard-wide Waal River in 26 flimsy canvas boats. The first wave suffered over 50 per cent casualties as German machine guns and artillery poured fire into the boats. Major Cook, a devout Catholic, recited “Hail Mary” prayers to encourage his men as they used rifle butts for oars.
Meanwhile, three columns of Grenadier Guards attacked from the south. Lieutenant Colonel Edward Goulburn’s forces coordinated with the Americans in a complex pincer movement. At around 1800 hrs, after the 504th PIR had secured the north end of both bridges, Sergeant Peter Robinson, 2nd Battalion, Grenadier Guards, led four Sherman tanks in a desperate charge across the road bridge. For his bravery, Robinson was awarded the Distinguished Conduct Medal, and, later, a grateful city granted him the Freedom of Nijmegen. Lieutenant Colonel Giles Vandeleur, commanding the 2nd Battalion, Irish Guards, and cousin of J.O.E. Vandeleur, witnessed the ‘Waal Crossing’ and remarked that it was one of the most courageous sights he had ever seen.
Standing on the Nijmegen road bridge today, you can imagine Robinson’s gunner engaging the German 88mm anti-tank gun in a brief but decisive duel. But by the time the bridge was secured, Market Garden was already 36 hours behind schedule. Early the next morning, Lieutenant Colonel John Frost would surrender his hold on the north end of the Arnhem bridge.
Arnhem Oosterbeek Cemetery


On the third day of our tour, we visited some of the Drop Zones and Landing Zones near Arnhem, seeing Ginkel Heath and the memorials there, the Glider Memorial at Wolfheze, and the original Airborne monument at Heelsum. Next, we stopped at the Arnhem Oosterbeek War Cemetery, where the dead from Arnhem are buried.
According to the Commonwealth War Graves Commission website, Arnhem Oosterbeek War Cemetery contains the graves of most of those killed during the September landings, and many of those killed in later fighting in the area.
There are now 1,684 Commonwealth servicemen buried or commemorated in the cemetery. 243 of the burials are unidentified, and special memorials commemorate two casualties. There are also 79 Polish, three Dutch and four non-war (including three former Commission employees) graves in the cemetery.
For Valour
The Victoria Cross (VC) is the highest and most prestigious military decoration awarded to British and Commonwealth personnel for acts of extreme valour. Notably, the cemetery includes the graves of Flight Lieutenant David Lord, Captain Lionel Queripel, and Lieutenant John Grayburn, all of whom were posthumously awarded the Victoria Cross for their bravery during the battle. The cemetery also commemorates Lance Sergeant John Baskeyfield.
While defending the Oosterbeek perimeter three days into the battle, Baskeyfield commanded a pair of anti-tank guns that destroyed several enemy tanks before the crews were killed. Baskeyfield subsequently fired the guns alone before he, too, was killed. His body was not identified after the war, and he has no known grave. The last paragraph of his VC’s citation states:
The superb gallantry of this N.C.O. is beyond praise. During the remaining days at Arnhem, stories of his valour were a constant inspiration to all ranks. He spurned danger, ignored pain and, by his supreme fighting spirit, infected all who witnessed his conduct with the same aggressiveness and dogged devotion to duty which characterised his actions throughout.
Every September, a joint Anglo-Dutch Service of Remembrance is held at the Oosterbeek War Cemetery, where local school children each lay a flower on the grave of a serviceman.
The General is Missing


In the afternoon, we travelled to the Hartenstein Hotel, Airborne Headquarters in 1944. Here we toured the superb museum with its extended displays and life-size recreations of the battle. A handful of us also walked the Oosterbeek defensive perimeter with battlefield guide Andy Ingham. For those not familiar with how the battle unfolded, when the attempt to capture Arnhem Bridge failed, Major General Roy Urquhart, commander of the 1st Airborne Division, ordered his forces into a defensive perimeter around Oosterbeek village, which is located about seven miles west of Arnhem. For six days, the airborne troops held this shrinking perimeter against overwhelming German forces in what became known as “the Cauldron.”
Next, we visited Oosterbeek Church and St Elisabeth’s Hospital. We also walked the nearby streets, retracing the steps taken by the “missing general”. At the start of the Battle of Arnhem, General Urquhart and Brigadier Lathbury went missing for some time. This created a dangerous command vacuum during the critical early stages of the operation, from Monday, 18 September, to the early hours of Tuesday, 19 September. Urquhart left his headquarters and went forward to assess the situation after radio communications failed. Lathbury was wounded, and Urquhart took refuge in the attic of a house near the hospital. As you approach Arnhem from Oosterbeek, the area around the hospital forms a bottleneck with the river and railway lines forming the sides, and where, in 1944, the Germans were quickly able to form blocking lines. The proximity of the railway marshalling yards meant that German reinforcements arriving from the Reich could immediately be fed into the battle. However, John Frost and a composite force of the 2nd and 3rd Parachute Battalions, Reconnaissance and Airborne Engineers made it through to the north end of the Arnhem road bridge before the Germans put a stopper in the bottle.
The John Frost Bridge


Our tour ended at the iconic Arnhem road bridge, or the John Frost Bridge (John Frostbrug) as it is known today. The actual road bridge defended by Frost’s 2nd Parachute Battalion was destroyed by the Allies a month after Operation Market Garden. Initially, the airborne troops held the north end of the bridge into Arnhem town and the surrounding buildings.
For three days and four nights, the lightly equipped airborne troops held off a superior German force that was armed with tanks, heavy artillery, and mortars. Eventually, the defenders' ammunition, food, and water ran low, forcing them to surrender, although some managed to evade capture. Of the 750 men who reached the bridge, 81 were killed, and virtually all the rest were wounded.
In 1977, the bridge was renamed for John Frost, despite his initial reluctance. He felt it was “too much of an honour” since they had lost the battle. Veteran Freddie Gough convinced him the accolade was deserved. Today’s bridge, rebuilt in 1948, closely resembles the original. However, due to urban development in the Arnhem area, the John Frost Bridge was not used in the filming of A Bridge Too Far. The scenes set around the Arnhem bridge were shot in Deventer, northeast of Arnhem.
The Cost of Market Garden


In all, the British 1st Airborne Division took just under 12,000 men into Arnhem. By Monday, 25 September, 1,485 men were dead, and around 6,500 were taken prisoner, and many of them were wounded. The RAF lost 68 aircraft shot down and around 500 aircrew killed. Due to incomplete records, German losses can only be estimated, and numbers vary between 2,500 and 5,000 casualties for the fighting around Arnhem. The evacuation of the Oosterbeek pocket saw 2,398 men escape capture. Around 450 Dutch civilians were also killed during the operation. Another 100,000 Dutch civilians were forcibly evicted from their homes in the Lower Rhine area by the Germans immediately after the fighting concluded. It is estimated that an additional 18,000 Dutch civilians died from malnutrition due to German reprisals, which included cutting the population's rations during what became known as the “Hunger Winter” of 1944/45.
Field Marshal Montgomery claimed that Market Garden was ninety per cent successful. Prince Bernhard of the Netherlands said that his country could ill afford another Montgomery success. In truth, for all the heroics and loss of life, the operation was a strategic failure.
The Irish Guards’ swift capture of Joe’s Bridge, their costly advance along Hell’s Highway, the Grenadier Guards’ seizure of the Nijmegen road bridge, and the doomed but heroic defence at Arnhem represent the finest traditions of British military service.
Final Thoughts
Today, these sites are accessible to anyone seeking to understand pivotal moments in European history. Museums provide context, cemeteries offer reflection, and the surviving bridges and battlefields let visitors walk in the footsteps of a remarkable generation.
The courage of the airborne forces, aircrew, and soldiers of 30 Corps during those nine days in September 1944 deserves to be remembered not just for their tactical achievements but for their embodiment of duty, courage, sacrifice, and camaraderie under the most extreme circumstances.
These historic sites remind us that behind every strategic decision and tactical manoeuvre were ordinary people, many barely out of their teens, who answered their nation’s call and paid the ultimate price in the fight against Nazi tyranny. In visiting these places, we hope to honour their memory and ensure their sacrifices will never be forgotten.
Further Reading
Much ink has been spilt on the subject of Operation Market Garden and the reasons for its failure. Amongst the books I have recently read on the subject are Arnhem by Major General R.E. Urquhart (1958), A Drop Too Many by Major General John Frost (1983), A Tour of the Arnhem Battlefields by John Waddy (1999), Arnhem 1944 by William F. Buckingham (2002), and Arnhem Black Tuesday by Al Murray (2024). I would also recommend It Never Snows in September: The German View of Market-Garden and the Battle of Arnhem September 1944 by Robert Kershaw (2008) and The Last German Victory: Operation Market Garden 1944 by Aaron Bates (2021).
Photographs & Sketches
Items in order of appearance
Gallery 1: Joe’s Bridge
Portrait of Lieutenant Colonel John Ormsby Evelyn “J.O.E.” Vandeleur, Irish Guards.
A Sherman tank of the 2nd (Armoured) Battalion Irish Guards, Guards Armoured Division, crossing the Meuse-Escaut Canal, Neerpelt, during Operation Market Garden, September 1944. George Rodger, Photographer, LIFE Magazine Archives.
Joe’s Bridge, July 20215, by the author.
Irish Guards Group memorial, Joe’s Bridge, July 2025, by the author.
Gallery 2: Hell’s Highway
IWM (Imperial War Museum), BU 925, Sherman tanks of the Irish Guards Group advance past others which were knocked out earlier during Operation 'Market-Garden', 17 September 1944.
IWM, BU 926, A Sherman Firefly tank of the Irish Guards Group advances past Sherman tanks knocked out earlier during Operation 'Market-Garden', 17 September 1944.
Guardsman William Gill Moore died during the ambush of this tank. The Sherman commanded by Lance Sergeant Dave Roper was struck by a Panzerfaust on 17th September 1944 during Operation Market Garden. Copyright “De bevrijding in Beeld" / "Vantilt fragma”.
IWM, BU 927, Squadron Sergeant Major William John Parkes of No. 3 Squadron, 2nd Irish Guards, killed when his Sherman tank was knocked out during the advance towards Eindhoven as part of Operation Market Garden. Photo taken on 17th September 1944 by Sergeant Carpenter, No. 5 Army Film and Photographic Unit.
Front page of The Illustrated London News of September 30, 1944. The village square of Valkenswaard, Sherman tank, “Snow White”, Brigade HQ, 5th Guards (Armoured) Brigade. Nationaal Archief (National Archives of the Netherlands).
Gallery 3: Valkenswaard War Cemetery
Headstones:
Guardsman W. Ackers, Irish Guards
Guardsman, Michael Dee, Irish Guards
L. Cpl. M.J. Delaney, Irish Guards
Squadron Sergeant Major (SSM) William John Parkes, Irish Guards
L. Sgt. John Watters, Irish Guards
Unidentified Irish Guardsman, known only to God.
Irish Guardsmen, Valkenswaard War Cemetery, all photographs by the author.
Gallery 4: Jackal
IWM, B 10809, A Churchill tank of 6th Guards Tank Brigade supporting infantry of 3rd Division attacking Overloon in the Netherlands, 14 October 1944.
IWM, BU 1232, Churchill tanks of the 6th Guards Tank Brigade lay a smokescreen during the advance on Venraij, 17 October 1944.
Charlie Trumpess with Mk. V Churchill tank of B Squadron, 4th (Tank) Battalion, Coldstream Guards, 6th Guards (Tank) Brigade, named Jackal, Overloon War Museum, July 2025, by the author.
British Churchill tank named Jackal formed part of the staff platoon, 2nd Squadron, 4th Battalion, Coldstream Guards, 6th Guards Tank Brigade that supported the infantry attack on Overloon – by the author.
Gallery 5: Grave
VIRIN: 440917-A-ZZ999-791, U.S. Department of War, US Army paratroopers are dropped near Grave, Netherlands, while livestock graze near gliders that landed earlier. Operation Market Garden.
John S. Thompsonbrug over the river Maas at Grave, July 2025, by the author.
Sketch of the Grave Bridge, September 1944, Sergeant Charles Murrell, Welsh Guards. Courtesy of the Welsh Guards.
Cyclists on the John S. Thompsonbrug over the Maas River at Grave, by Havang(nl).
The 82nd Airborne Memorial, beside the John S. Thompson bridge over the Maas River between Grave and Nederasselt, Netherlands, July 2025, by the author.
Gallery 6: Nijmegen Bridge
Cromwell tank of the Welsh Guards, Guard Armoured Division passes the "Schoonoord" corn mill in Alverna, Wijchen municipality near Nijmegen during Operation Market Garden. Nationaal Archief (National Archives of the Netherlands).
American paratroopers advance while being attacked by German anti-aircraft fire. According to the caption, the location is Arnhem, but it is more likely Nijmegen. The photograph is dated 10 September 1944, which must be a mistake. The picture is attributed to the US Army Signal Corps. Nationaal Archief (National Archives of the Netherlands).
IWM, EA 44531, tanks of the 2nd (Armoured) Battalion, Irish Guards, Guards Armoured Division, British XXX Corps cross the road bridge at Nijmegen during its capture. Operation Market Garden.
Battalion crosses the Nijmegen Bridge, 22nd September 1944, sketch by Sergeant Charles Murrell, Welsh Guards. Courtesy of the Welsh Guards.
Two sketches of the Nijmegen Bridge or Grenadiers Bridge by Sergeant Charles Murrell, Welsh Guards, 3rd November 1944. Courtesy of the Welsh Guards.
The Waalbrug or Nijmegen Road Bridge over the River Waal, July 2025, by the author.
Gallery 7: Arnhem Oosterbeek War Cemetery
The memorial on Ginkel Heath, Drop zone “Y”, where the 4th Para Brigade landed on Monday, 18th September 1944, during Operation Market Garden, by the author.
Gravestones of the fallen, Arnhem Oosterbeek War Cemetery, by the author.
In the centre of the photograph, Lt. Col. Sir William Richard De B. Des Voeux, BT, Grenadier Guards, 156th Battalion, 4th Para Brigade. Household Brigade Lodge No 2614 website.
The gravestone of Lt. Col. Sir William Richard De B. Des Voeux, BT, Grenadier Guards, 156th Battalion, 4th Para Brigade, by the author.
John "Jack" Grayburn was posthumously awarded the Victoria Cross for his actions with the 2nd Parachute Battalion at the Arnhem Bridge.
The gravestone of Lieutenant J.H. " Jack" Grayburn, VC, Parachute Regiment, Army Air Corps, by the author.
Lance Sergeant John Daniel Baskeyfield, VC. Gun Commander, 2 Anti-Tank Platoon, Support Company, 2nd (Airborne) Battalion, South Staffordshire Regiment, Battle of Arnhem. His body was never identified. Digitally enhanced portrait by the author.
Gallery 8: The General is Missing
IWM, BU 1136, Major-General Roy Urquhart DSO and Bar, commander of the British 1st Airborne Division during Operation Market Garden, plants the Airborne flag outside his headquarters (Hotel Hartenstein). By Smith, D M (Sgt), Army Film and Photographic Unit.
Rear of the Airborne Museum Hartenstein, Oosterbeek, July 2025, by the author.
A diorama of the 1st Airborne Division HQ and signals featuring a depiction of Major-General Roy Urquhart, Airborne Museum Hartenstein, Oosterbeek, July 2025, by the author.
Original wallpaper from the battle for Arnhem, inscribed “Never Surrender, Fuck the Gerry’s, 1st Airborne Division” and showing a tally of German soldiers killed. The photo also shows a No. 4 Lee Enfield rifle with a telescopic sight. Airborne Museum Hartenstein, Oosterbeek, by the author.
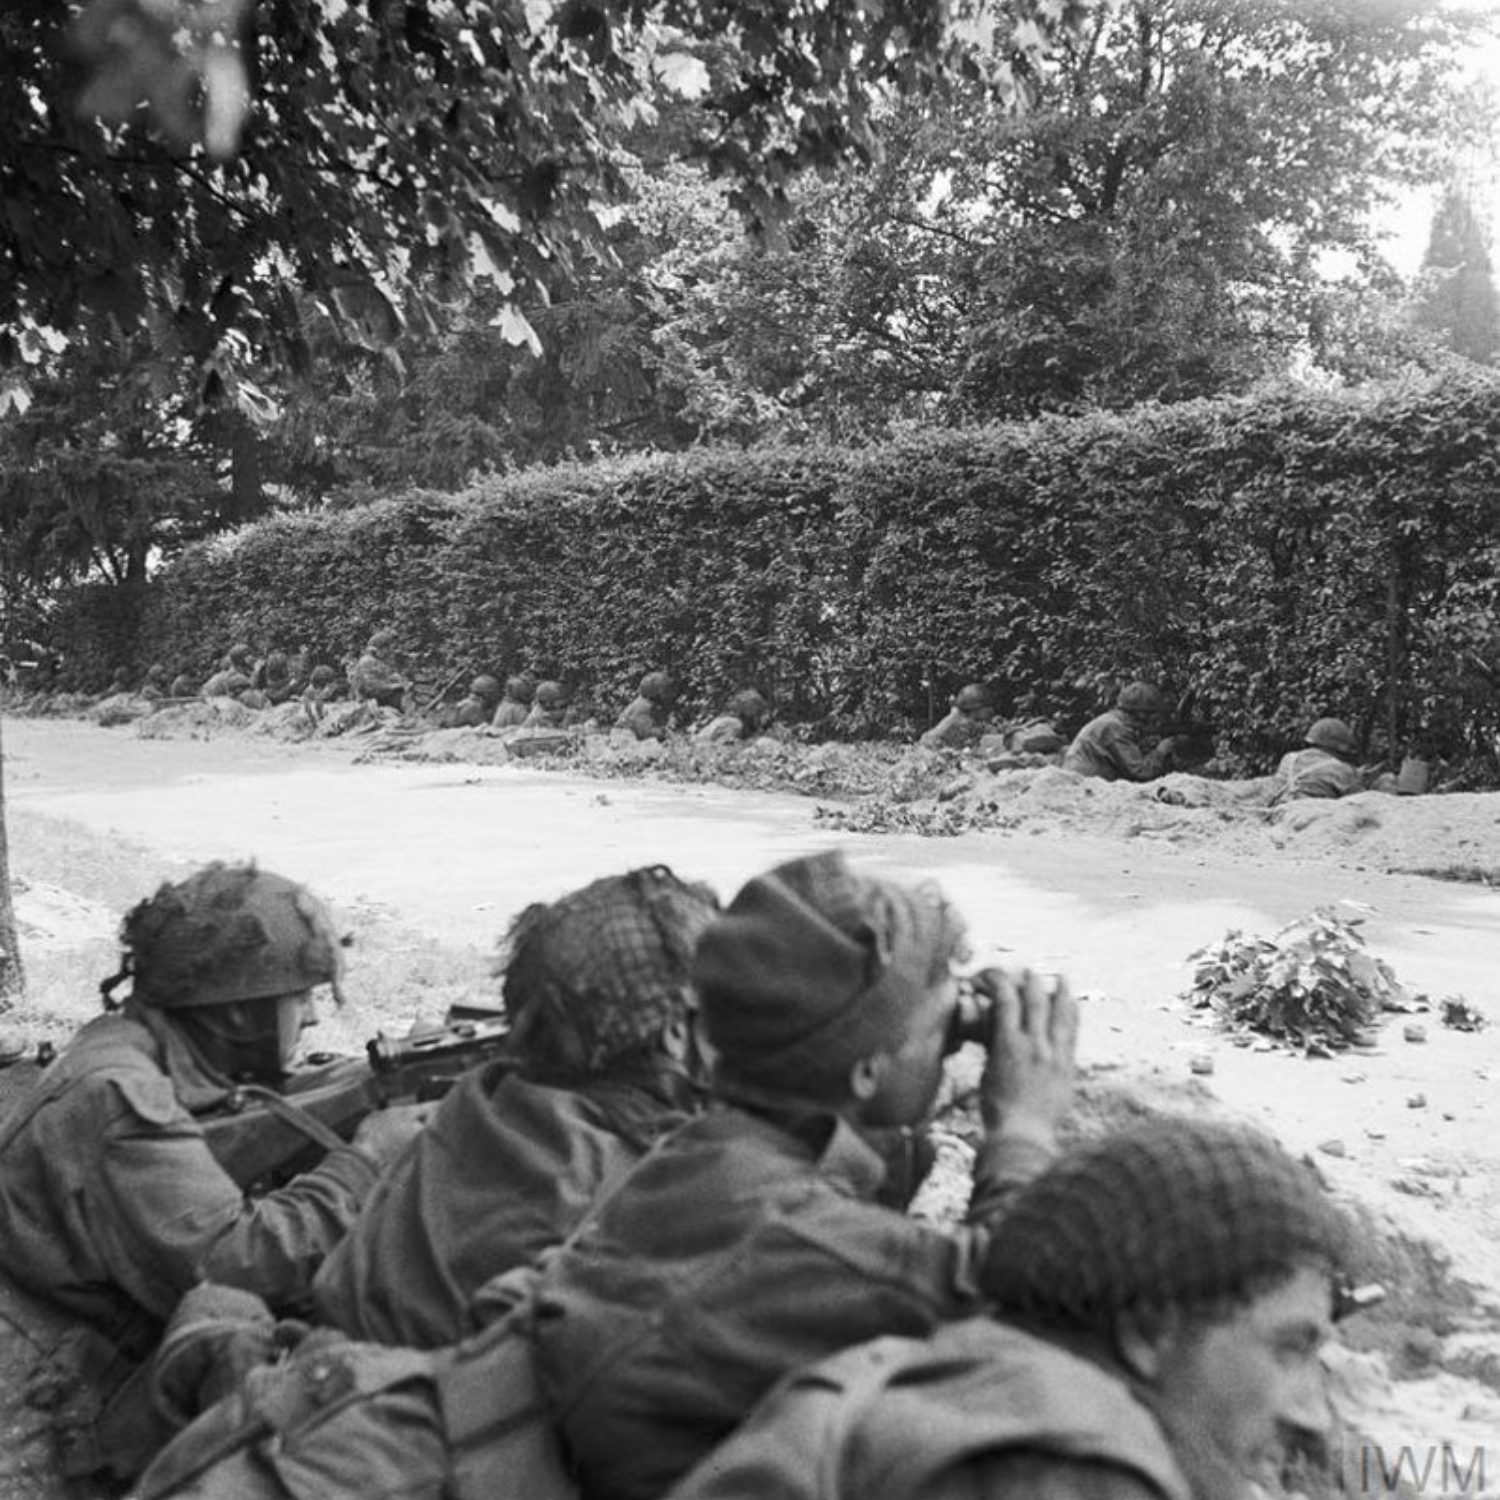
IWM, British paratroopers prepare for yet another attack on the Oosterbeek Perimeter.
Photo of a 3-inch mortar team, 1st Borders, defending the Oosterbeek perimeter, 200m from the Hartenstein Hotel (photo taken on the spot where the original was taken), by the author.
The ter Horst family home, which served as a Regimental Aid Post, inset, a picture of Kate ter Horst and her MBE medal, Oosterbeek. Known to the British as the “Angel of Arnhem”, she famously tended to hundreds of wounded and dying airborne troops during the Battle of Arnhem. By the author.
The Old Church (Oude Kerk) in Oosterbeek dates back to the 10th Century and is possibly the oldest church in the Netherlands. As the Oosterbeek Perimeter shrank, the church became a stronghold for the airborne troops, by the author.
A view of the Arnhem railway bridge from the rear of the Old Church, July 2025, by the author.
Our tour group outside the former St Elizabeth Hospital in Arnhem. The site was used as a military hospital by both sides during the fighting. Famously, Major-General Urquhart became trapped in the attic of No. 14 Zwarteweg, which is located to the rear of the hospital. Our battlefield guide, Andy Ingham, took the photo in July 2025.
Gallery 9: The John Frost Bridge
Girders, the John Frost Bridge, July 2025, by the author.
IWM, MH 2061, aerial view of the bridge over the Neder Rijn, Arnhem; British troops and destroyed German armoured vehicles are visible at the north end of the bridge.
Lieutenant Colonel John Frost led the 2nd Parachute Battalion to capture the northern end of the Arnhem Bridge and was later promoted to the rank of Major General.
IWM, HU 2127, the Arnhem Bridge after Frost's force had been overrun and the road cleared. Notice the destroyed buildings on the right.
Photo of the steps leading down to the riverbank, the north end of the Arnhem road bridge. Battlefield guide, Andy Ingham, holds a picture taken from precisely the same spot after the battle, showing the surrounding devastation. By the author.
Arnhem. War damage 1944/1945. View from the Sabelspoort towards the Grote Kerk (Great Church), 1945, Nationaal Archief (National Archives of the Netherlands).
The destroyed Rhine bridge (Arnhem road bridge) is seen from under the nearby temporary Bailey bridge, 1945, Nationaal Archief (National Archives of the Netherlands).
On 7 October, the Arnhem bridge was bombed and destroyed by B-26 Marauders of the 344th Bomb Group, USAAF. The buildings of Arnhem were bombarded by the Allies over the next few months and suffered further during the Liberation of Arnhem in April 1945.
Aerial view of the devastation in Arnhem's city centre. Above, the Rhine Bridge is under construction; the temporary Bailey Bridge has already been removed. To the left of the church is the town hall, partially preserved, 1946, Nationaal Archief (National Archives of the Netherlands).
The John Frost Bridge from the north bank of the lower Rhine, July 2025, by the author.
Charlie Trumpess standing on the north ramp of the John Frost Bridge, Arnhem, July 2025.
The Bridge, July 2025, by the author.
Gallery 10: The Cost of Market Garden
The temporary graves of two British paratroopers at a kilometre marker with the inscription “Arnhem 6”, 1945, Nationaal Archief (National Archives of the Netherlands).
Commemoration on 17 September at the Airborne Cemetery in Oosterbeek. The graves of the British paratroopers who fell in September 1944 are being specially cared for by Oosterbeek schoolchildren, 15 September 1955, Nationaal Archief (National Archives of the Netherlands).
Since the end of the war, school children in Oosterbeek, specifically primary school children, have participated in what has become an annual tradition of laying flowers at the Arnhem Oosterbeek War Cemetery to honour the heroes of the Battle of Arnhem.
References
Airborne Assault: ParaData - A living history of The Parachute Regiment and Airborne Forces
J.O.E. Vandeleur, A Soldier's Story, privately printed for the author by Gale & Polden, 1967
Major D.J.L. Fitzgerald, History of the Irish Guards In the Second World War, published by Aldershot Gale and Polden Ltd, 1949
National Army Museum, Archive Reference, 2016-10-23-76, Papers of Lt Col Sir James Newton Rodney Moore, War Diary, 2nd (Armoured) Bn Grenadier Guards, 20 September 1944
Major General John Frost, A Drop Too Many, published by Pen & Sword Military, Kindle Edition, 2019
Commonwealth War Graves Commission, 2024, A Visitor's Guide to the Best Arnhem WW2 Sites, URL: https://www.cwgc.org/our-work/blog/a-visitors-guide-to-the-best-arnhem-ww2-sites/, Accessed 15 August 2025
Cornelius Ryan Collection of World War II Papers (Digital), Cornelius Ryan WWII papers, box 115, folder 36: Giles A. Vandeleur, page. 2
Commonwealth War Graves Commission, 2023, Lance Serjeant John Daniel Baskeyfield VC, URL: https://www.cwgc.org/stories/stories/lance-serjeant-john-daniel-baskeyfield-vc/, Accessed 16 August 2025
Imperial War Museum, The Story Of Operation 'Market Garden' In Photos, URL: https://www.iwm.org.uk/history/the-story-of-operation-market-garden-in-photos, Accessed 19 August 2025
WartimeNI, Scott Edgar, Operation Market Garden: A Bridge Too Far, URL: https://archives.wartimeni.com/article/operation-market-garden-a-bridge-too-far/, Accessed 12 September 2025

The British Army’s Occupation of Northwest Germany after May 1945
In this article, we will focus on the British occupation of Germany after May 1945, the British Army's occupation of West Berlin, the Victory Parade of July 1945, and relations with the Soviets.
After the defeat of Nazi Germany in May 1945, the victorious Allied powers divided the country into four occupation zones, each controlled by one of the four occupying powers - the United States, Great Britain, France, and the Soviet Union. This division of Germany would mark the beginning of a new era for the country, as it faced a long and difficult process of reconstruction and democratization. In this article, we will focus on the British occupation of Germany after May 1945, the British Army's occupation of West Berlin, the Victory Parade of July 1945, and relations with the Soviets.
The British Occupation of Germany after May 1945
On 25 August 1945, Field Marshal Montgomery's 21st Army Group was renamed the British Army of the Rhine (BAOR). It was responsible for the occupation and administration of the British Zone in northwest Germany, including the cities of Hamburg and Bremen, assisted by the Control Commission Germany (CCG). The CCG took over aspects of local government, policing, housing and transport.
Their primary objective was to demilitarize and disarm the defeated German forces, as well as to dismantle the Nazi regime and bring war criminals to justice. The British forces, under the command of Field Marshal Bernard Montgomery, faced a daunting task, as Germany was in a state of complete chaos and disarray.

One of the first challenges the British faced was dealing with the large numbers of displaced persons, refugees, and prisoners of war. The British Army, along with other Allied powers, established numerous displaced persons camps and worked to repatriate prisoners of war and refugees to their home countries. The British also faced the challenge of providing food and shelter to the German population, which was suffering from severe shortages of basic necessities such as food, fuel, and medicine. The BAOR mobilised former enemy soldiers into the German Civil Labour Organisation (GCLO), providing paid work and accommodation for over 50,000 Germans by late 1947.
The BAOR was also responsible for pursuing suspected war criminals in its zone of occupation. It established the British Army War Crimes Investigation Teams (WCIT) and was assisted by other units, including the Special Air Service (SAS). The most famous Nazi caught by the British was Heinrich Himmler, chief of the SS and one of the main architects of the Holocaust. He was arrested at a checkpoint and taken to an interrogation camp near Lüneburg. However, Himmler was able to escape prosecution for his crimes by committing suicide with a concealed cyanide pill. Political support for war crimes prosecutions soon declined as relations with the Soviet Union deteriorated. It soon became a political necessity for the Western powers to make friends with the Germans rather than prosecute them.
The British Sector of Berlin 1945
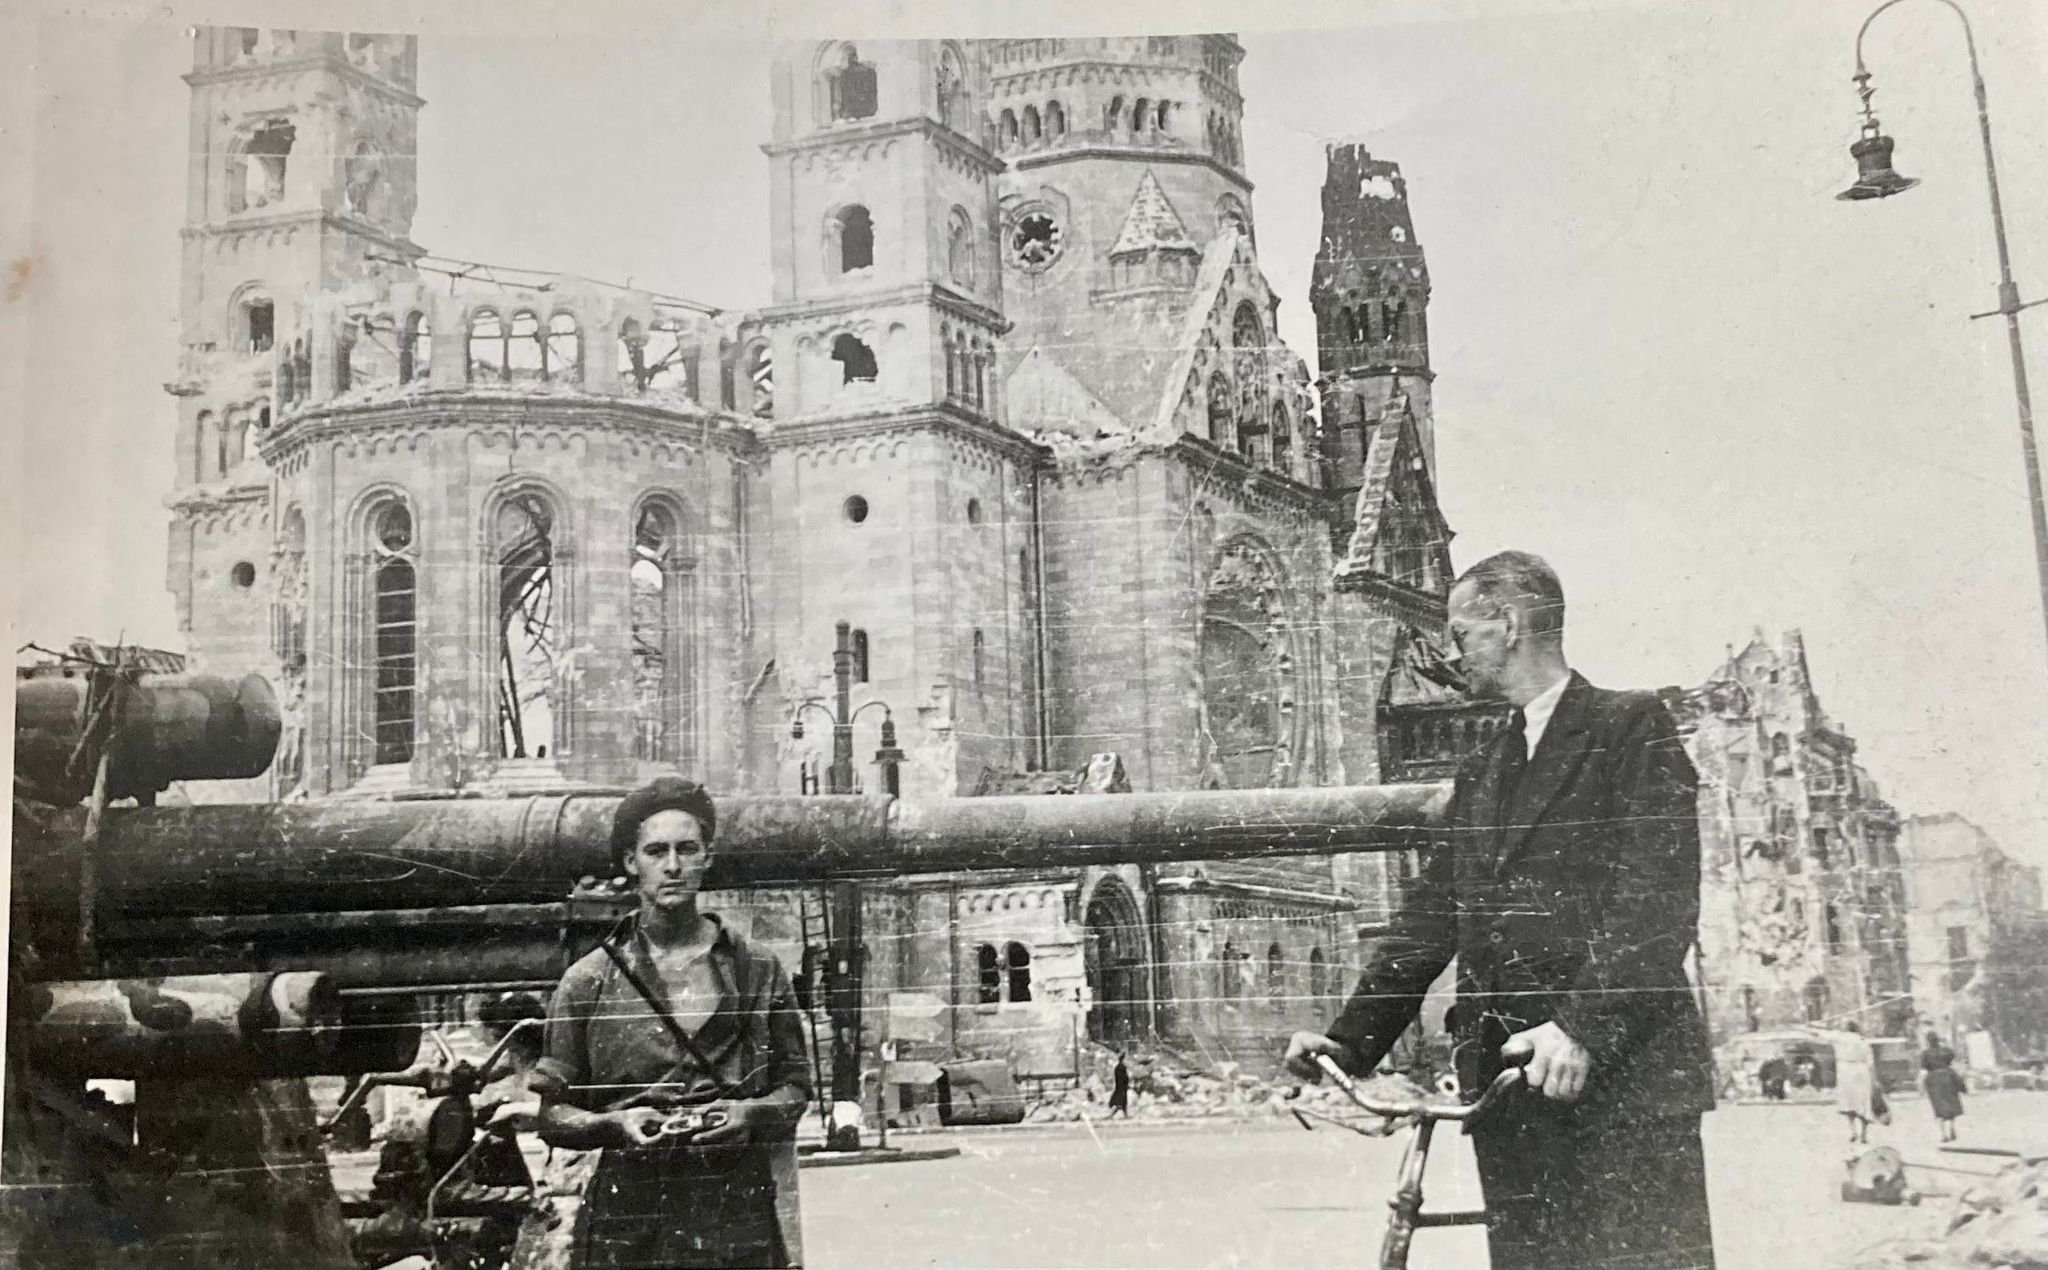
The British Army's occupation of the British sector of Berlin in 1945 was a key moment in the post-war history of Germany. Berlin, which was located deep within the Soviet-occupied zone of Germany, was divided into four sectors, with the Soviet Union, the United States, Great Britain, and France each controlling a sector. The British sector was in the western part of the city.
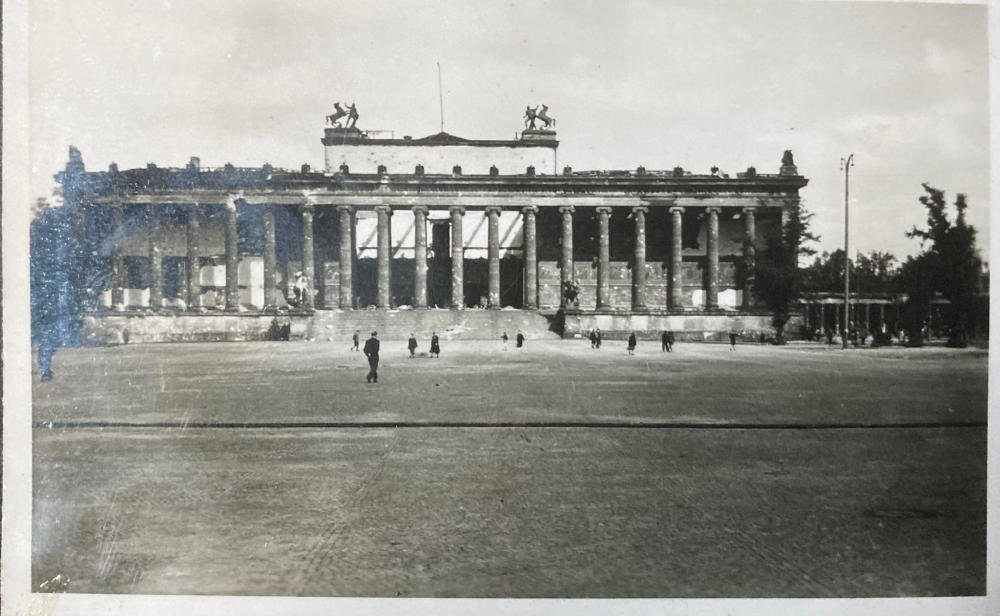
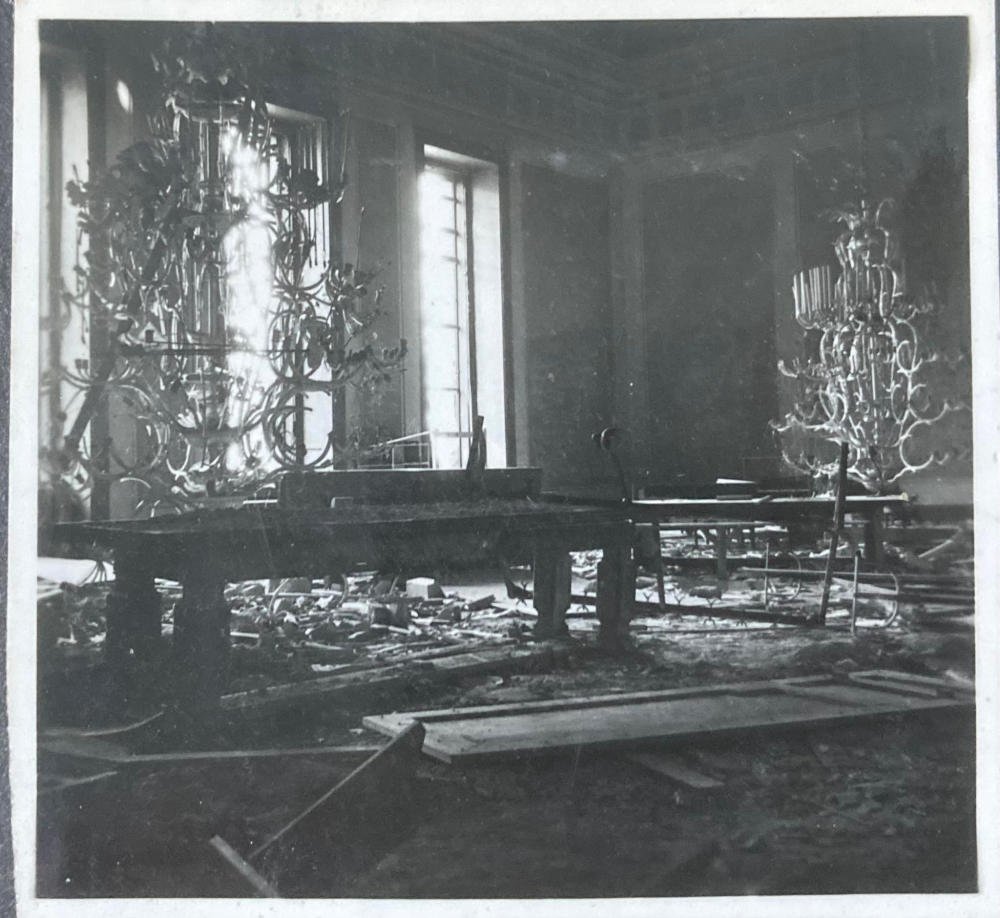
The British Army faced numerous challenges in the occupation of Berlin. The city had been heavily bombed during the war, and many buildings were in ruins. The British Army worked to rebuild the city's infrastructure and provide basic services such as water, electricity, and sanitation.
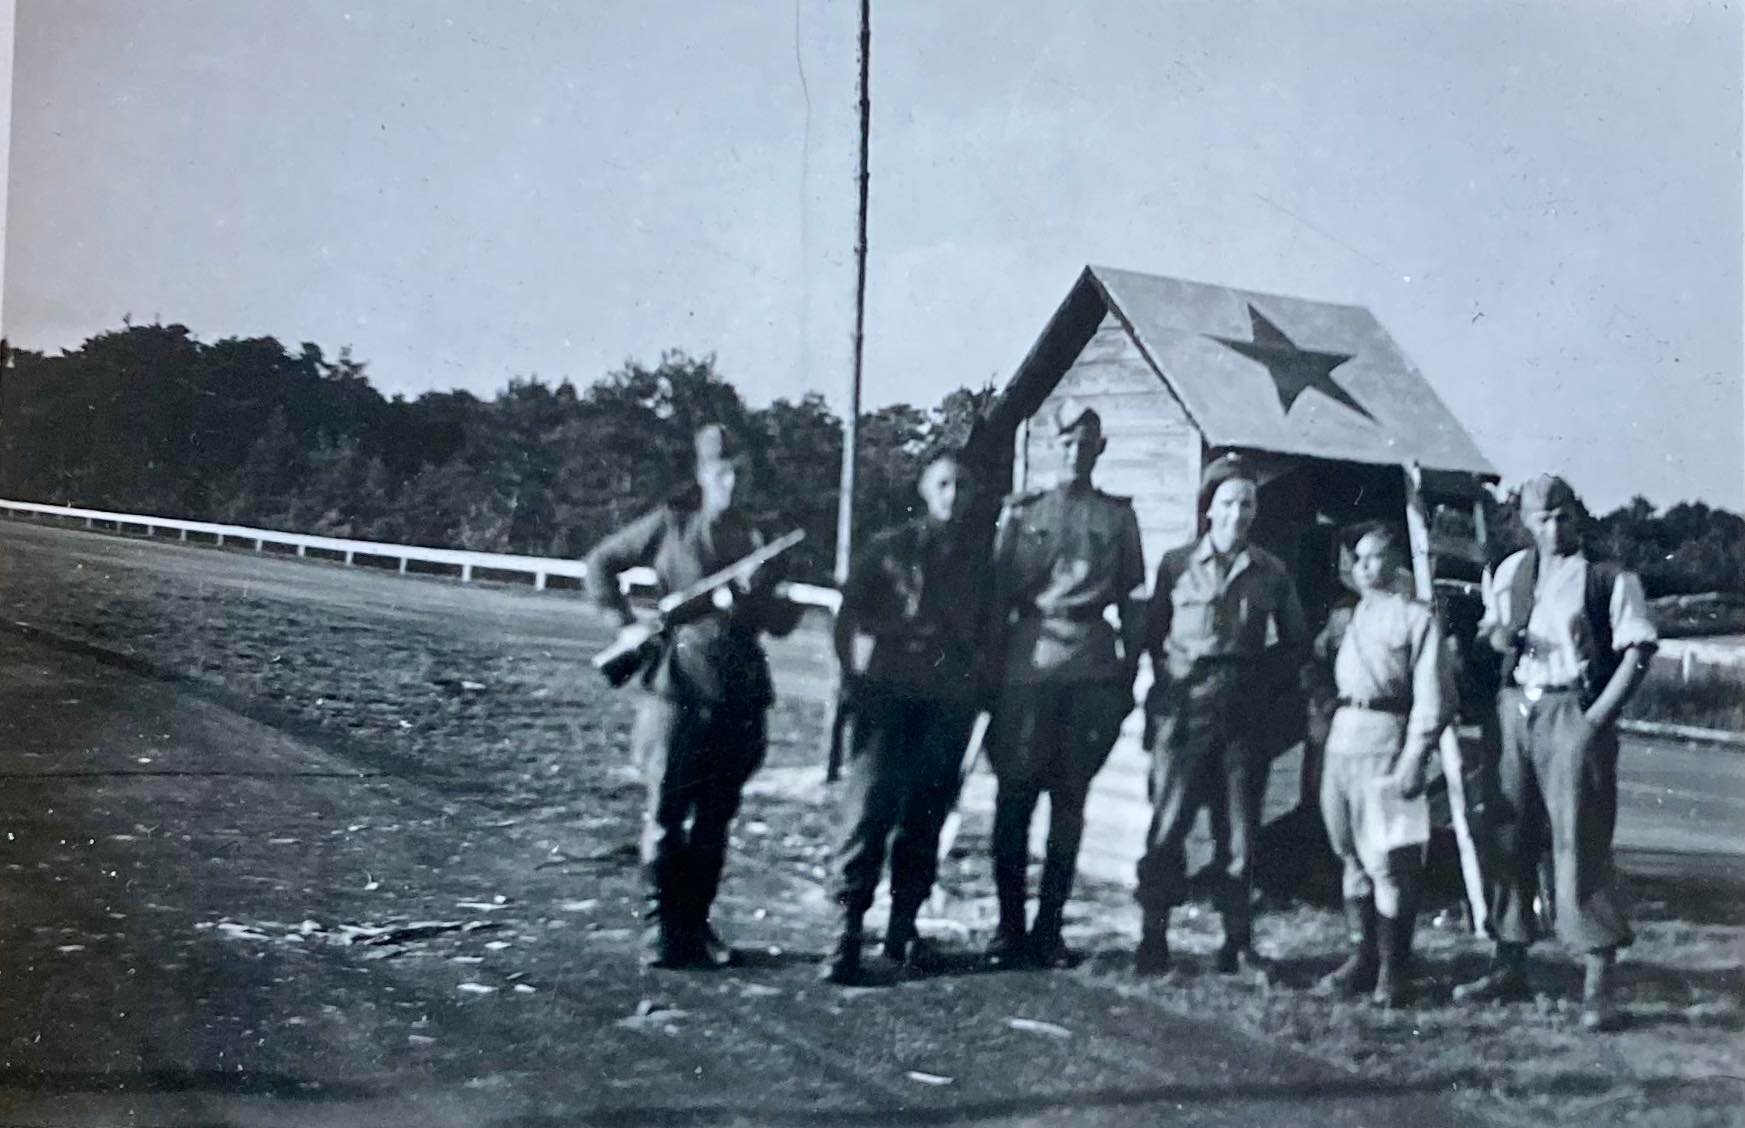
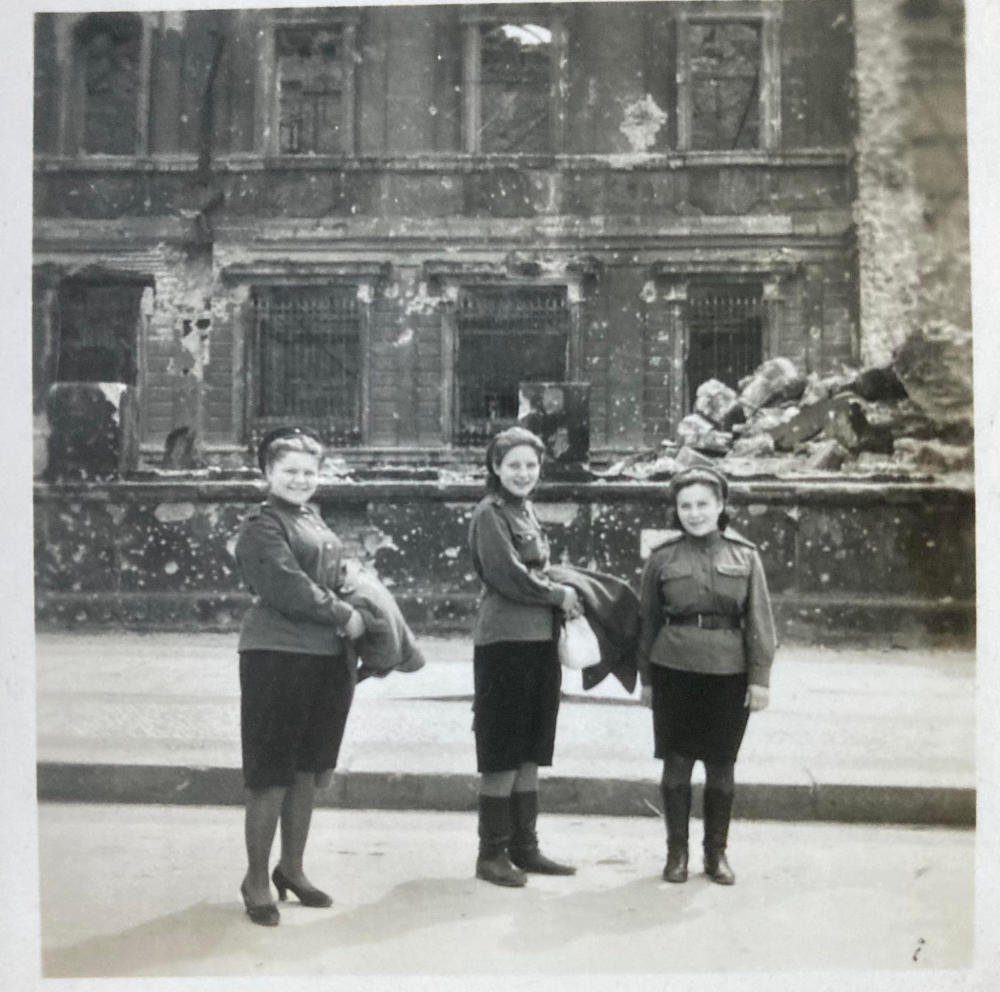
Another major challenge faced by the British Army was dealing with the Soviet Red Army, which was stationed in and around Berlin. The relationship between the British and the Soviets was strained, with tensions running high over issues such as the repatriation of Soviet prisoners of war and the control of Berlin. The British Army, along with the other Allied powers, worked to maintain a delicate balance of power in the city, while also providing security and maintaining order.
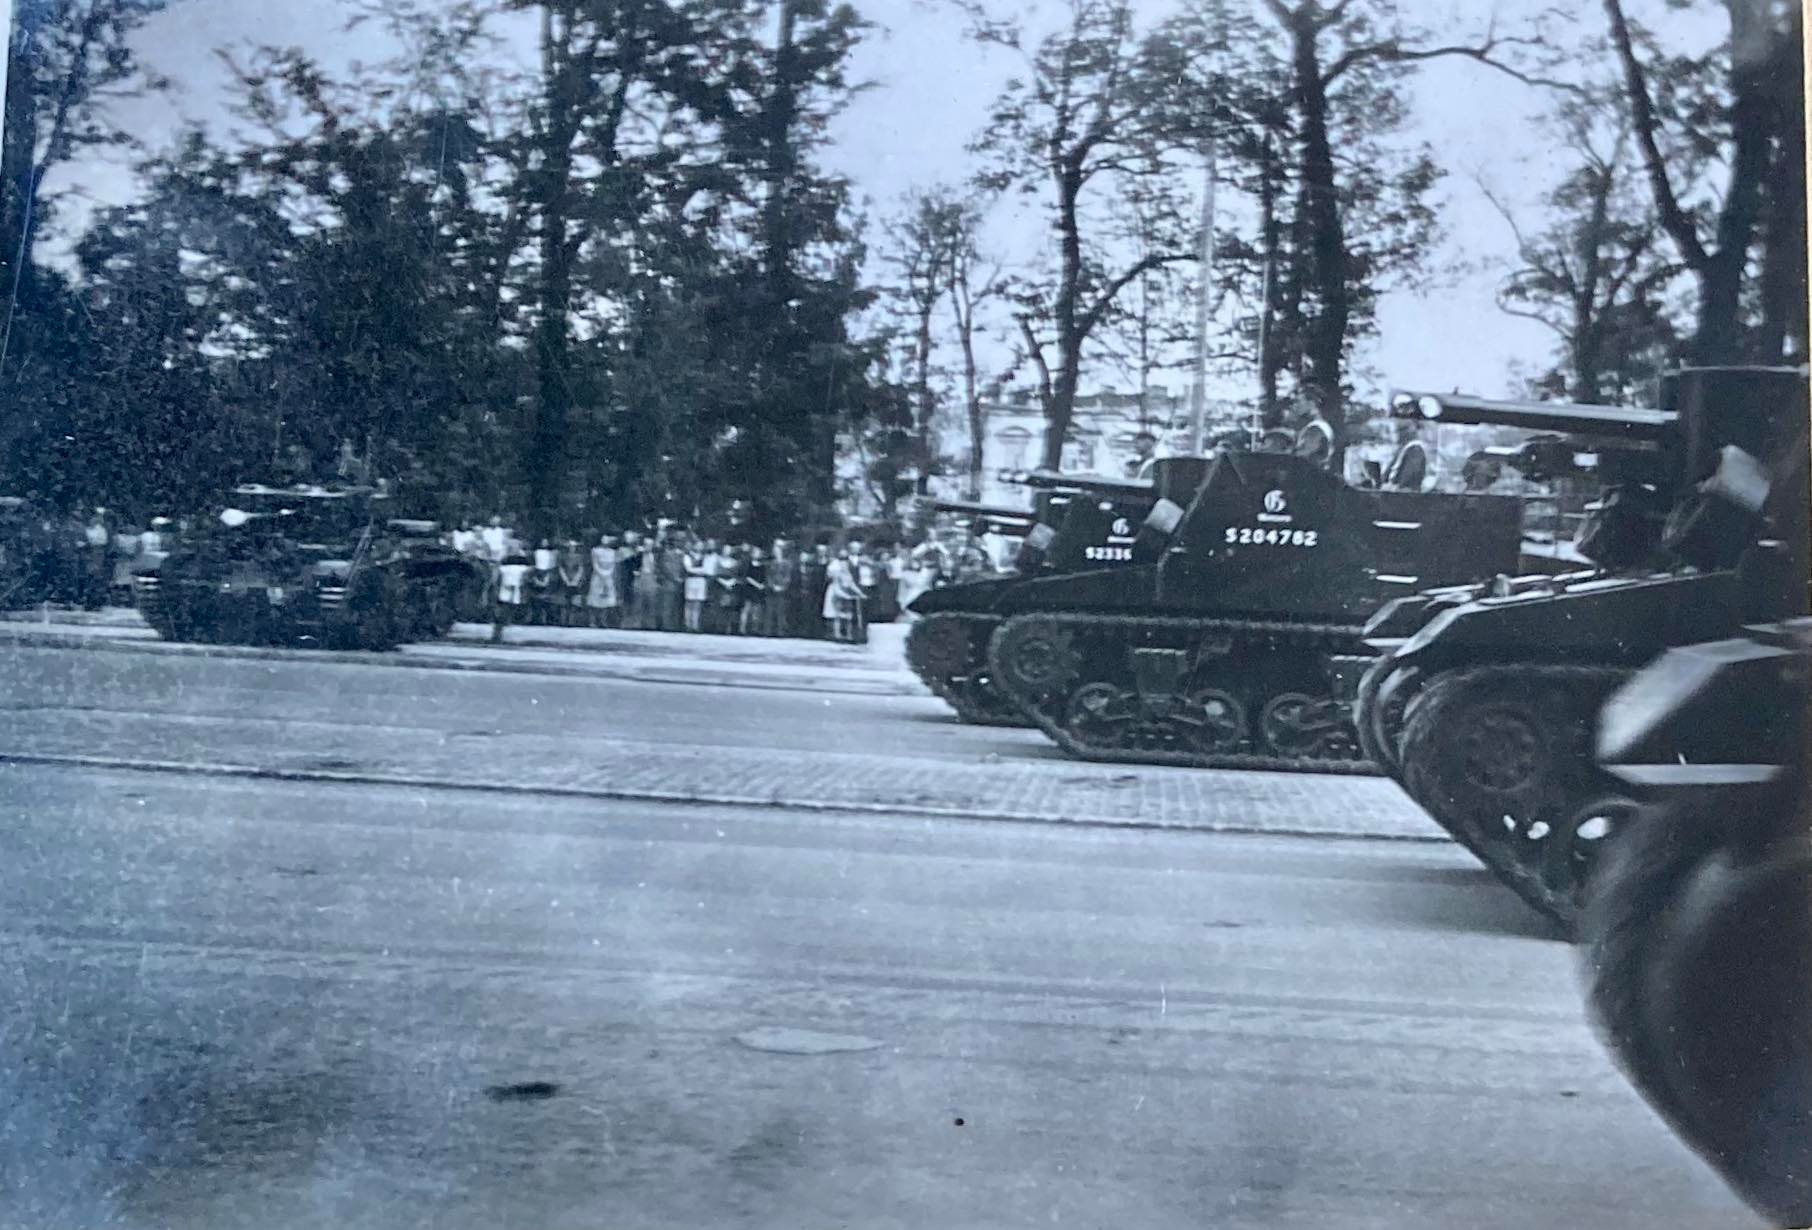
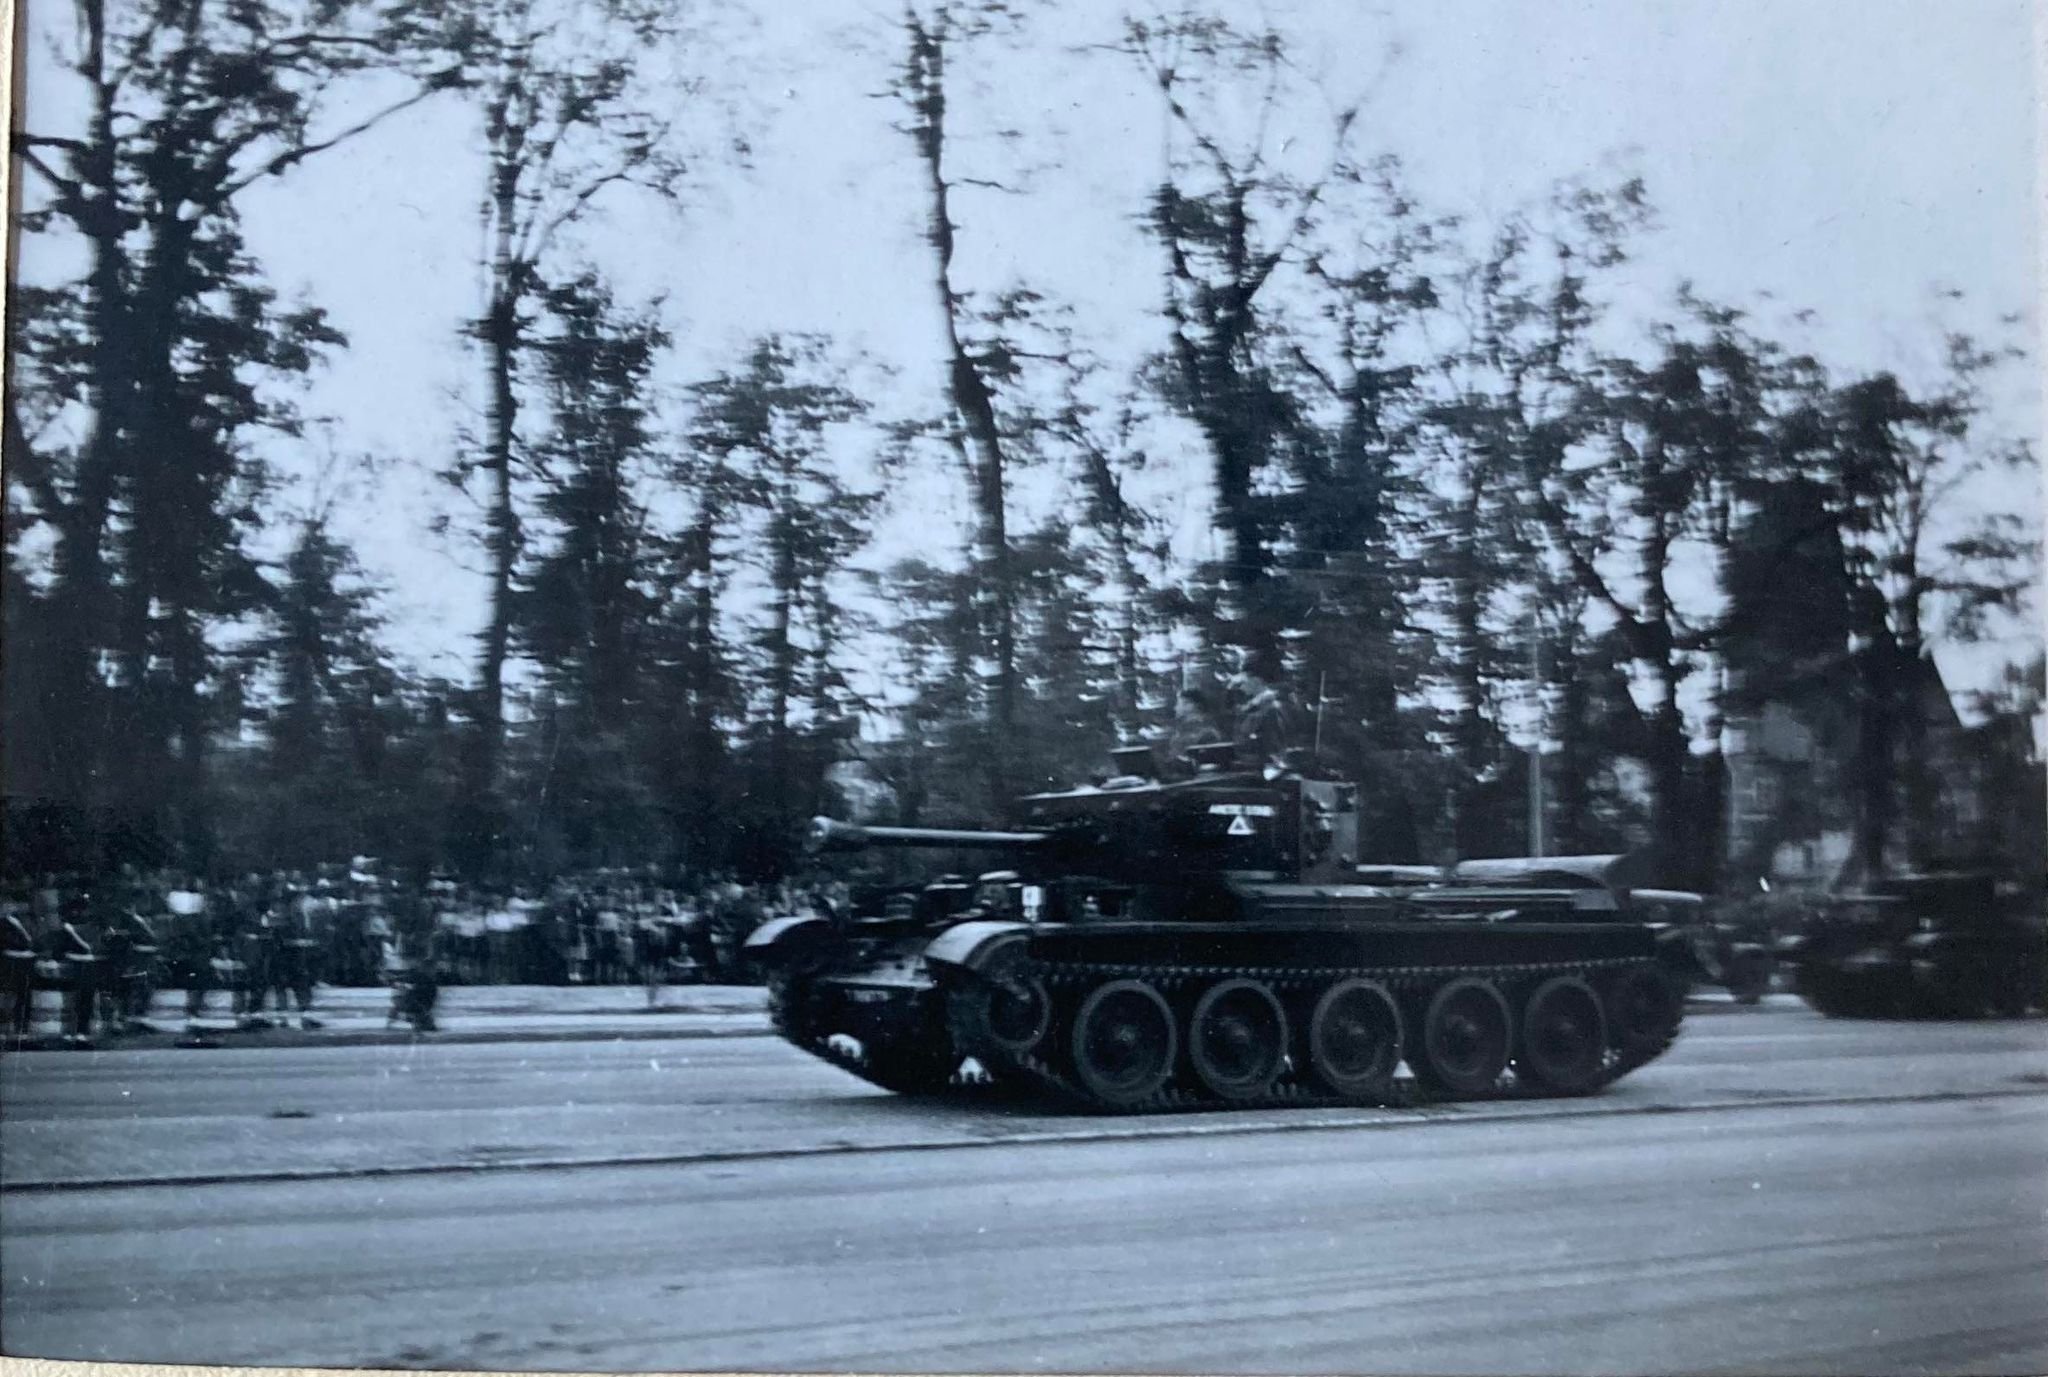
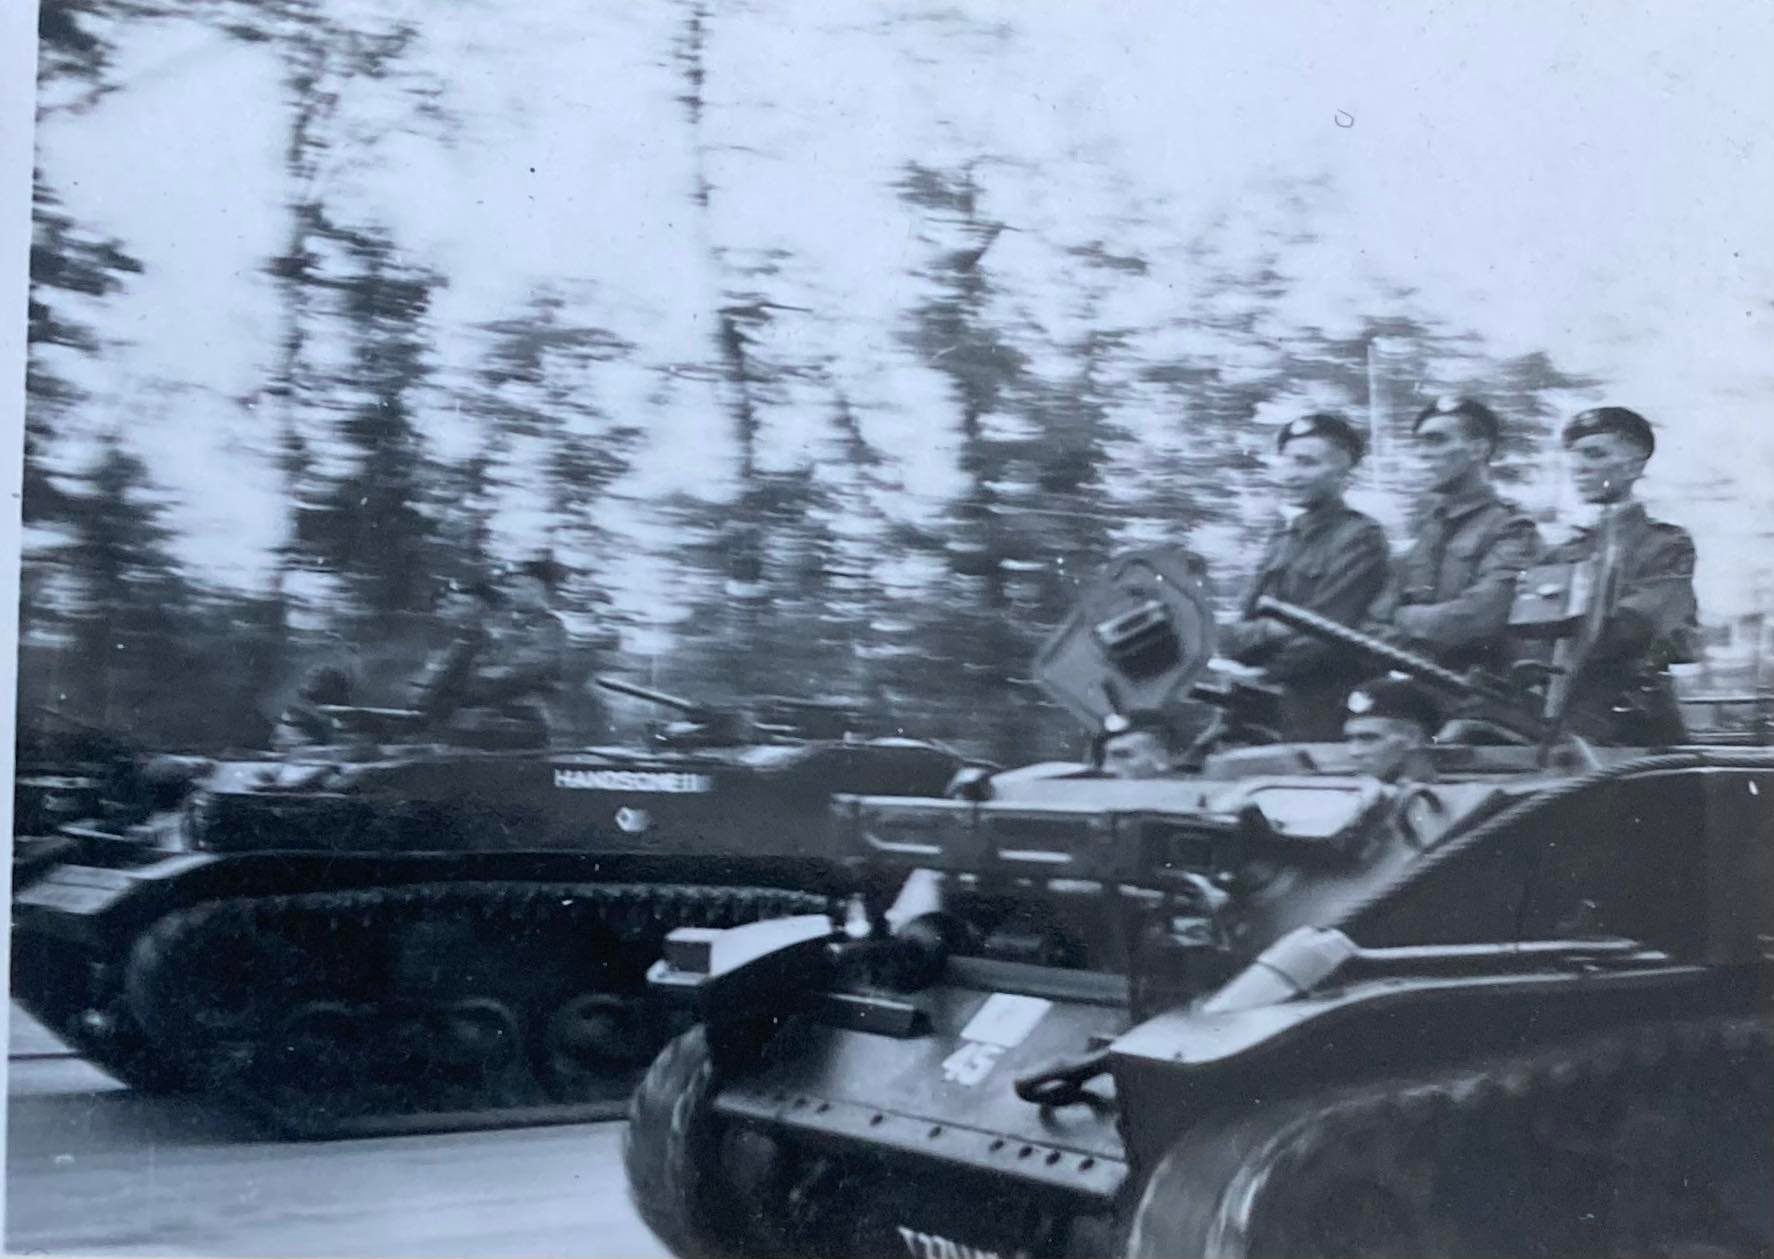
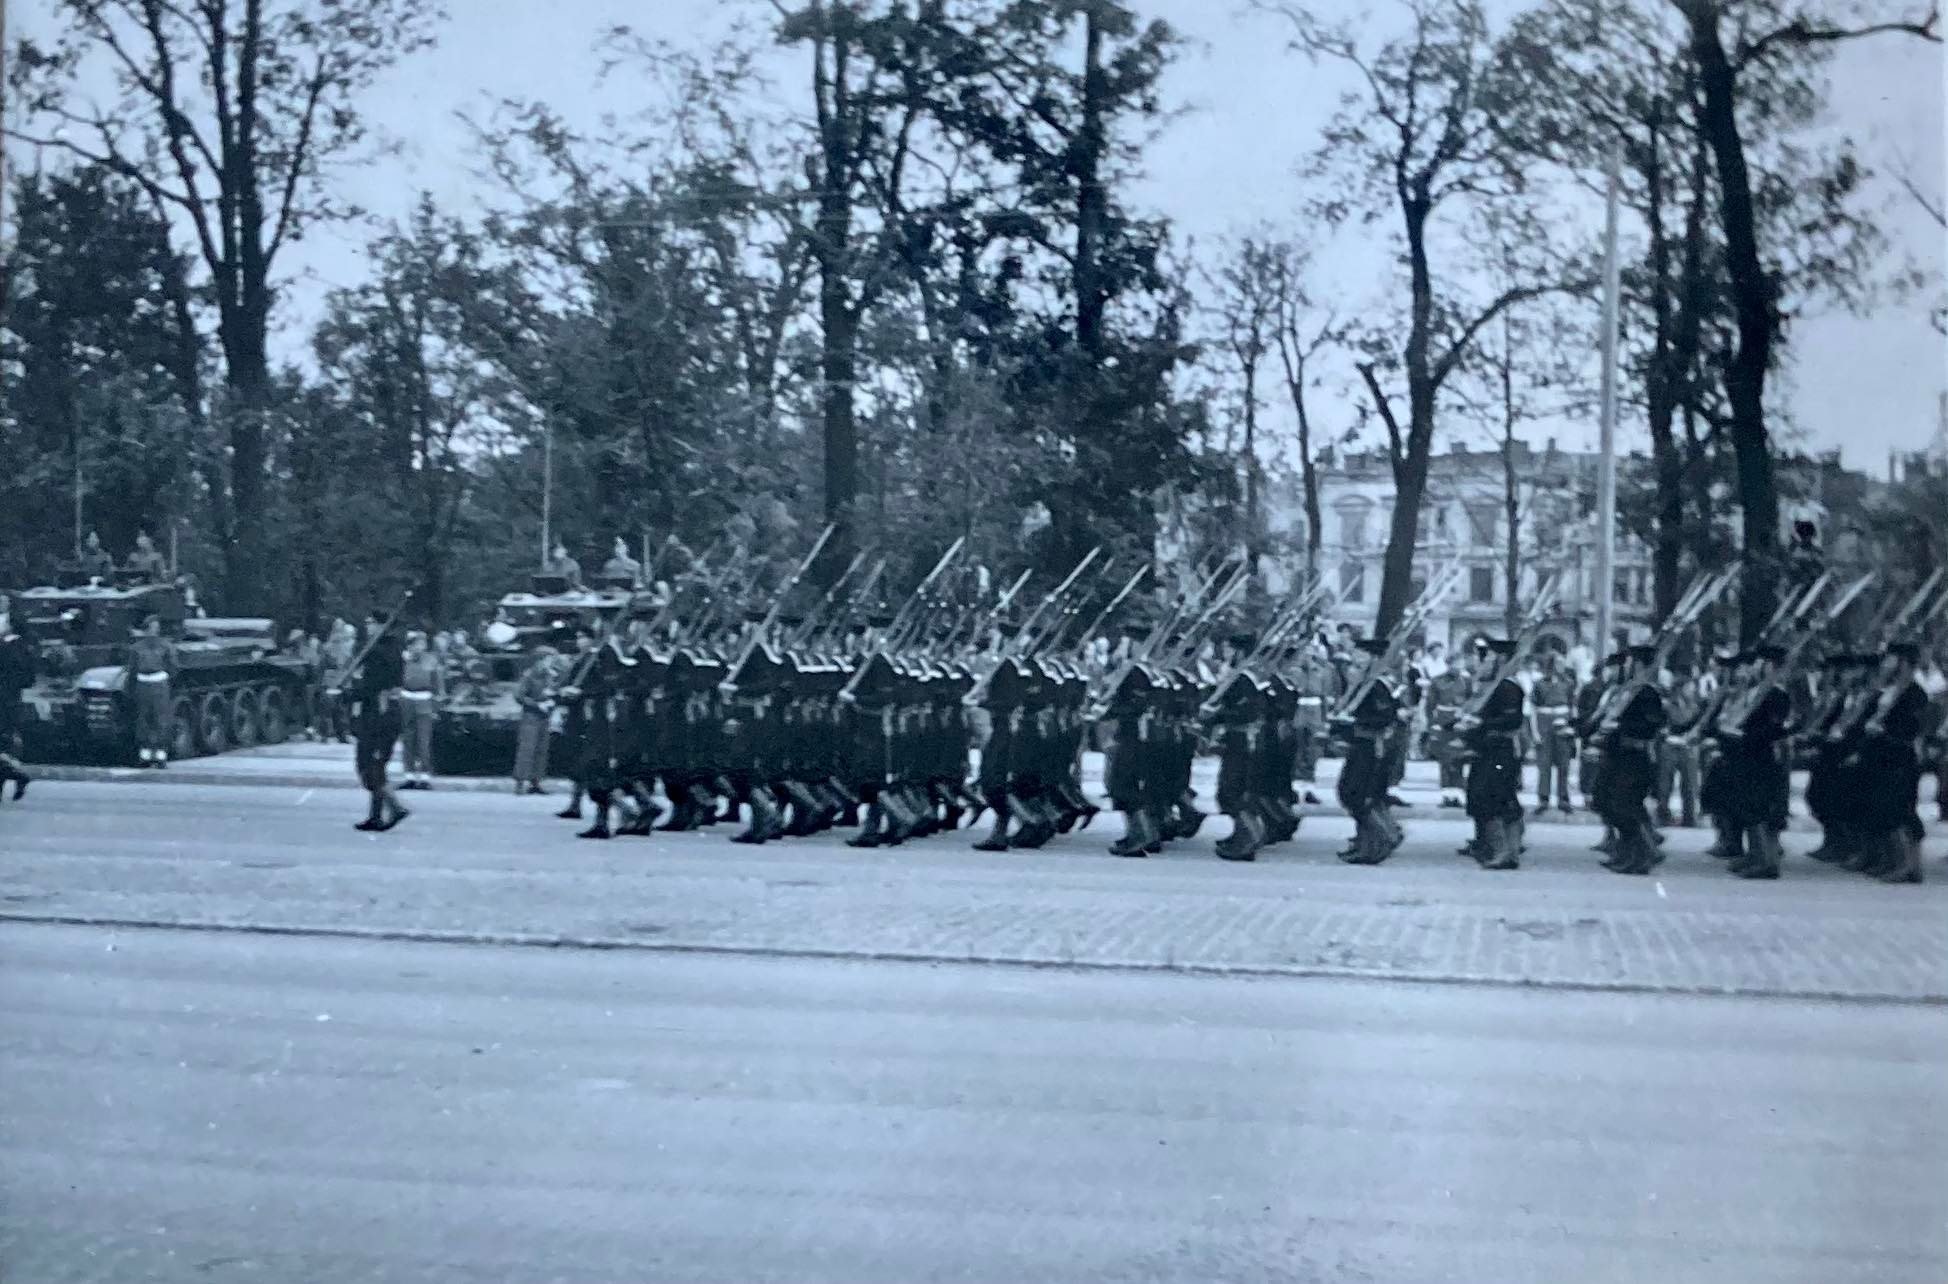
The Victory Parade of July 1945
On 21 July 1945, the British held a victory parade through the ruins of Berlin to commemorate and celebrate the end of the Second World War. Around 10,000 troops of the British 7th Armoured Division, the famous 'Desert Rats', were paraded under review by British Prime Minister Winston Churchill and Field Marshal Bernard Montgomery. On 7 September 1945, there was another parade featuring all the victorious Allies, but neither Montgomery nor U.S. General Dwight D Eisenhower attended. This gesture signified a deterioration in the relationship between the Allies, as differences in ideology between the West and the Soviet Union were becoming harder to ignore and the slide towards a Cold War had begun.
British Pathe News footage of the Berlin Victory Parade, 21 July 1945.
An Iron Curtain
Relations between the Western powers and the Soviet Union deteriorated immediately following the end of the war in Europe. The main sources of tension were the Soviet Union's unwillingness to allow democratic governments to emerge in Eastern Europe, and its desire to maintain a sphere of influence in the region. The Western powers, led by the United States, saw this as a threat to their own security and interests.
The Soviet Union's aggressive actions in the post-war period, including the establishment of communist governments in Poland, Hungary, and Czechoslovakia, fuelled Western fears of Soviet expansionism. The United States responded by implementing the Truman Doctrine, which committed the U.S. to support countries threatened by communism, and by providing economic and military aid to Western Europe through the Marshall Plan.

Tensions between the West and the Soviet Union reached a boiling point in 1947 when the Soviet Union refused to participate in the Marshall Plan and instead formed its own economic bloc, the Council for Mutual Economic Assistance (COMECON). In 1948, the Soviet Union blockaded Berlin, prompting the Western powers to launch the Berlin Airlift to supply the city.
On March 5, 1946, former British Prime Minister Winston Churchill delivered his famous "Iron Curtain" speech at Westminster College in Fulton, Missouri. In this speech, Churchill warned of the growing Soviet threat in Europe and called for a closer alliance between the United States and Great Britain to contain Soviet aggression. The speech marked a turning point in the post-war era and is considered a seminal moment in the Cold War.
In 1949, the three western occupation zones were merged to form the Federal Republic of Germany (West Germany). The Soviets followed suit in October 1949 with the establishment of the German Democratic Republic (East Germany). In 1955, West Germany joined NATO and was encouraged to build a new military, the Bundeswehr. In response, the Communist states of Eastern Europe formed the Warsaw Pact.
Sources:
Photography/Images:
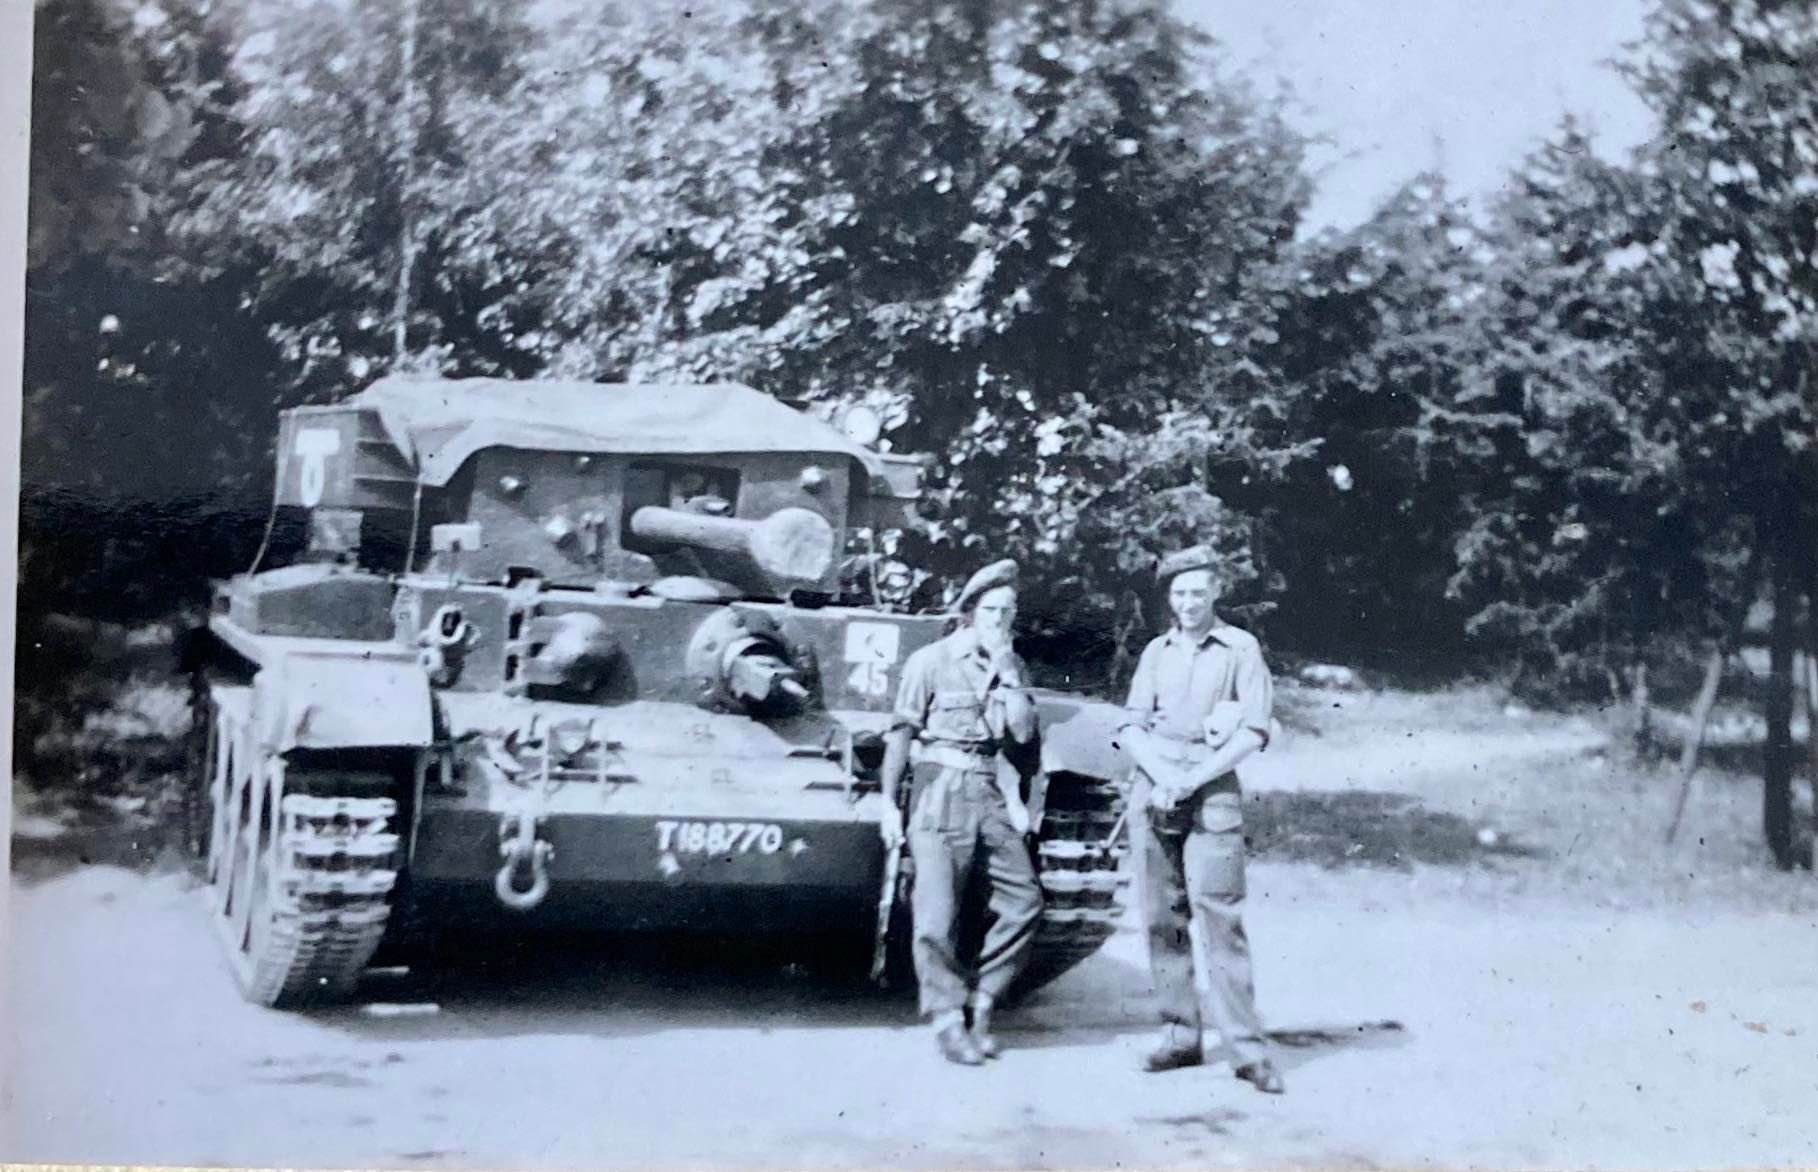
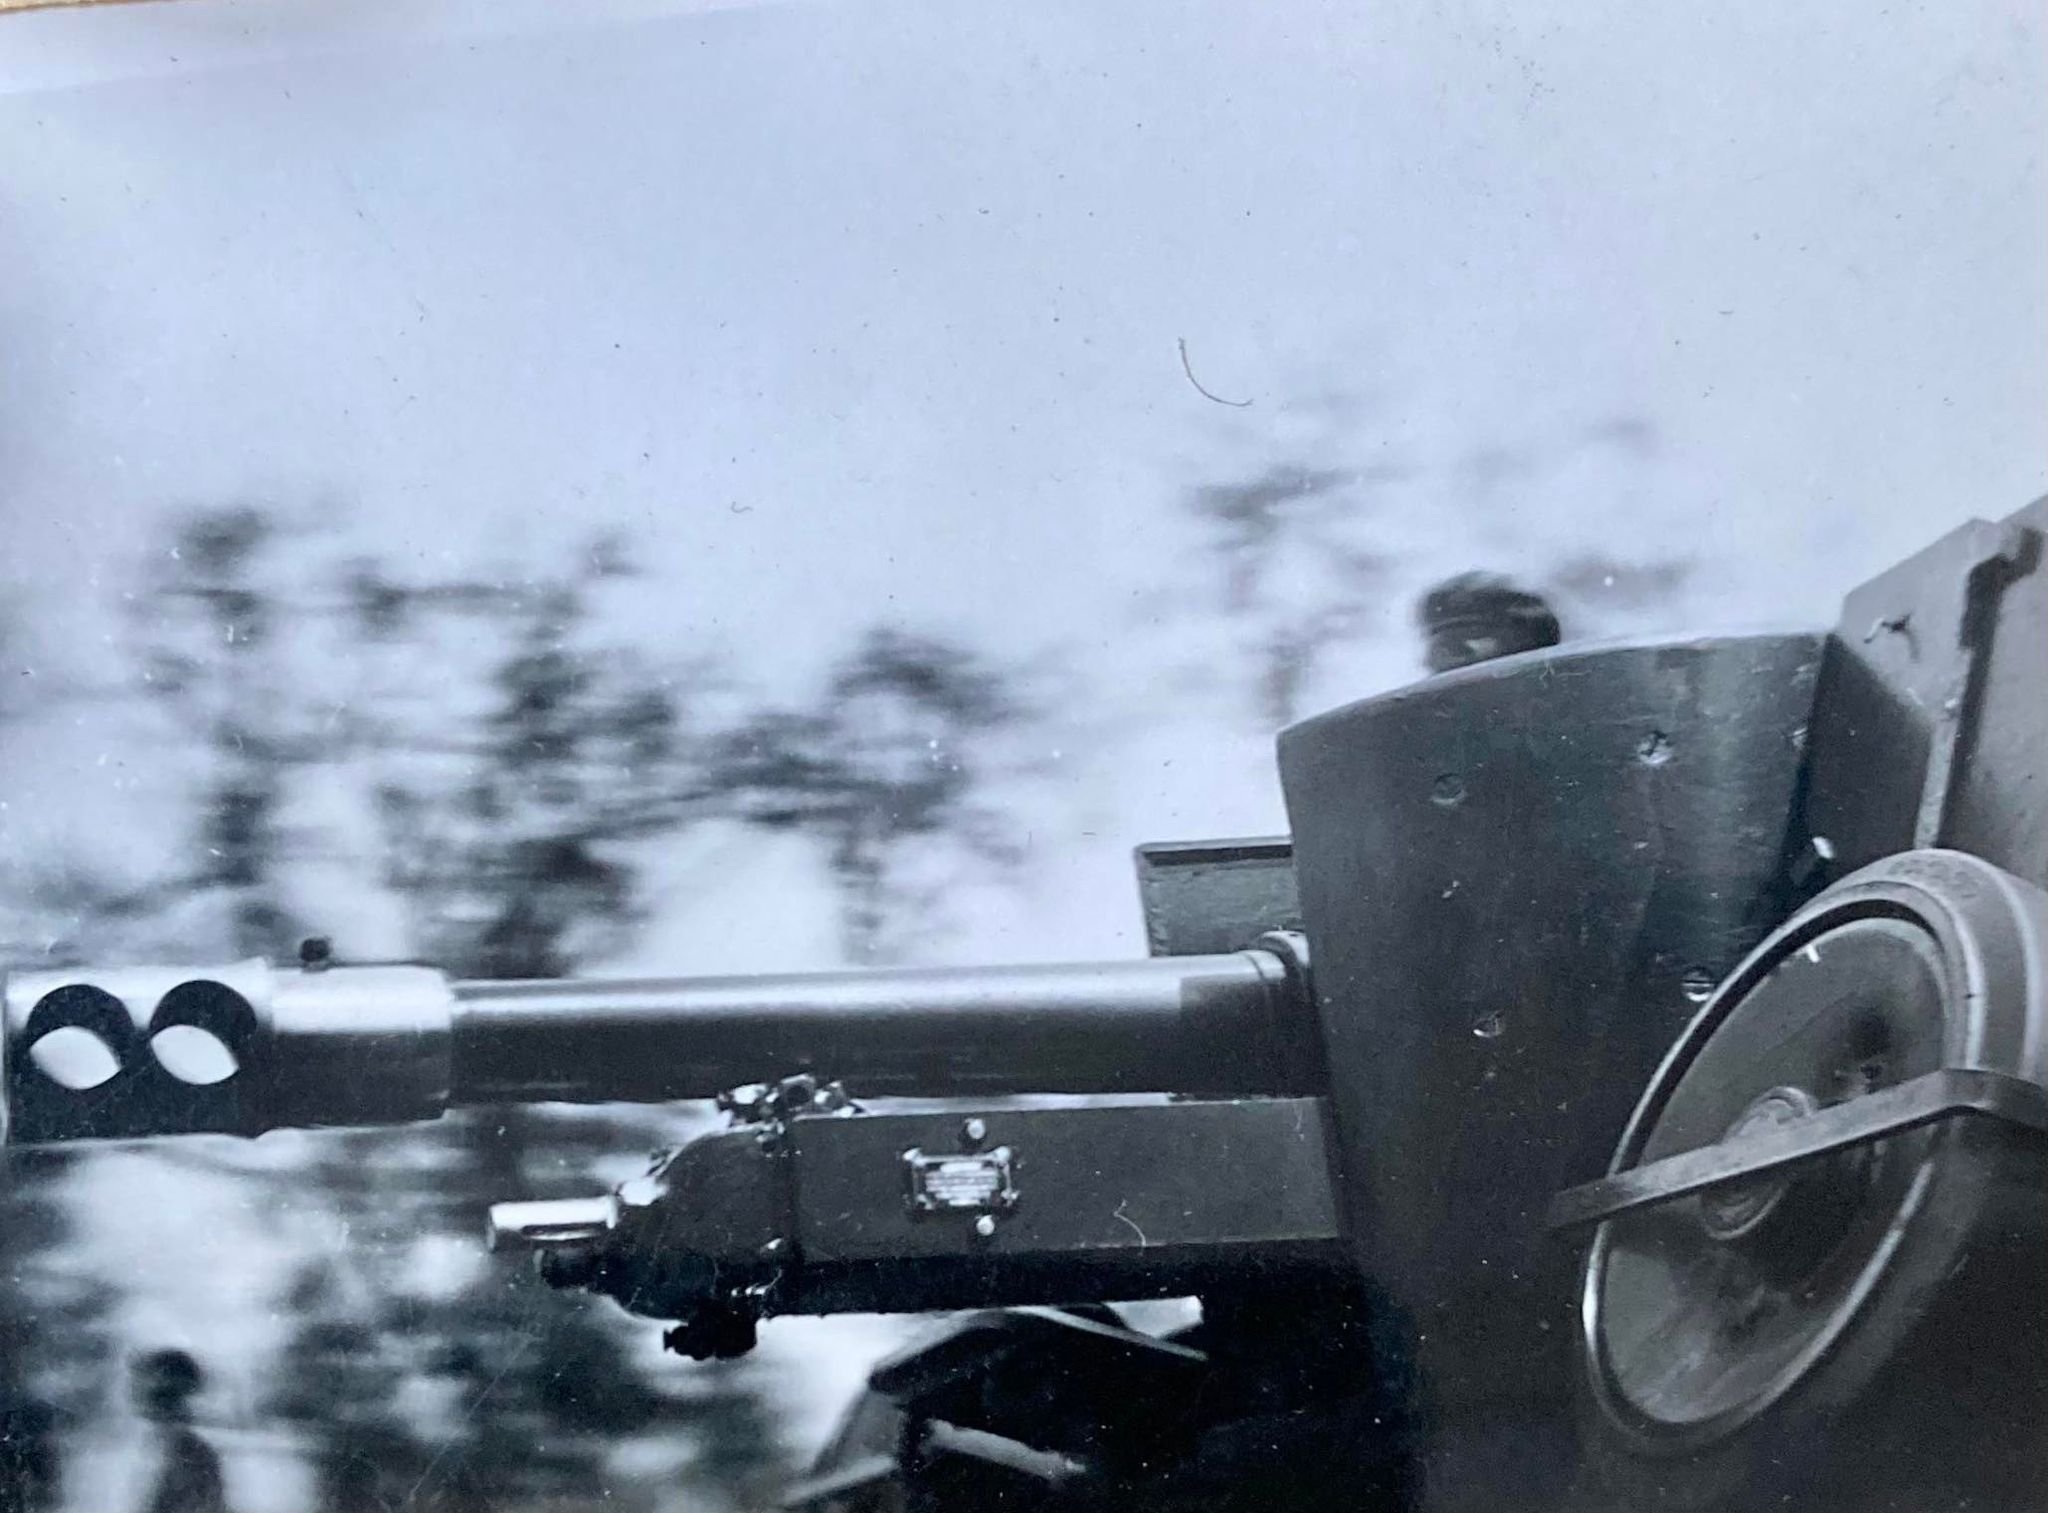
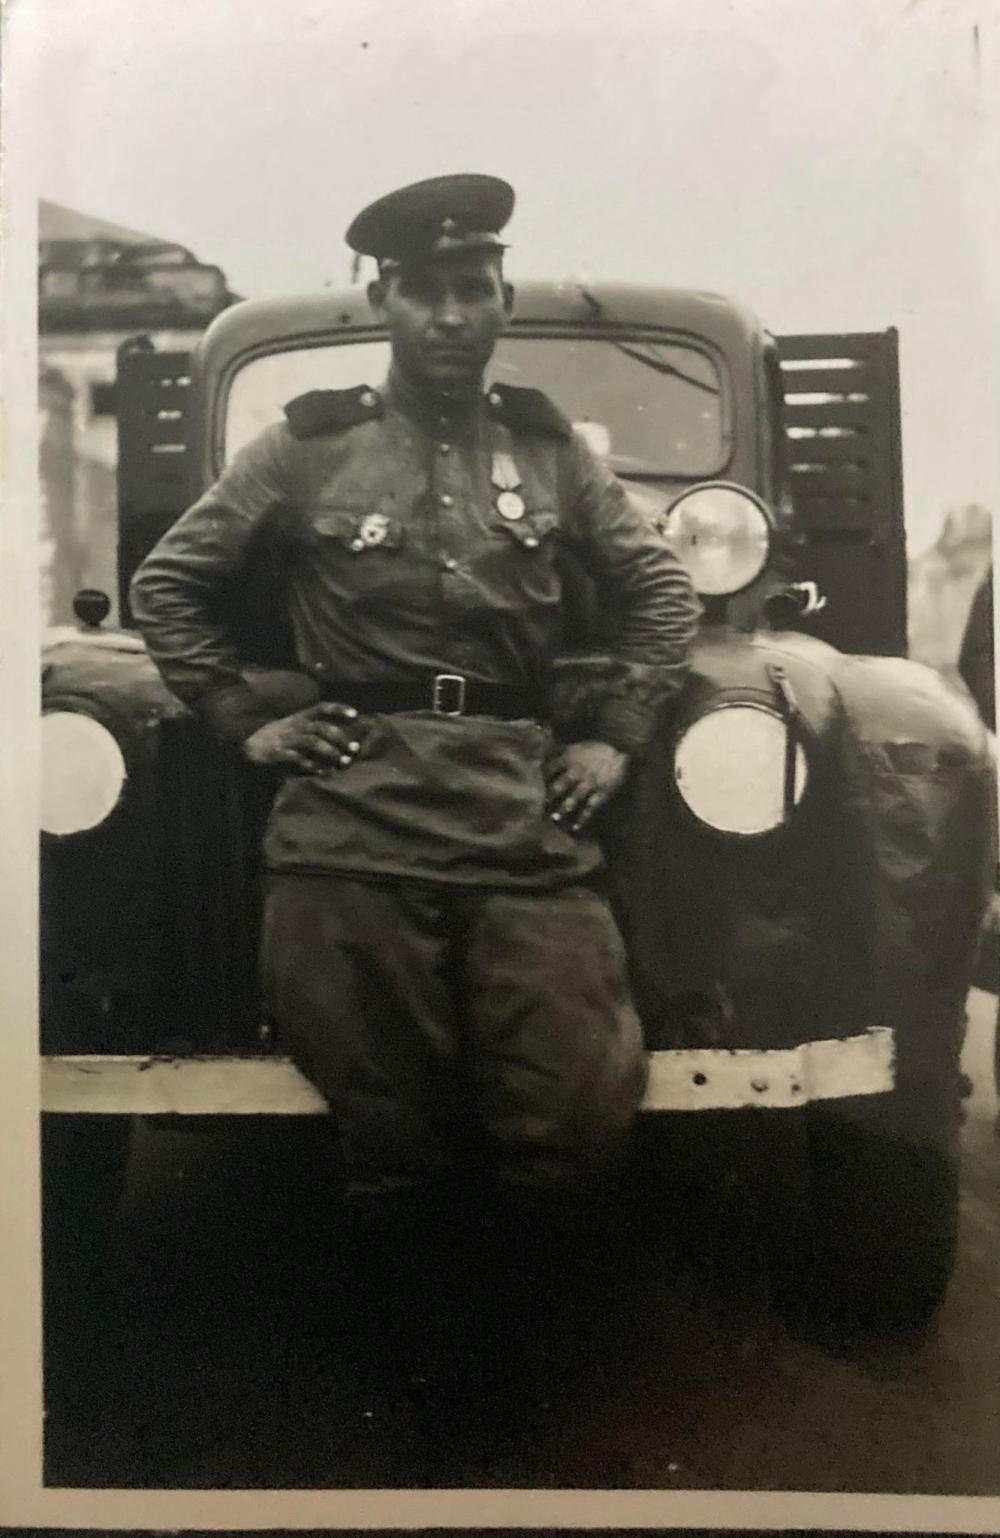
All photographs used to illustrate this article were taken by my relative George Trumpess who was stationed in Minden, Germany, and travelled regularly to Berlin during the summer of 1945.

George's War: From Harpenden to Berlin with No. 1 Special Wireless Group
In this blog post, we examine the wartime service of George Trumpess, who was a member of No. 1 Special Wireless Group, Royal Signals. During the Second World War, 40 Special Wireless Sections were engaged in enemy radio traffic intercepts for the Army (Y Service). George would serve throughout the Campaign for Northwest Europe, and travel from sleepy Hertfordshire to the ruins of Berlin in 1945.
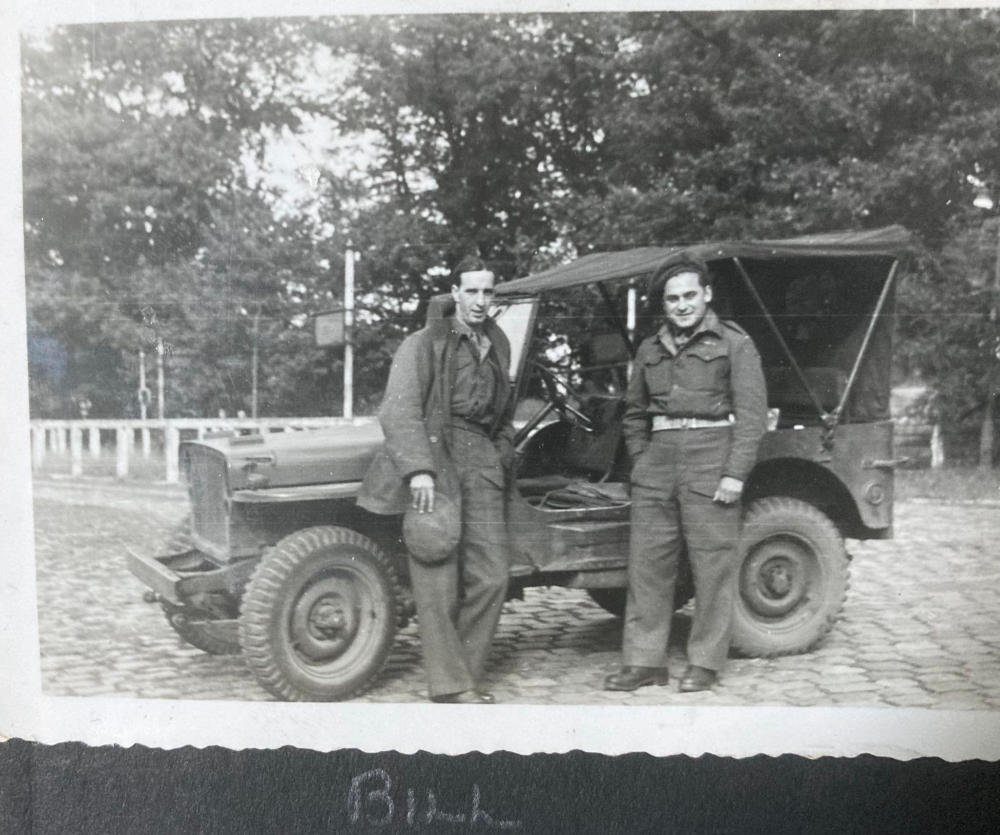
George Trumpess, left, at Brandenburg Gate, Berlin, 1945
Recently, a relative of mine had the unenviable task of having to clear the contents of his late parent’s house. Among the countless objects accumulated over a lifetime emerged a large, handcrafted wooden box and several photograph albums. The box contained an assortment of Second World War German medals and coins. The photograph albums revealed a tantalising glimpse into George Trumpess’s wartime service with the Royal Signals. George had been very circumspect about his military career.
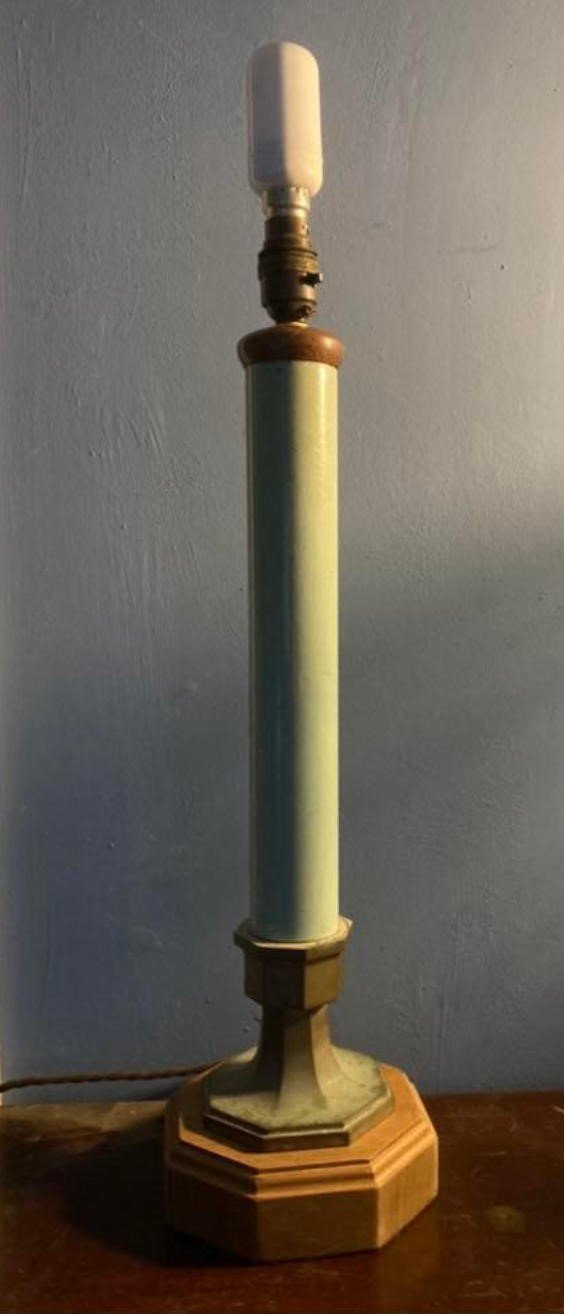
George’s collection of Second World War German medals, Nazi currency, assorted photos, and his own campaign medals
Initially, I started my research into George’s unit by contacting the Royal Signals Association on the social media platform Facebook. One member of the Facebook group recommended I contact Bletchley Park. Officially, the Government Code and Cypher School (GC&CS), Bletchley Park was a top-secret centre of Allied codebreaking during the war also known as Station X. Dr Thomas Cheetham, Research Officer at Bletchley was able to provide the following:
George was a member of No. 1 Special Wireless Group (1 SWG), who would become 1 Special Wireless Regiment (1 SWR) in late 1945. 1 Special Wireless Group comprised of army signals units intercepting, decrypting, and analysing low-grade German Army radio traffic and cyphers in the field. It operated in Northwest Europe from D-Day onwards.1
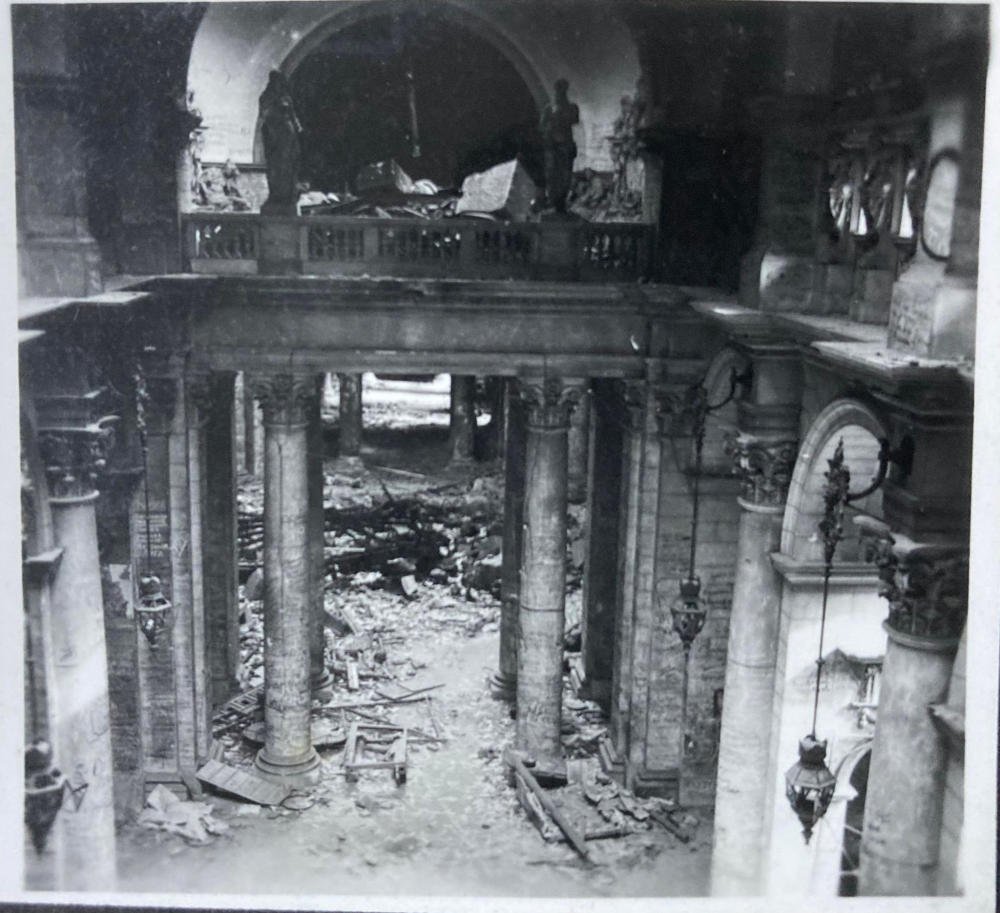
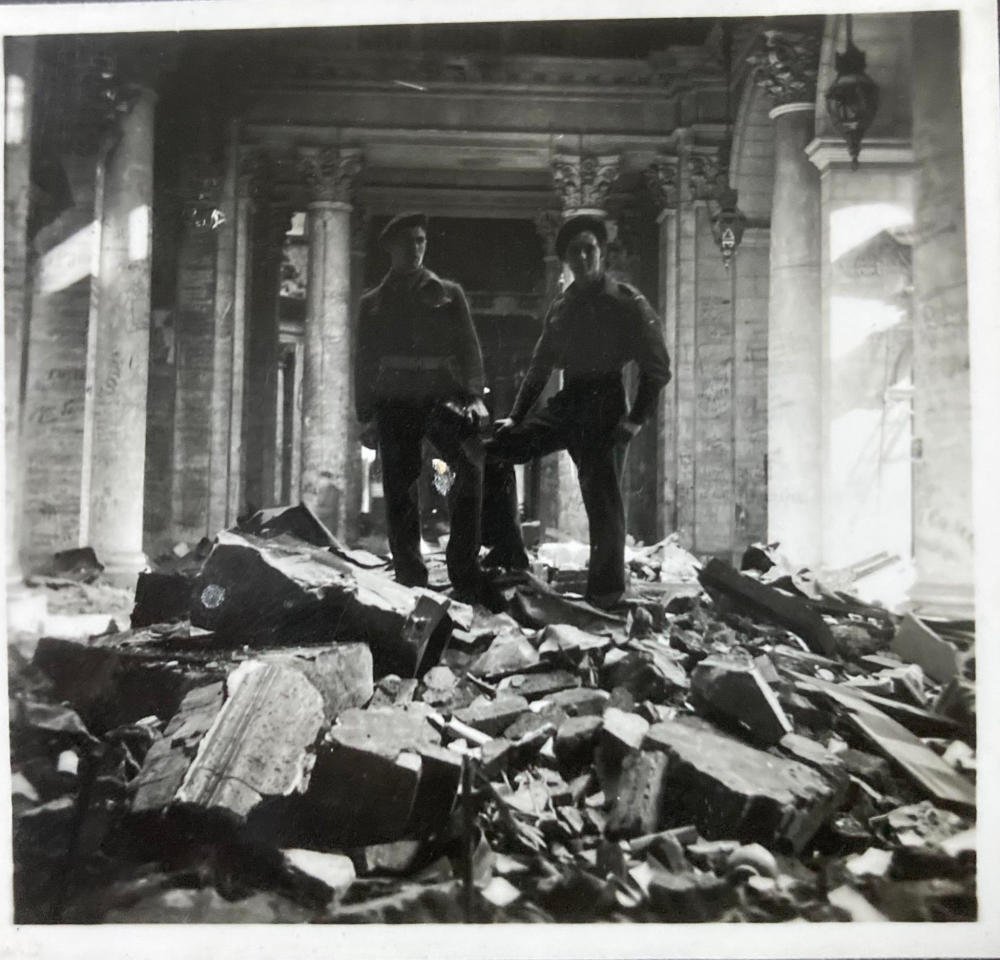
George in the ruins of the Reich Chancellery, Berlin, 1945
Dr Cheetham was not able to provide any information on the Regiment’s post-war activities. However, it appears that 1 SWR was collecting signals intelligence (SIGINT) on the Soviets immediately after the war, although they were still our allies at the time.
Dr Cheetham recommended that I contact the Military Intelligence Museum, which I did. Alan Judge, Corps Historian, Military Intelligence Museum responded with the following:
Not a lot is known about this unit. It started as 1 Wireless Intelligence Company (WIC) of No. 1 Special Wireless Group, which formed up in November 1945 with a strength of 18 officers and 90 other ranks. Both these units were in Gneisenau Kaserne in Minden. 1 WIC's role was signals intelligence, they listened, initially, for clandestine radio transmissions from the remnants of the Nazi resistance units until it became obvious that Nazi resistance was no longer a threat.
However, the threat from the Soviet Union was then becoming more apparent and the unit started to pay more attention to the USSR and the countries under its domination. By 1949, 1 Wireless Group had been re-designated 1 Wireless Regiment and moved to Nelson Barracks in Münster. Detachments were in Berlin at RAF Gatow, Efeld, Cuxhaven, Iserlohn, and Plön in Schleswig-Holstein. In 1970 it was renamed 13 Signal Regiment, which moved into Mercury Barracks near Birgelen on the Dutch/German border in 1955. The unit had a strong Intelligence Corps representation as well as around 80 Women’s Royal Army Corps (WRAC) personnel. There followed a series of moves until 1994 when 13 Signal Regiment closed for good.2

© IWM A 21474, SPECIAL WIRELESS MOBILE UNITS. 30 JANUARY 1944, NEVE, POOL.
Formation of 1 SWG
No. 2 Company, GHQ Signals went to France with the British Expeditionary Force (BEF) in 1940.3 In July, following the evacuation of the BEF from Dunkirk, the unit was renamed No. 1 Special Wireless Group. The unit was based at Rothamsted Manor, Harpenden under the command of Lieutenant-Colonel A.E. Barton.4 1 SWG remained at Harpenden until 22 June 1944, when they closed down Rothamsted Manor and moved in three shifts (A, B and C) of eight detachments to Normandy.5
During the Second World War, 40 Special Wireless Sections were engaged in enemy radio traffic intercepts for the Army (Y Service). Each Section was a composite of Royal Signals operators, Military Intelligence, often with linguistics skills, and Royal Army Service Corps (RASC) providing drivers and logistical support. The parent organisation was the Wireless Group, which trained Signals operators, held stores of equipment and spares, and ran training courses for Intelligence officers and NCOs on Signals sections.6
Recruitment & Training of Special Operators
The recruitment of Y Service operators required the candidates to pass an IQ test, demonstrate an ability to work under pressure, and have the patience to wait for hours until an enemy radio station started broadcasting. Candidates had to show that they were mature enough not to gossip about their work. They also had to be mentally and physically resilient, often working long hours with little sleep and irregular meals. Forces operators’ training lasted 19 weeks, which included both basic military and technical training.7
Basic training for wireless operators consisted of 6-hours of military training and 2-hours of technical training per day. After an aptitude test, those selected for further training were sent to the Special Operations Training Battalion (SOTB), situated in Douglas, Isle of Man, from 1942.8
In his memoir, Major G.K. Rothwell, 1 Special Wireless Group, described his extensive training:
The initial training was standardised for all arms and comprised six weeks of rigorous and exhausting infantry training. The training day ran from 07.30 to 18.00 including Saturdays. It was only after four weeks, when we were fitted with Battle Dress, that we were allowed out on a Sunday afternoon to go to the Club at Camp Centre.
After leave I was instructed to proceed to the Isle of Man where the Special Operator Training Battalion was located. A long row of Boarding House along the promenade had been requisitioned and the promenade divided in half by a wire mesh fence. Special Operators were trained to receive and send Morse to British Army standards and additionally learnt the styles, codes, and procedures of German and Italian services.
After three months or so there was a test which eliminated the less proficient. The remainder continued the course until they qualified as Operator Special Class II after six months or so. Training continued with operational training, meaning one practised monitoring actual German networks. Additionally, Japanese procedures were taught as the Japanese Morse alphabet had 72 characters this was not at all simple.
So, the training lasted over a year (extraordinary for the wartime), and it was not until April 1944 that I was to join No. 1 Special Wireless Group, then located in a large country house at Rothampsted in Harpenden.9

© IWM CM 2448 The interior of the wireless telegraphy receiving van of an RAF Wireless Observer Unit post in the Western Desert, showing the W/T operators at work.
1 SWG & Campaign for Northwest Europe
The long-awaited Second Front finally opened with the D-Day landings on 6 June 1944. On the morning of D-Day, the mobile section (MobSec) of 1 SWG identified 21st Panzer Division moving from Falaise toward Ouistreham (Sword Beach). As a result, the Division was subjected to an Allied air attack. Next, having found the road bridge over the Caen Canal (Pegasus Bridge) in the hands of British 6th Airborne, 21st Panzer had to detour via Caen, which delayed their planned counterattack until 16.30hrs. When they finally attacked, 21st Panzer lost approximately 50 tanks from a strength of 127. Nevertheless, they did frustrate General Montgomery’s planned objective of taking the city of Caen on D-Day.10
From the 14 June, MobSec, 1 SWG started to waterproof their vehicles in anticipation of crossing to Normandy. However, they were then ordered to de-waterproof them at the end of July. Finally, on 8 August the unit received its movement orders, and arrived in Normandy on 10 August 1944.11
Operation OVERLORD, the Battle for Normandy, raged on for three months. The Germans finally withdrew across the river Seine at the end of August 1944. After weeks of inching forward in the notoriously closed country of the Normandy bocage, the Allies suddenly made spectacular advances into France and Belgium.
In August 1944, Major Rothwell, 110 SWS, was monitoring German radio traffic in the Falaise Pocket:
The Germans were using a three letter Book Code. A Book Code provides little or no protection if the enemy has a copy of it. Now we did have a copy of the code book! So, when I began picking up a long message in this code, the Intelligence chap was sitting on the back steps of the radio van decoding it as I handed him each sheet as it was completed. And it turned out to be the complete plan for the counterattack the Germans planned at Mortain.12

© IWM BU 531 The crew of a Cromwell Mk IV tank of 2nd Welsh Guards on the drive into Brussels, 3 September 1944.
On 1 September 1944, one detachment of the 110 Special Wireless Section (110 SWS) was attached to the Guards Armoured Division. The remainder of 110 SWS was attached to XXX Corps HQ, following in the wake of the Guards as they advanced across Belgium. On 3 September, Guards Armoured liberated the Belgium capital of Brussels. Corporal Harold Everett, 110 SWS, recalled the liberation and subsequent celebrations:
The noise, the ecstasy of the crowd, the knowledge that we, the British, were the cause of this great outburst of joy and gratitude gave us feelings of pride and pleasure that it is impossible to put into words. I felt emotionally super charged. On that September day I lived a moment in history that I can never live again.13
Between 5 and 9 September 1944, Shift B of 1 SWG moved six officers, 174 other ranks and 43 vehicles to a transit camp in Wickham, Hampshire. Next, they embarked on Landing Ship, Tank (LST) 158 sailing from Gosport and landed at Arromanches, Normandy. Similarly, Shift C landed in France on 15 September 1944. 1 SWG then moved from Amiens to Brussels, Belgium.14
On 14 September, 1 SWG and 1 Special Intelligence Company (1 SI Coy) moved to Brussels to set up an important intercept station.15 According to Hugh Skillen, Ultra and Y Section intelligence indicated a rapid build-up of German forces in the Arnhem-Nijmegen area at least one week before the start of the ill-fated Operation MARKET-GARDEN.16
Detachments of 1 SWG were operating in Eindhoven, Holland during Operation MARKET-GARDEN (17 to 25 September 1944) but the unit’s war diary makes no mention of it.17 At the end of September MobSec, 1 SWG was attached to the American 12th Army Group.18
During November, No. 7 SW Section (Type A: Army HQ), 109 and 110 SW Sections (Type B: Corps HQ) arrived in the Brussels area. According to the war diary, the winter passed without Christmas, the New Year or Operation VERITABLE. The same phrase is repeatedly used in the war diary: Nothing of importance to record. Presumably, the lack of information recorded in the war diary at a group level is a security precaution in case the documents were ever captured.19
On 13 December 1944, the war diary for MobSec, 1 SWG mentions a force of 20 Germans 3-miles from their positions, and the men having to stand to until the morning. On the 16 December, the war diary records a breakthrough of German forces North of their position at Chattancourt close to the Meuse River. This attack was the Ardennes Counteroffensive, the last major German offensive of the war, also referred to as the Battle of the Bulge. During the night and early morning of the 23/24 December, the war diary records enemy air activity and some bombing nearby but no casualties.20
In February 1945, following leave in the UK, Major Rothwell returned to Holland and Operation VERITABLE (the clearing of German forces from the West bank of the Rhine):
I returned to the section at Issum in Holland, where the Reichwald Forest was slowly being cleared in some very bitter fighting and preparations were being made for the crossing the Rhine. Shift working was back, with a continuous system without free days. The shifts were worked so: 08.00 –13.00, 22.00 – 03.00, 13.00 – 17.00, 03.00 – and then 17.00 – 22.00 before starting round again.
And when one was not on a radio set, sleeping, meals washing (self & cloths) weapon cleaning, sentry duty and various other chores had all to be fitted in. And whenever we moved the old latrine pit had to be filled in and new slit trenches dug at the new site!21
During the winter months of 1945, 110 SWS repeatedly moved locations, setting up new stations, transmitters, and continually changed cypher books. At the same time, leave was organised in the UK and Paris. On 8 May 1945, the war diary for 110 SWS simply states that hostilities officially declared closed.22 The war in Europe was over for 1 SWG.
Visit George’s War in our Gallery section to see 46 photographs of George and his comrades in Berlin between 1945 and 1946. Click Here.
Victory in Europe & Russian Intercepts
By mid-April 1945, 1 SWG was located at Kempen, Germany, northwest of Dusseldorf. By June, the unit had moved to Minden, between Munster and Hanover. The War Diaries are silent about German capitulation in May 1945. Throughout the summer, 1 SWG remained busy and had numerous visitors from Signals Research and Development Establishment (SRDE) and Southeast Asia Command (SEAC). Of course, Japan would not be defeated until August 1945, and it was certain that some elements of Y Service would have been redeployed to the Pacific if the war had continued. In mid-July, the unit found time to exhibit captured German cypher equipment, visited by Chief Signals Officer, 21st Army Group. At the same time, some sections were being returned to the UK and demobilised.23
It seems that 1 SWG was intercepting Russian wireless and possibly landline traffic after May 1945. On 14 September 1945, GC&CS and Foreign Office prepared a draft policy paper on what radio traffic should be monitored in the immediate post-war period. Russia was a prime target for intelligence gathering. The paper stated:
The Russians are realists, and they will intercept our traffic and expect us to intercept theirs.
The paper continued:
Interception of Russian traffic is normally difficult for us, but owing to their present advance westwards, the opportunity to do so is good and an intense study could be made while there is a chance and resources available.24
As the Cold War got underway, GC&CS moved from Bletchley Park to Cheltenham in 1952, having changed its name to Government Communications Headquarters (GCHQ) in 1946.
References:
Dr Thomas Cheetham, Research Officer, Bletchley Park, museum & heritage attraction, https://bletchleypark.org.uk/, 2020.
Alan Judge, Corps Historian, Military Intelligence Museum, https://www.militaryintelligencemuseum.org/, 2020.
Hugh Skillen, Spies of the Airwaves: A History of Y Sections during the Second World War (London: H.M. Stationery Office, 1989), p. 56.
Skillen, Spies of the Airwaves, p. 110.
Skillen, Spies of the Airwaves, p. 397.
Skillen, Spies of the Airwaves, pp. 50-51.
Sinclair McKay, The Secret Listeners: The Men and Women Posted across the World to Intercept the German Codes for Bletchley Park (London: Aurum Press Ltd, 2013), pp. 6-7.
Skillen, Spies of the Airwaves, pp. 50-51.
The Y Service 1939-1945, Major G.K. Rothwell (Ret'd), extract from his biography, from March 1943 to June 1945, https://www.goldbeach.org.uk/yservice/Rothwell.htm, downloadable PDF, 2021.
Skillen, Spies of the Airwaves, pp. 397-398.
The National Archives (TNA), WO 171/2042, Mob Sect, No. 1 Special Wireless Group, June to August 1944.
Rothwell, The Y Service 1939-1945.
Skillen, Spies of the Airwaves, pp. 432-433.
TNA, WO 171/2041, War Diary, No. 1 S.W. Group, R. Signals, 5 to 9 September 1944.
Skillen, Spies of the Airwaves, p. 431.
Skillen, Spies of the Airwaves, pp. 441.
TNA, WO 171/2041, War Diary, No. 1 S.W. Group, September 1944.
TNA, WO 171/2042, War Diary, Mob Sect, September 1944.
TNA, WO 171/2041, War Diary, No. 1 S.W. Group, September 1944 to November 1945.
TNA, WO 171/2042, War Diary, Mob Sect, December 1944.
Rothwell, The Y Service 1939-1945.
TNA, WO 171/6051, War Diary, 110 S.W. Section, 1 January to 30 June 1945.
TNA, WO 171/2041, War Diary, No. 1 S.W. Group, April to September 1945.
Kenneth Macksey, The Searchers: Radio Intercept in Two World Wars (London: Cassell Military Paperbacks, 2003, (reprinted 2018), p. 274.
Additional resources:
Birgelen Veterans Association
BOAR Locations, Mercury Barracks: https://www.baor-locations.org/MercuryBks.aspx.html
Royal Signals, Corps History: https://www.royalsignalsmuseum.co.uk/