
Blog
The Second World War resulted in the deaths of around 85 million people. Additionally, tens of millions more people were displaced. However, amid all the carnage, people demonstrated remarkable courage, fortitude, compassion, mercy and sacrifice. We want to honour and celebrate all of those people. In the War Years Blog, we examine the extraordinary experiences of individual service personnel. We also review military history books, events, and museums. We also look at the history of unique World War II artefacts, medals, and anything else of interest.

War Stories and Myths: Revisiting the Falklands, the Denison Smock, and Arnhem’s Legacy
In this blog article, I bring together reviews of books and documentaries that revisit the Falklands War, unravel the myths of the Denison smock, and challenge long-held beliefs about Arnhem and Operation Market Garden. Join me as I explore how personal accounts and new evidence reshape our understanding of these pivotal moments in military history.
In recent months, I’ve been reading a range of books and viewing a series of documentaries exploring the realities of twentieth-century conflicts. From the windswept battlefields of the Falklands to the airborne drops of Operation Market Garden, these works both in print and on YouTube challenge accepted narratives, expose enduring myths, and offer fresh perspectives on events that continue to shape our understanding of war. In this article, I combine reflections on various military history books and videos to create a narrative about how easily historical facts can become obscured over time.
The Falklands War: Personal Accounts and Broader Perspectives
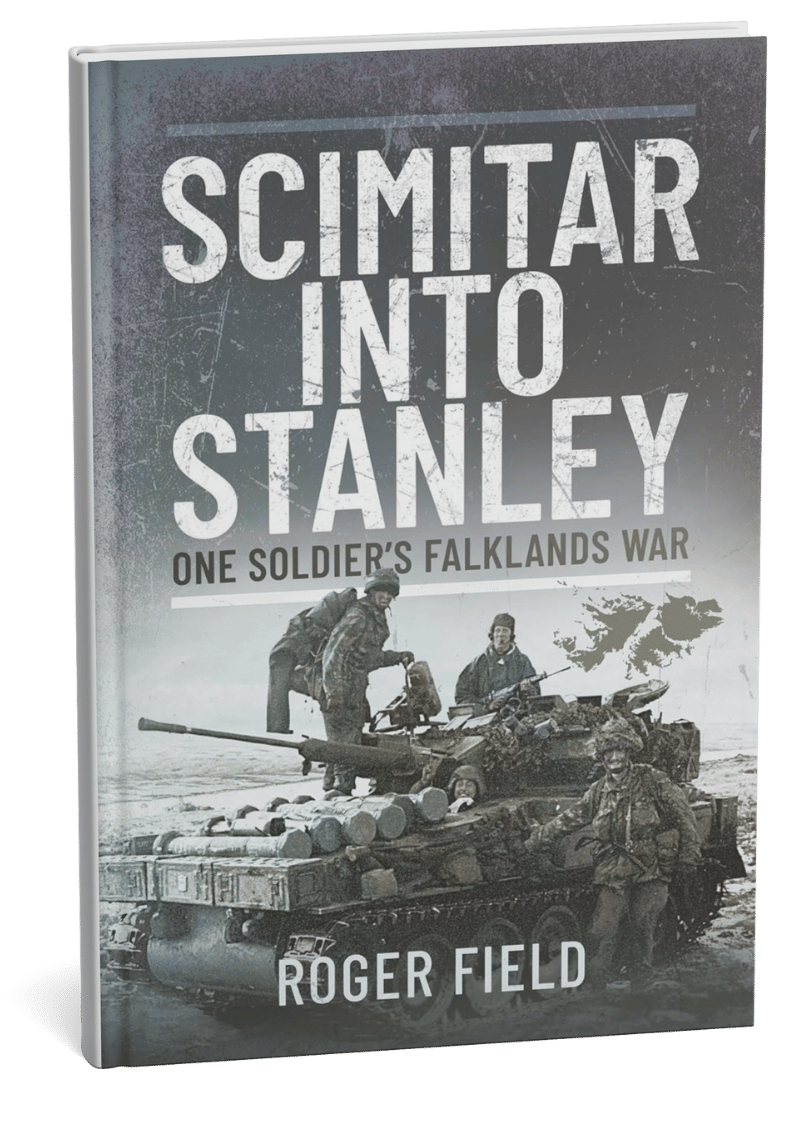
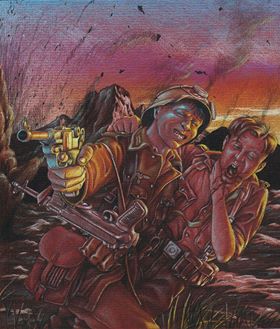
Roger Field’s Scimitar into Stanley (2022) offers a first-hand account of his experiences with the Blues and Royals during the 1982 Falklands War. Initially a staff officer, Field found himself commanding a Scimitar armoured car in battle, famously leading the charge into Port Stanley with journalist Max Hastings clinging to the back of his vehicle. The book is laced with humour, sometimes laugh-out-loud funny, though in today’s climate of political correctness, some may find parts of the text a little too candid. Field doesn’t shy away from naming names or calling out poor leadership, particularly criticising Brigadier Sir Tony Wilson. Yet, he’s equally honest about his own post-war struggles. The result is an open and honest personal account of modern conflict.
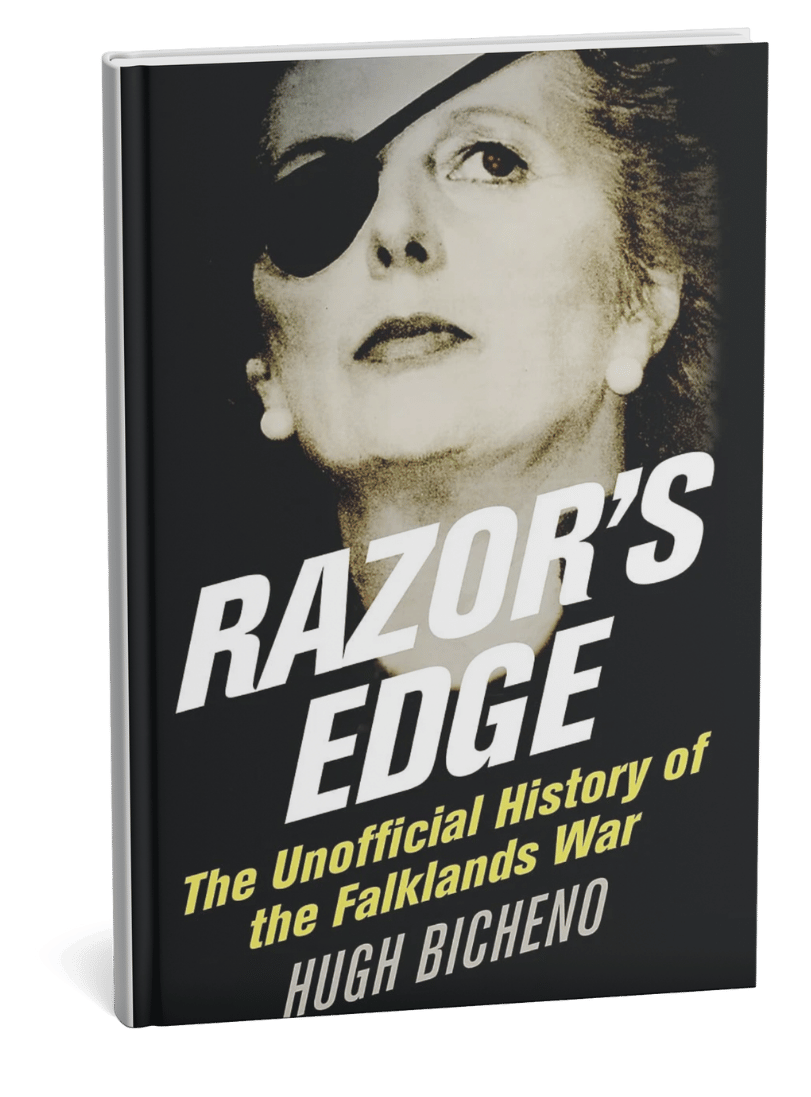
For those seeking a broader view, Hugh Bicheno’s Razor’s Edge (2007) steps back to examine the origins of the conflict. Bicheno, a former British spy in Argentina, foresaw the coming war, but his warnings fell on deaf ears in Whitehall. He spares no one in his critique, lambasting the Foreign Office, Civil Service, and politicians. The book is notable for its inclusion of the Argentine perspective, often overlooked elsewhere, and for its detailed descriptions of the campaign’s battles from both Argentine and Allied viewpoints. Bicheno highlights the role of chance in victory and defeat, and his unsparing criticism is directed at all parties in what he sees as an avoidable conflict. Interestingly, his book is used as a text at Argentina’s war college, a testament, perhaps, to its thoroughness.
If you want the soldier’s view, read Field. For the bigger picture, turn to Bicheno. Both are well worth your time.
Justice Denied: The Welsh Guards and the Sir Galahad Cover-Up
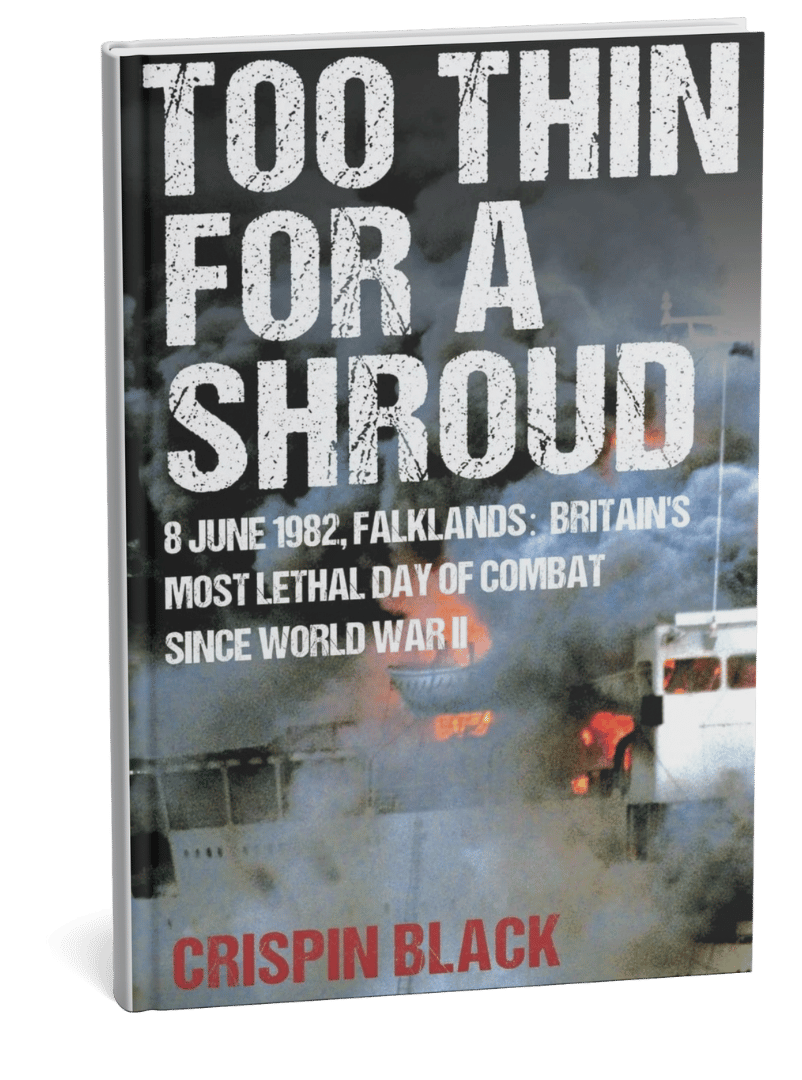
Another recent read, Too Thin for a Shroud by Lieutenant-Colonel Crispin Black (2023), delves into the bombing of the Royal Fleet Auxiliary’s Sir Galahad by the Argentine Air Force on 8 June 1982, the British Army’s deadliest day since 1945.
The Book's Claims
Black documents how 48 men died when Argentine A4 Skyhawks bombed Sir Galahad at Port Pleasant, Fitzroy. The ship was in the wrong location and lacked proper air defence. Packed with Welsh Guardsmen, Sir Galahad sat exposed in broad daylight for over six hours.
Using newly declassified Board of Inquiry documents from The National Archives, Black demonstrates that no direct orders to disembark were given to Major (later Colonel) Guy Sayle and the Welsh Guards. For 40 years, he was wrongly blamed for failing to disembark the troops. The inquiry proves this false. Black argues that senior Royal Navy and Royal Marines commanders made cascading failures: wrong location, defective landing craft, no air defence, and poor communications. The inquiry’s findings were classified until 2065, 83 years after the event.
The declassified files state, “At no time was a direct order to disembark given to Major Sayle by a superior officer.” Colonel Guy Sayle’s daughter has spoken to the media about how her father was made a “scapegoat” for the disaster, and now the Ministry of Defence (MoD) has said it “in no way blames” the Welsh Guards for the losses that day. Colonel Sayle died in 2022. According to Emma Sayle, her father died “haunted and penniless”.
Critical Reception
Unsurprisingly, reviews of Black’s book split sharply along service lines. Welsh Guards veterans and families praised the book as vindication. Royal Navy and Royal Marines personnel frequently criticise it as biased. The conservative Daily Telegraph called it “a repository of damning facts.” The Spectator acknowledged it “shows the Welsh Guards in a new light”, but questioned broader claims. In the court of public opinion, Amazon reviews range from five-star praise for the book's formidable detective work to one-star criticism for an inaccurate rewriting of history.
Senior commanders mounted coordinated rebuttals. RUSI Journal published responses from Major General Julian Thompson, Rear Admiral Jeremy Larken, and other Falklands officers. They challenged Black's interpretations whilst acknowledging errors in the original inquiry. Rear Admiral Larken contacted Black's publisher before reading the book, claiming the Welsh Guards were “unprofessional.” The Mirror reported that Larken claimed the Welsh Guards were an unprofessional and poorly led unit responsible for “pilfering” on his ship. Personally, if true, I think this statement says all we need to know about Larken.
On the flipside, General Sir Michael Rose supported Black's findings, suggesting a “cover-up” on national television.
Political Fallout
The book triggered parliamentary debates. On 25 March 2024, MPs pressed for the release of the documents. Sir Iain Duncan Smith stated: “There is now no question but that some kind of cover-up took place.” Defence Minister Andrew Murrison formally exonerated the Welsh Guards: “The board of inquiry is quite clear...the Welsh Guards were absolutely exonerated.” You can read the full transcript of the House of Commons debate on the Hansard website.
In May 2024, the MoD released 62 pages of previously classified documents. These largely confirmed Black's central claims: no orders were given to the Welsh Guards to disembark, the ship was sent to the wrong location, inadequate landing craft were available to offload the vessel, and no air defence was established.
Luckily for the families of those lost, the wounded and veterans, Black's credentials proved difficult to ignore by the Government, MoD and Navy. After all, he was on board Sir Galahad that fateful day, worked for the Cabinet Office as an intelligence adviser, and received an MBE for his work with the Defence Intelligence Staff during the crisis in the Former Yugoslavia. He is also a frequent contributor to the BBC and major British newspapers on terrorism and intelligence matters.
Crispin Black's book focuses on the bombing of RFA Sir Galahad, the subsequent cover-up, and the release of documents that prove the Welsh Guards were not to blame. He successfully campaigned for the declassification of these documents, which led to the official exoneration of the Welsh Guards after 42 years. While some critics question his interpretation of the events during the Falklands War, they present little counter-evidence. Many fundamental questions remain, and numerous documents will stay classified until 2065. Furthermore, no public inquiry has been announced. Black's work has challenged the previously accepted “official” narrative that unfairly scapegoated the Welsh Guards, turning it into an ongoing controversy.
Unravelling the Myths: The Denison Smock
On a lighter note, my recent purchase of a reproduction 1972-pattern Denison smock led me to a fascinating YouTube video by David Willey, formerly of The Tank Museum: “So you thought you knew about Denison Smocks…” The Denison smock, with its distinctive “brushstroke” camouflage, became iconic among British airborne forces, the SAS, and commandos. Yet, as Willey and Jon Baker (Curator at the Airborne Assault Museum) reveal, much of what we think we know is myth. There’s no evidence the smock was named after Major Denison—indeed, there’s no proof such a person existed. The famous “beaver tail” wasn’t designed to stop the garment riding up during jumps, as is often claimed. Willey’s video is a reminder of how easily repeated stories can become accepted fact.
Market Garden Revisited: Myths and Realities at Arnhem
Turning to Operation Market Garden, I recently watched two videos that challenge established narratives about the battle for Arnhem. The first was Niall Cherry’s Some Arnhem Myths... and a dose of reality! Part 2 on WW2TV, hosted by Paul Woodadge. Cherry, a former Royal Army Medical Corps senior NCO, has written eleven military history books. He is secretary of the Arnhem 1944 Veterans Club, a member of the 23 Parachute Field Ambulance OCA and Secretary of the Arnhem 1944 Fellowship. In the video, Cherry addresses specific myths and misconceptions with documentary evidence. Perhaps one of the most commonly held misconceptions about Market Garden is that because the radio equipment failed, the operation failed. On radios, Cherry explains that the 68 sets had known range limitations in wooded terrain. Tests in North Africa, Sicily, Italy and Normandy confirmed this. Commanders knew the Arnhem operational area exceeded set capabilities. In John Frost’s book, A Drop Too Many, he states that the failure of radio equipment was a perennial problem for Britain’s airborne forces.
Regarding the arming of British medics during the operation, establishment tables indicate that each parachute field ambulance was equipped with 123 pistols, 12 rifles, and 31 Sten guns. Of the 630 medics, only six were conscientious objectors. Photographic evidence confirms that most medics carried sidearms. As for the 21st Independent Parachute Company, the nominal rolls reveal that there were eleven foreign personnel among a total of 886 men, disproving the claim that there was a significant number of German Jews, which has become something of a myth.
In terms of planning failures, Cherry argues the 1st Air Landing Brigade should have seized the bridges at Arnhem. Air landing battalions had 750 men versus 550 in parachute battalions, formed up in seconds rather than forty minutes, and possessed superior firepower with four rifle companies, additional mortars, machine guns and anti-tank weapons. He examines General Browning’s influence on Jim Gavin at Nijmegen, where securing the Groesbeek Heights took priority over the Waal road bridge. Browning subsequently blamed Polish General Stanisław Sosabowski in a damning letter before departing for the Far East. Sosabowski's military career never really recovered from Browning’s unfounded criticisms.
During the WW2TV video, Cherry mentioned a short documentary film produced by Anglia Television on the 25th anniversary of Operation Market Garden in 1969. A quick search of YouTube, I found the programme in question, The Battle of Arnhem, directed by Harry Aldous. The programme is largely a collection of documentary interviews with many of the key protagonists and some local witnesses to events during the fighting for Arnhem and Oosterbeek.
In the documentary, Major General Roy Urquhart explained his 36-hour absence from divisional headquarters. He claimed wireless failures prompted his forward movement on the first afternoon. German opposition then trapped him with Brigadier Lathbury near St Elisabeth's Hospital. Lieutenant Colonel John Frost described reaching the Arnhem bridge intact on Sunday evening with over 500 men. Fewer than 200 remained alive and unwounded when resistance ended on Thursday morning. Brigadier John Hackett recounted arriving on Monday afternoon into active combat. His disagreement with Brigadier Pip Hicks over troop deployment at the Hartenstein reflected command confusion during Urquhart's absence.
Major General Allan Adair, Guards Armoured Division, blamed the terrain for his formation’s slow progress up the central axis of advance. The single-road approach prevented flanking movements, and the marshy Dutch polder land between Nijmegen and Arnhem, an area known as the Island, prohibited armoured manoeuvre.
SS General Wilhelm Bittrich assessed British troops as an “absolute elite” and commented on his troops' respect for their enemies. Housewife and mother, Kate ter Horst, described caring for the many wounded who packed her Oosterbeek home. Casualties filled every room. In the final segment of the programme, General Urquhart read from his 1945 report stating all ranks would willingly undertake similar operations again. Frost believed that most men who served at Arnhem, if asked, would accept another “invitation to the party”.
The Anglia Television documentary is an interesting, if uncritical, oral history filmed before later narratives worked their magic on the public imagination. The inclusion of a German perspective remains unusual for a 1969 British production. Both videos offer valuable source material. Cherry challenges operational assumptions with documented evidence. The Anglia TV program features first-hand accounts from key figures who planned, executed, and fought in the Battle of Arnhem. However, time and concerns about preserving their own reputations likely influenced the accuracy of their memories.
From the windswept South Atlantic to the battlefields of Holland, these books and documentaries reveal the enduring power of personal testimony and the importance of challenging received wisdom. Whether exposing cover-ups, debunking myths, or simply telling it as it was, each work adds a vital thread to the tapestry of military history. In revisiting these stories, we honour the lived experience and also ensure that the lessons, whether bitter or inspiring, are not forgotten.
Amazon Affiliate
This blog contains Amazon affiliate links. If you purchase books through these links, I receive a small commission at no additional cost to you. This helps support the ongoing research and content on The War Years.
References, Justice Denied:
https://www.spectator.co.uk/article/could-the-bombing-of-sir-galahad-have-been-prevented/
https://www.tandfonline.com/doi/full/10.1080/03071847.2024.2444114

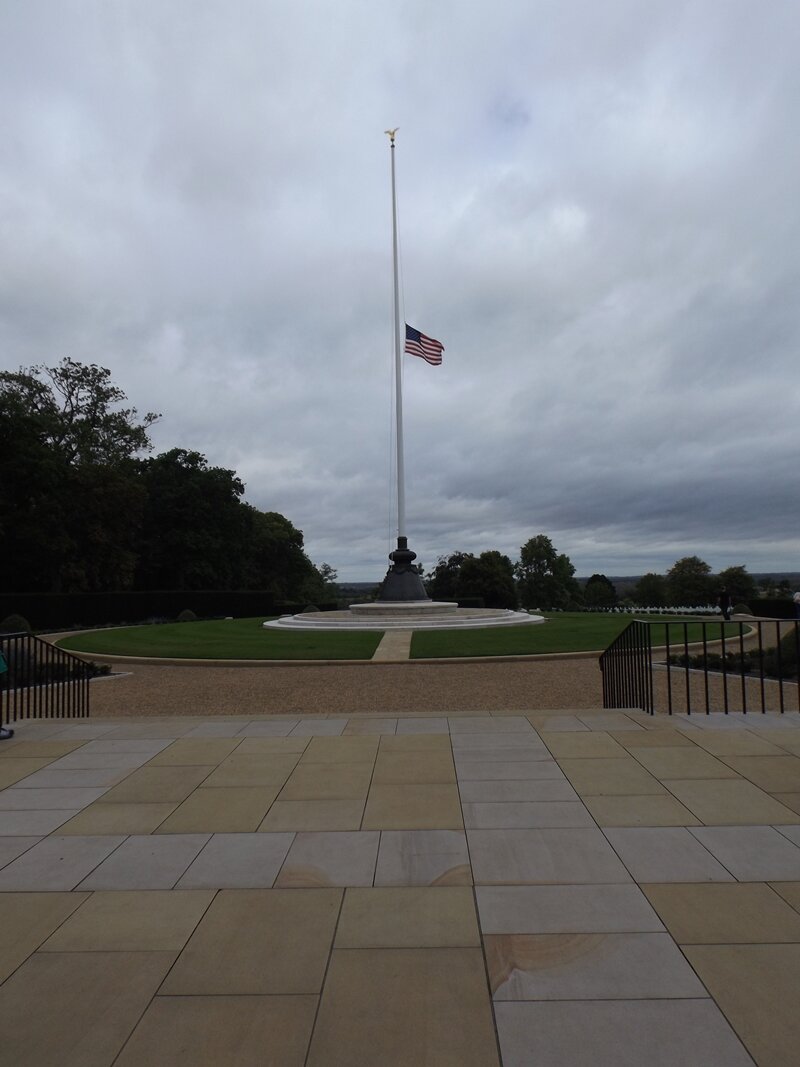
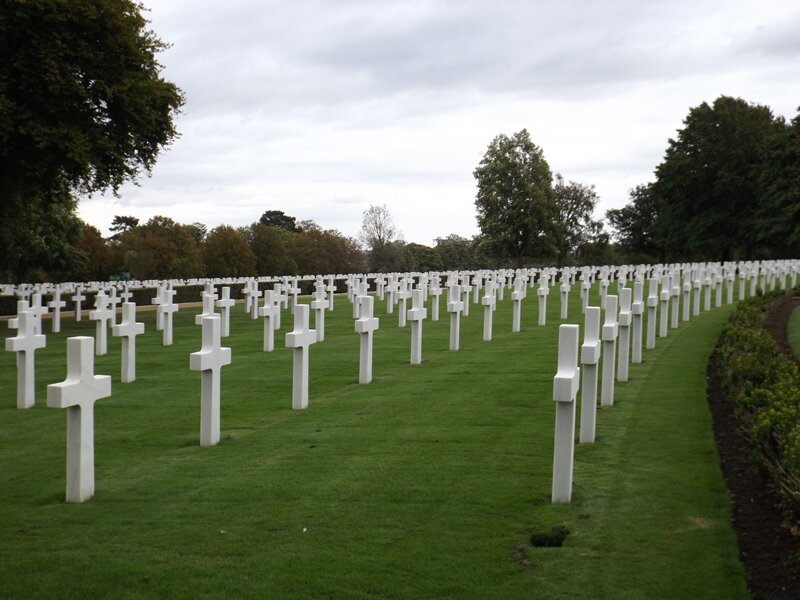
Cambridge American Cemetery and Memorial
In this blog post, we visit the Cambridge American Cemetery and Memorial. The Cambridge American Cemetery and Memorial holds the graves of 3, 812 soldiers, sailors and airmen. Another 5, 127 souls are commemorated on the Tablets to the Missing. During a recent visit to the Cambridge American Cemetery and Memorial I came across the headstones of three members of the US 29th Infantry Division, and decided to investigate.
Known as the “Friendly Invasion”, 1.6 million American service personnel were stationed in the UK by 6 June 1944. Three months after D-Day, 1.2 million of those Americans had been committed to battle. Of course, Americans had been supporting Britain from the very start of the Second World War from the famous Eagle Squadrons to US Navy and Merchant Marine. The US Eighth Airforce bombed targets across Occupied Europe and Germany from August 1942 to May 1945. By the end of the conflict, over 3 million Americans had been sent to Britain. Regrettably, many ground, naval and air force personnel would never return home.
The American Battle Monuments Commission operates and maintains 26 American military cemeteries and 29 monuments across 16 countries. There are two American military cemeteries in the UK, situated in Cambridge and Surrey. The Cambridge American Cemetery and Memorial hold the graves of 3, 812 soldiers, sailors and airmen. Another 5, 127 souls are commemorated on the Tablets to the Missing.
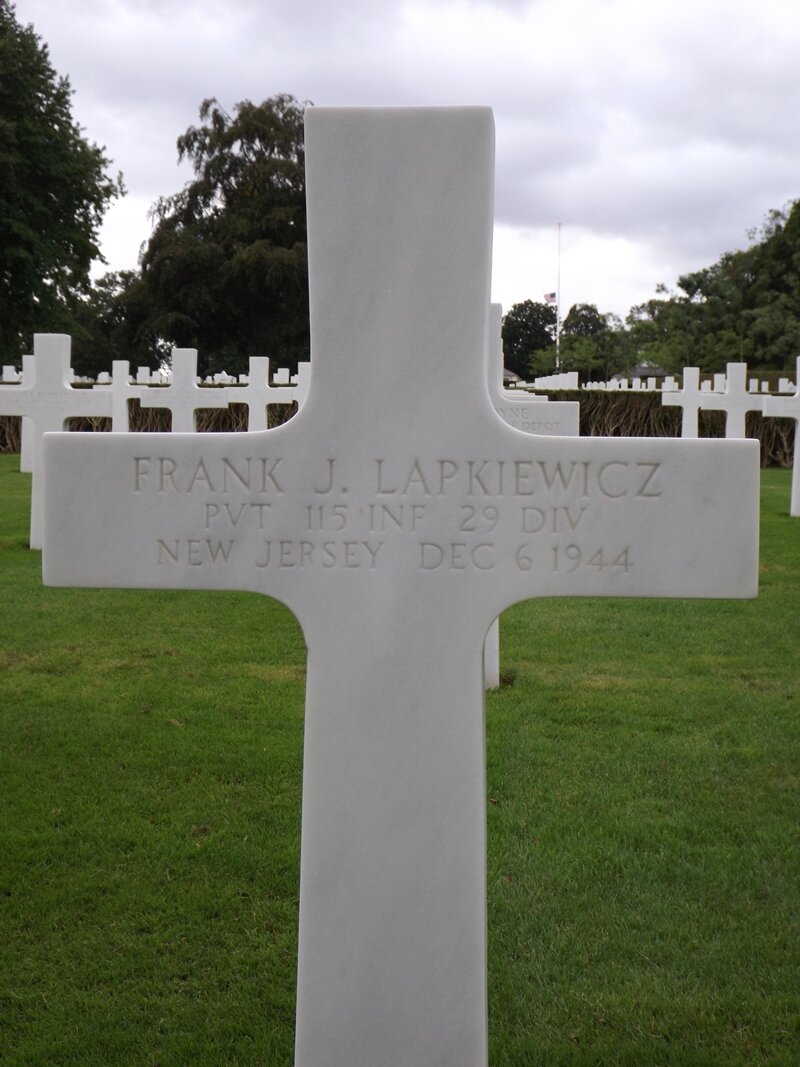

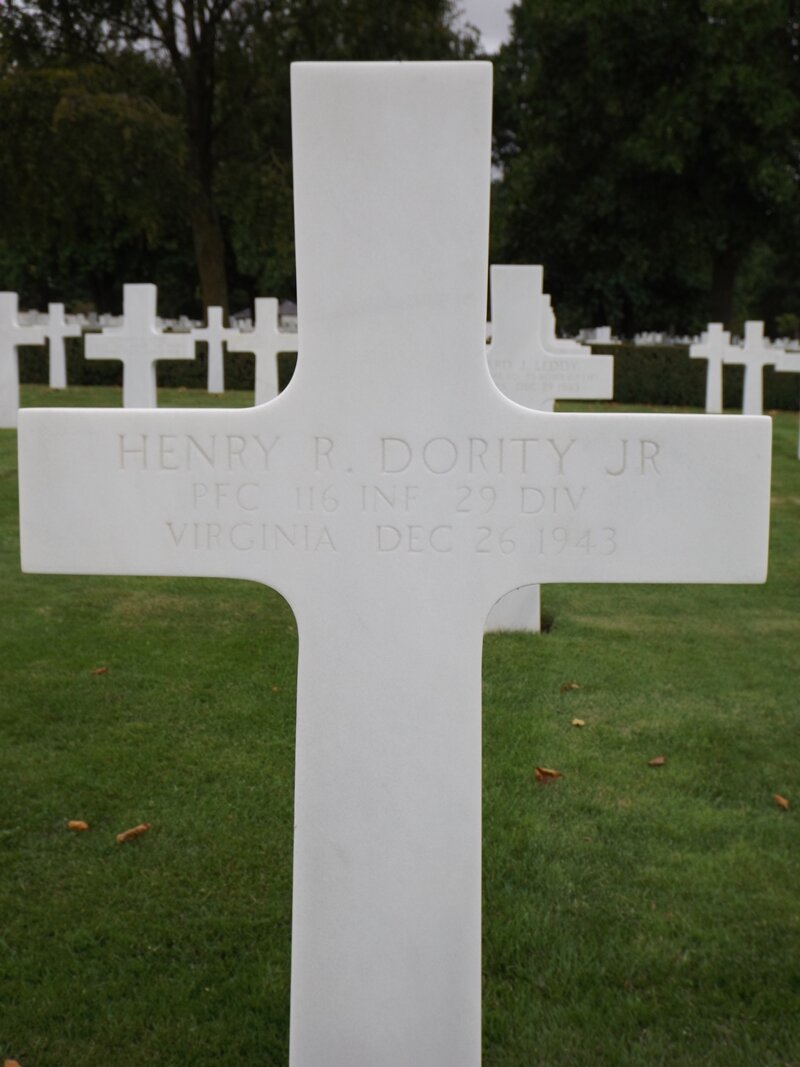

During a recent visit to the Cambridge American Cemetery and Memorial, I came across three members of the US 29th Infantry Division. As an associate member of the 29th Division Association, I took photos of each headstone so that I could do a little research about these men. In the case of PFC. Henry R. Dority, Jr, 116th Infantry Regiment, 29th Infantry Division, it seems likely that he was killed in a training accident or succumbed to some sort of illness. The 116th Infantry Regiment had started amphibious assault training on the English coast by the date of this death, December 26th, 1943.
Henry R. Dority, Jr
YOB: 1920
Home: Halifax, VA
Occupation: Semi-Skilled Painter, Construction or Maintenance
Marital Status: Single with dependents
Enlisted: 3 February 1941
Service No: 20364712
Private First Class, 116th Infantry Regiment, 29th Infantry Division
DOD: 26 December 1943
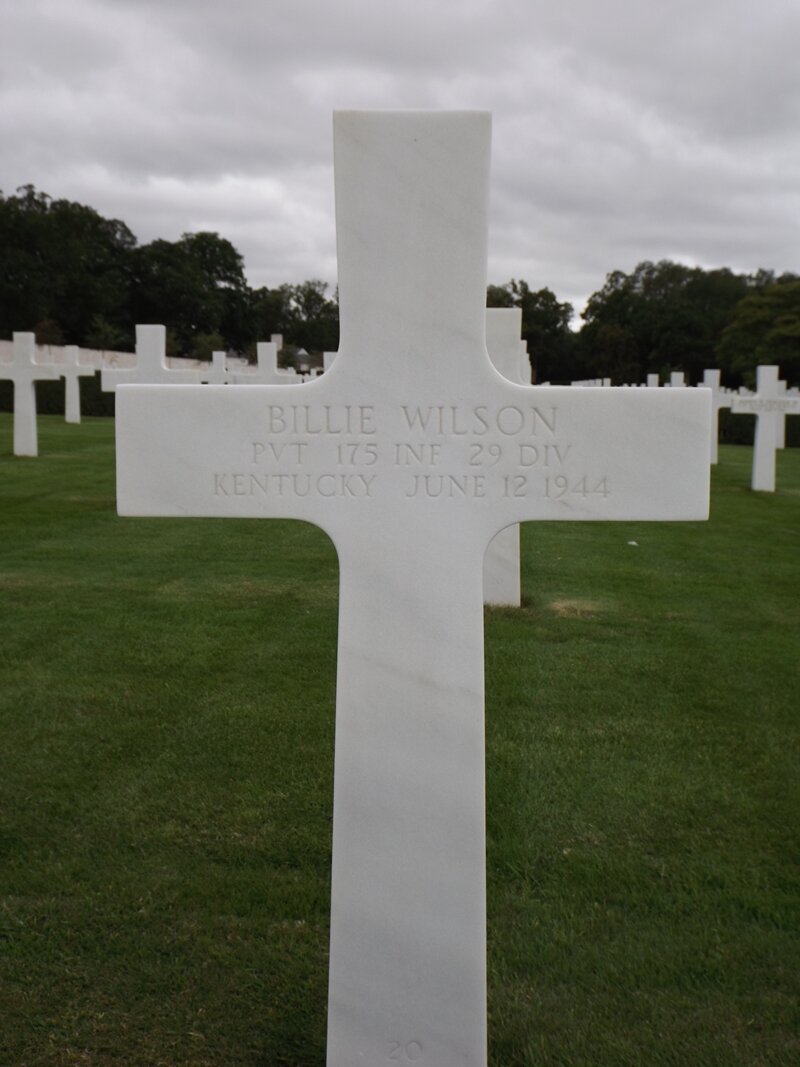
Private Billie Wilson must have been badly wounded during the initial bitter fighting for the beachhead following the D-Day landings. Billie’s unit, Company L, 3rd Battalion, 175th Infantry, landed on Omaha Beach, Normandy, on 7 June 1944, D+1. Their landing was opposed. On 8 June, the 1st battalion passed through and captured La Cambe. However, the 2nd and 3rd Battalions were strafed by RAF Typhoon fighter-bombers with six men killed and 16 wounded. It is possible that Billie was wounded during the blue-on-blue attack by Allied planes. There was some opposition at the start of the push into Isigny. The operation did not start until dusk. Once again, it is possible that Billie was wounded and reported missing during the night advance on Isigny. The 3rd Battalion supported by tanks took Isigny only to find it abandoned by the Germans and set on fire by Allied bombing. We do know that Billie was seriously wounded, returned to the UK and subsequently died of his wounds on 12 June 1944. On 9 June, 175th pushed through Isigny and supported by tanks secured a bridge over the Vire River. The regiment then consolidated around Lison on the 9 and 10 June 1944.
Billie Wilson
YOB: 1923
Home: Kentucky
Occupation: General Farmer
Marital Status: Single
Enlisted: 1 June 1942
Service No: 15114820
Private, Company L, 3rd Battalion, 175th Infantry Regiment, 29th Infantry Division
Reported missing in action on 8 June; dropped rolls on 21 June
DOD: 12 June 1944
Awards: Purple Heart
Frank J. Lapkiewicz joined Company E, 115th Infantry Regiment on 4 September from the replacement depot as a Rifleman. On 16 September, Frank was listed as lightly injured in action (LIA) and moved to the hospital. In November 1944, the 29th Infantry Division began its drive to the Roer River, Germany, blasting its way through Siersdorf, Setterich, Durboslar, and Bettendorf, and reaching the Roer by the end of the month. Frank returned to duty on 14 November. The attack on Durboslar, preceded by an artillery barrage, started on 19 November. The 2nd Battalion, 115th Infantry advanced on the town supported by tanks and artillery. In response, the Germans brought up 12 self-propelled 88mm guns. Two Allied airstrikes helped to dislodge the German defenders. Small unit actions continued into the night and the 115th took a number of prisoners. At some point during the fighting on the 19, after just five days back in the line, Frank was seriously wounded. Frank was evacuated back to the UK but died of his wounds on 6 December 1944.
Frank J. Lapkiewicz
YOB: 1915
Home: 1111 Maple Street, Wilmington, Delaware
Parents: Leon & Nellie Lukiewska
Occupation: Skilled worker in manufacturing
Marital Status: Single
Enlisted: 28 February 1944
Service No: 42085191
Private, Company E, 2nd Battalion, 115th Infantry Regiment, 29th Infantry Division
Wounded during the battle for the German town of Durboslar
DOD: 6 December 1944 (Died of Wounds)
Awards: Purple Heart
In total, the Cambridge American Cemetery and Memorial contain the graves of around 45 members of the 29th Division’s three infantry regiments. The American Battle Monuments Commission keeps the cemetery in immaculate condition. The visitors centre and helpful staff ensure that the stories of service personnel such as Henry, Billie and Frank are preserved and their sacrifices remembered.

Donald A. McCarthy, A Veteran’s Story
In this post, we tell the story of D-Day veteran Donald A. McCarthy, who served with Headquarters Company, First Battalion, 116th Infantry Regiment, 29th Division, and landed on Omaha Beach.
In 1999, I was researching the D-Day landings for a radio project. As part of my research, I was lucky enough to start corresponding with 29er veteran, Donald A. McCarthy. Sadly, Donald passed away in 2017 at the grand age of 93. He lived a full and active life. He was rightly proud of his military service. He was Commander of the 29th Division Association from 1995-96 and made 14 trips back to the Normandy beaches and battlefields. In 2014, he was awarded the French Foreign Legion of Honour. As part of the 75th anniversary of D-Day and battle for Normandy, I thought it worth sharing Donald’s own experience of landing on Omaha Beach as he told it to me.
Training for D-Day
I was a member of Headquarters Company, First Battalion, 116th Infantry, 29th Division. I was drafted in July 1943 after graduating from High School. I completed basic infantry training in Alabama, shipped overseas on the Il de France, assigned to 1BN 116t RCT at Ivybridge, 26 January 1944. The RCT (Regimental Combat Team) began intensive training at the Assault Training Centre, Woolacombe Beach on the North West Coast of Devon, and later in April participated in Exercise Fox at Slapton Sands. We were fortunate to have preceded the horrible debacle of Exercise Tiger of 27th April.
Omaha Beach
Again, I was fortunate to have survived the landings of the third wave at Omaha Beach. Although the flotilla was originally scheduled for Dog Green sector of the beach, the British Coxswain and the entire flotilla of LCAs (Landing Craft Assault) from the SS Empire Javelin (Infantry Landing Ship, Large) were carried in an easterly direction by the tide toward the Dog Red sector and the Moulin Draw.
My LCA had taken on water, was swamped and sank about 200 yards from the low watermark and beach obstacles. Several of us swam in behind bodies and attempted to hide behind the obstacles from machine gun and artillery fire. Although the MG fire was intense, the Germans on the bluff were unable to see us because of smoke from burning grass and buildings blowing east from the Vierville (Vierville-sur-Mer) area. The smoke screen provided an opportunity to run from the water’s edge, and the fear of getting run down from incoming landing craft, and find protection from the high water shingle.
Evacuation
Some of us managed to crawl toward the Vierville Draw and were eventually able to move up the draw and reach our objective, the church in Vierville. We came under fire from our own navy and I was ordered to return to the beach and attempt to contact the US Navy beach master. I was hit by an overhead shell burst in my left leg after finding a radio. The radio caught the brunt of the burst and both my leg and the radio became inoperative. A medic dragged me to a makeshift slit trench near the shingle within 100 yards of the draw. The following morning hundreds of us managed to walk towards the Moulin Draw and most were evacuated on LSTs (Landing Ship, Tank) back to ports in Britain. Some of us recovered and returned to Normandy within three weeks.
Wounded Again
I was able to re-join my company by early July and participate in the battle for St. Lo and Vire. During the attack at Vire, I came under heavy fire in an abandoned garage. The roof collapsed and debris hit my hand and neck. I did not consider my wounds serious until a form of blood poisoning finished my days with the 116th in France.
After several weeks in a General Hospital at Great Malvern, I was assigned to an Infantry Training Centre at Tidworth Barracks. We ran a training facility for Air Force personnel and shipped them to Holland and Germany as infantrymen.
Home
I remained a PFC (Private First Class) throughout my time in the ETO (European Theatre of Operations). In January 1946, I returned home to Boston and enrolled in college. I got married and worked for Bell Systems for 30 years. My work with Bell Systems centred on defence telecommunications with the US Navy including a period in Vietnam between 1967 and 1968. After leaving Bell, I worked for the Chamber of Commerce in Providence, Rhode Island. In 1969, I returned to England, chartered a small sailboat at Gosport, and sailed to Omaha Beach to recapture the event that changed my life. Since then I have returned to Normandy to take part in D-Day anniversary events with many other 29ers.
-END-
Visit the 29th Division Association website to learn more about the unit’s contribution during World War Two. Additional material courtesy of US Department of Veteran Affairs and Back to Normandy website.

D-Day 75th Anniversary Commemoration
As part of the D-Day 75th-anniversary commemorations, The War Years will be adding a range of content over the coming week.
As part of the D-Day 75th-anniversary commemorations, The War Years will be adding a range of content over the coming week.
The Story of D-Day, Part One
The Plan
The largest amphibious operation in military history, code-named Overlord, D-Day started in the early hours of 6 June 1944. The objective was an 80 km stretch of the Normandy coastline. An armada of 7000 ships planned to land 175,000 men, 50,000 vehicles and all their equipment by day’s end. 11,000 aircraft, oil pipelines under the English Channel and even giant Mulberry Harbours would be towed across the sea.
Neptune
Operation Neptune was the naval element of the Overlord plan. 7,000 vessels from battleships to landing craft, Neptune was truly an allied effort. British, American, Canadian, French, Norwegian, Dutch, Polish and Greek vessels all played a part in enabling the landing’s success.
The Landings
The Allies planned to land on 5 beaches code-named Utah, Omaha, Gold, Juno and Sword. The flanks or sides of the planned beachhead would be secured by airborne forces dropped during the night and early morning on 5/6 June.
Pegasus Bridge
Strategically important, the bridges over the Caen Canal and Orne River had to be captured to enable Allied tanks to operate east of the river, and prevent German counter-attacks against the landings.
Seized by a daring glider assault the bridges were successfully captured by Major John Howard’s D Company, 2nd Battalion, Ox and Bucks Light Infantry at just after midnight, 6 June 1944. Once captured it was vital Major Howard’s men held the bridges against counter-attacks until relieved by Lord Lovat’s 1st Special Service Brigade at 1 pm.
Merville
In the area immediately east of Sword Beach, some 4,800 elite airborne troops landed by parachute and glider. Men of the 9th Parachute Battalion took the German coastal battery at Merville that threatened the British landing beaches.
US Paratroops
The American 82nd and 101st Airborne Divisions secured the flanks of the US beaches. However, the 6,600 men dropped were badly scattered that reducing their initial effectiveness, although this did confuse the German defenders. The paratroopers successfully secured the exits from Utah Beach and captured bridges en route to Carentan.
The Story of D-Day, part Two
The American Beaches
Utah Beach
The D-Day landings started at the low water mark on a rising tide at 06.30hrs in the US sector and 07.30hrs for the British.
Strong coastal currents and obscuration of landmarks due to smoke from naval bombardment meant American invasion forces landed 2,000 yards south of their planned objective on Utah Beach. Luckily the area where troops from the 4th Infantry Division actually landed was less heavily defended, and casualties were mercifully light.
Pointe du Hoc
Just as Pegasus Bridge was vital to the success of the British landings so Pointe du Hoc was important to the Americans. Intelligence reports prior to the landings indicated that six 155mm guns in concrete emplacements sat atop a 177ft cliff. The guns threatened the landings on Utah and Omaha Beaches and had to be destroyed.
The elite 2nd Ranger Battalion was tasked with destroying the guns at Pointe du Hoc by direct assault from the sea, which meant scaling the cliffs while under fire. However, when the Rangers fought their way up to the gun emplacements they found them empty. The guns had been moved inland. Later, the guns were found and destroyed.
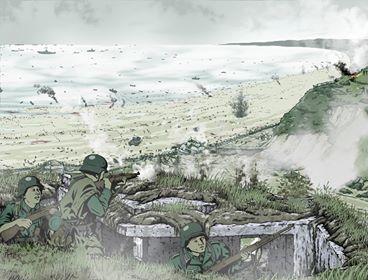
Omaha Beach
The most difficult terrain and heavily defended sector, Omaha Beach was the objective of the US 1st and 29th Infantry Divisions. At 5.40 am amphibious DD tanks launched 6,000 yards offshore, nearly all sinking in the heavy seas.
Only 5 tanks made it ashore to support the infantry landings. All but one of the 105mm field artillery guns also vital to the landings were lost. To make matters even worse, the naval and air bombardment had done little to reduce the German defensive positions commanding the exposed beach.
Seasick, heavily laden, troops of the nine companies in the first assault wave were decimated by German machine-gun, mortar and artillery fire. Those troops lucky enough to make it across the open beach took cover behind the sea wall.
The assault on Omaha initially stalled. However, gradually men formed small groups and started fighting their way up the bluffs that overlooked the beach. Later, navy destroyers came dangerously close to shore to give much-needed fire support. By day’s end, Omaha Beach was in American hands.
Brigadier General Norman “Dutch” Cota, several NCOs and Privates received decorations for gallantry during the action at "Bloody Omaha".
Today, 3 June 2019, we post a short video taken back in June 2010 on a visit to Omaha Beach and the American Cemetery and Memorial.
The Story of D-Day, part Three
The British, French and Canadian Beaches
Gold Beach
Westernmost of the British/Canadian beaches, code-named Gold, were assaulted by the 50th Division of the British XXX Corps. Specially developed armoured vehicles were landed ahead of the infantry to deal with beach obstacles, mines and the sea wall. Some 2,500 obstacles and mines needed to be cleared from Gold Beach alone. Allied forces quickly overcame German defences and moved inland.
During the advance of the 69th Brigade, Company Sergeant Major, Stan Hollis of the Green Howards won the Victoria Cross, for repeated acts of valour, Britain’s highest military honour. This was the only VC won on D-Day.
Juno Beach
Canada made a terrific contribution to the Allied war effort. Juno Beach was assigned to the Canadian 3rd Division. Like the British, the Canadians used special armoured vehicles to help overcome beach obstacles, mines and strong points. These vehicles were nick-named Hobart’s “funnies” after their creator Major General Sir Percy Hobart.
The town of Courseulles was strongly defended by the Germans but duly taken. The Queens Own Rifles suffered severe casualties crossing the beach at Bernieres. The Canadians made contact with 50th Division on their right by day’s end.
Sword Beach
The easternmost landing zone, Sword Beach, was assaulted by the British 3rd Division. The 3rd Division’s objectives were perhaps the most ambitious of the D-Day operation: capture or mask the Norman city of Caen by nightfall. The 3rd Division also knew it was likely to be counter-attacked by tanks of the German 21st Panzer (Armour) Division.
British intentions to quickly move off Sword Beach and drive inland were held up by resistance from German strong points. British troops reached Lebisey Wood, just three miles short of Caen, but could advance no further.
Special Forces - The Commandos
French Commandos led by Philippe Kieffer took Ouistreham casino and secured the canal gateway. However, the French suffered heavy casualties and Kieffer was wounded twice during the fighting.
Commandos of the 1st Special Service Brigade landed on the 'Queen Red' sector of Sword Beach at approximately 8.40 am, 6 June 1944. Commanded by Brigadier Simon Fraser, Lord Lovat, the 1st Special Service Brigade’s mission was to push inland and link up with the lightly armed British 6th Airborne Division holding Pegasus Bridge and bridge over the Orne River.
Today, we have added 241 photos to our Flickr site taken during visits to the D-Day beaches, Pegasus Bridge Memorial and Museum, Normandy American Cemetery and Memorial, Omaha Beach Memorial Museum, Airborne Museum, Sainte-Marie-du-Mont and Sainte-Mère-Église in 2010 and 2014.


WW2 Artwork of Michael Akkerman
In this blog post, we showcase the emotive, World War Two-inspired artwork of Michael Akkerman from the famous faces of Audie Murphy and Eugene Sledge to the bloody realities of the battlefield.
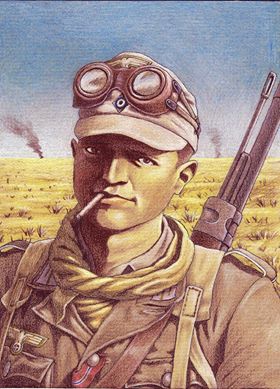
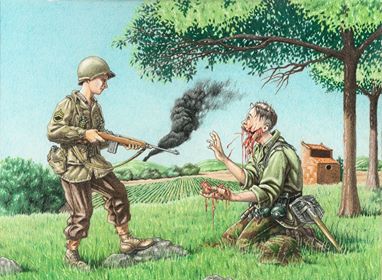
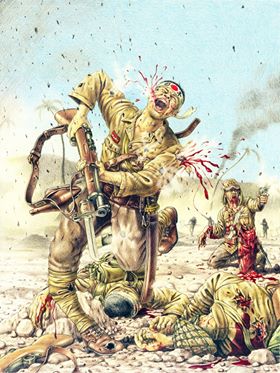
Michael Akkerman is an American artist whose work is heavily influenced by World War Two (WW2) military history. Michael has kindly allowed The War Years to show some of his work here. Probably the most recognised subject of Michael’s work is Hollywood legend, Audie Murphy. He was one of the most decorated American soldiers of WW2, winning the Medal of Honor aged 19. After the war, Murphy had a successful acting career, as a songwriter and horse breeder. Sadly, he was killed in a plane crash in 1971. He was only 45 years old. One of Michael’s pictures is inspired by an episode taken from Murphy’s wartime autobiography, where he felt compelled to shoot a badly wounded young German soldier as an act of mercy.
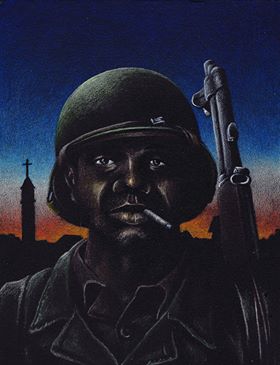
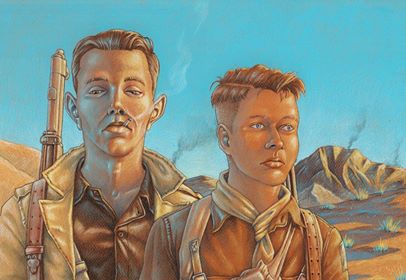
Eugene Sledge is another name that will be familiar to many people with a passing interest in the Second World War. He served in the US 5th Marines, 1st Marine Division fighting in the Pacific. His book, ‘With the Old Breed: At Peleliu and Okinawa’ became a bestseller when published in the 1980s. His book and Robert Leckie’s ‘Helmet for My Pillow’, also served as inspiration for the HBO miniseries The Pacific. The savage, relentless fighting of the Pacific campaign had a dehumanising effect on many of the combatants. However, somehow, Eugene Sledge was able to hold onto his humanity amidst the horror, which is vividly illustrated in Michael Akkerman’s artwork.
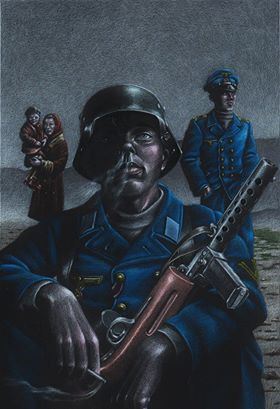
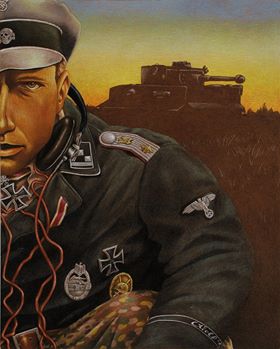
Made famous by Nazi propaganda and a legend by the battle of Villers-Bocage, Michael Wittmann was a German tank ace with an impressive tally of 138 kills, mainly achieved on the Russian Front. He is also the subject of one of Michael Akkerman’s paintings. A week after the D-Day landings, SS-Hauptsturmführer Wittmann and his Tiger tank bumped into the forward elements of the British 7th Armoured Division. Wittmann attacked the British column and destroyed 14 tanks, 15 personnel carriers and two anti-tank guns in an engagement that lasted about 15 minutes. Wittmann was awarded the Knight's Cross with Oak Leaves and Swords and became a propaganda star. However, he would be killed just two months later. His remains would not be found and positively identified until 1983.
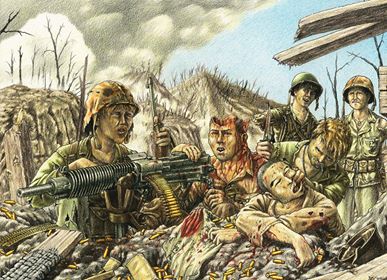
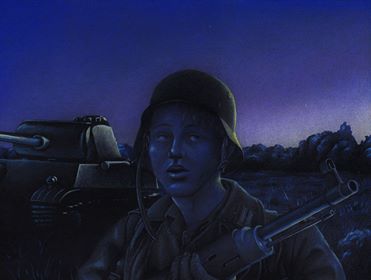
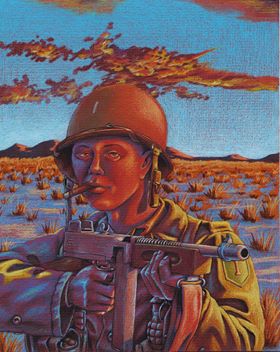
As well as the famous and infamous, Michael Akkerman’s paintings capture some of the more mundane and human elements of the Second World War, from the black ‘Buffalo Soldiers’ of the US Army to the hardships of the North Africa campaign. He also depicts the bloody realities of the Japanese Banzai charge and the lethal efficiency of the German MG-42 machine guns used to defend Omaha Beach on D-Day. To learn more about Michael’s artwork or to get a quote for a commission, you can find him on Facebook.

Face to Face with the German Tiger tank
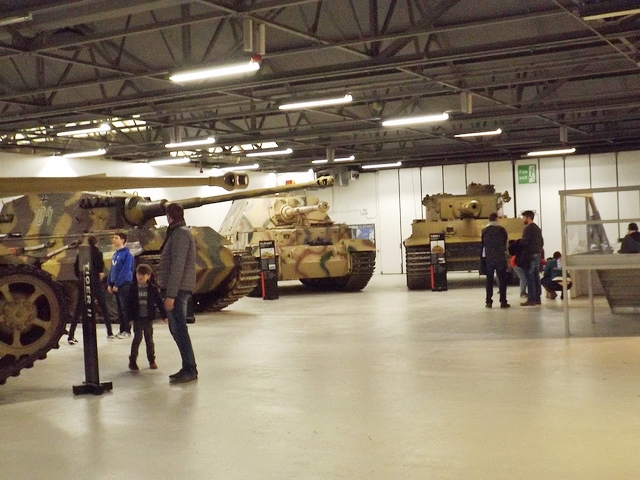
In this article, we look at the merits and deficiencies of the German Tiger tank during World War Two, and the muddled strategic thinking that drove the project forward.
The Tiger tank (Panzerkampfwagen VI Tiger Ausf. E) entered service at the end of 1942. It was not a great start. The tank was deployed over unsuitable terrain, limiting its effectiveness. The early production Tigers were plagued with technical problems including dangerous engine fires. Many of these early teething problems were symptoms of the tank being rushed into service without adequate development and testing. However, the Tiger was also over-engineered. The result was a highly complex, often temperamental weapons system that required extensive preventative maintenance and careful handling.
Fighting the Wrong War
Manufactured by Henschel, the Tiger I Ausf. E was the product of creaky strategic thinking. The Tiger was not built in response to Soviet tanks like the T-34 and KV-1. Instead, the Tiger was designed as a “sledgehammer” to smash holes in the enemy’s lines, which support units could then exploit. However, the Germans were already fighting a largely defensive war by late 1942. The days of the blitzkrieg were over. A far better solution would have been to concentrate all manufacturing resources on producing the reliable, very effective Panzer IV main battle tank (MBT).


60 Tonne Sledgehammer
Although the Tiger had many deficiencies, it was not without merit. In the hands of a well-trained and experienced crew who understood the Tiger’s advantages, the tank could prove a formidable opponent. Tank design is about achieving the right balance of mobility, armour and firepower so the vehicle can perform its primary task. Clearly, the Tiger was designed as a sledgehammer, and that’s what the panzer forces got. The Tiger weighed in at just under 60 tonnes, with 100mm frontal armour, 80mm side and rear armour, two MG-34 machine guns, and a high velocity, flat trajectory 88mm main gun.
40 Percent Reliable
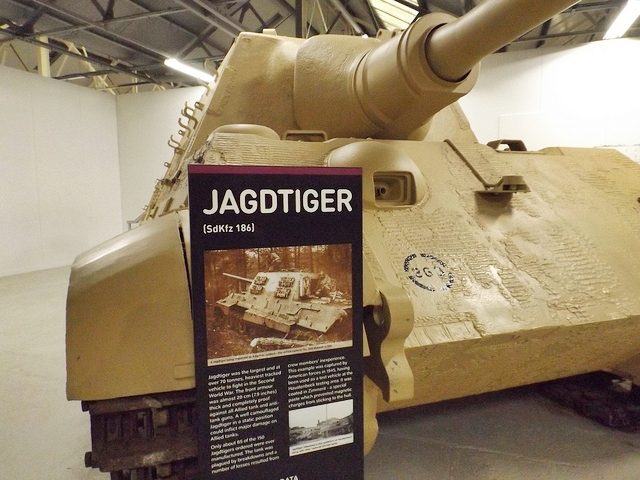
The Tiger’s 88mm main gun fired both armour piercing (AP) and high explosive (HE) shells. Officially, the tank could store 92 rounds. However, crews typically packed as many additional shells into every available space as possible. Although the tank was underpowered by the Maybach HL230 700-horsepower petrol engine, it was surprisingly quick and agile on good ground. A semi-automatic gearbox and steering wheel also made the tank easy to drive. Nevertheless, even when the tank was well maintained and supported by a good workshop company, the Tiger’s overall reliability was abysmal. Most Tiger Is were only operational 40 per cent of the time. The reliability of other Tiger variants such as Tiger II Ausf. B, Panzerjager and Jagdtiger were even worse.
Recovery No Easy Task
Naturally, broken down and battle-damaged tanks need to be recovered, whenever possible. Unfortunately, the Tiger’s size and weight often worked against easy recovery. Typically, it took two or three prime movers (tractors) to tow a Tiger to safety. Panzer units were under strict orders not to use one Tiger to tow another, as this could result in damaging the second tank. However, necessity often trumped orders and Tigers frequently towed one another. Later, specialist recovery tanks were introduced, such as the Bergepanther, but these vehicles were always in short supply.
The Importance of Training
How well or poorly an individual tank performs is mainly reliant on the quality and training of the crew. As the war progressed and losses mounted, the German army struggled to provide adequate manpower or training to its panzer forces. Subsequently, overall performance suffered. However, the Germans valued the lives of their panzer crews, and the Tiger provided a separate escape hatch for each man. Many Allied tanks were not designed as well, resulting in men being trapped inside burning vehicles after they had been hit. When it came to training Tiger crews, the official manual was surprisingly innovative. The Tigerfibel aimed to convey complex battlefield instructions in a simple and memorable manner to young recruits using cartoons, jokes and risqué pictures of women. Even today, you can buy a copy in English translation on Amazon.
The Unsinkable Tiger
Thanks to a combination of thick, seemingly impervious frontal armour, the legendary 88mm gun and copious amounts of Nazi propaganda, the Tiger quickly gained a reputation for impregnability. Of course, the Tiger was as impregnable as the Titanic was unsinkable. In reality, the Tiger’s main value came from its ability to stand off and deal with its opponents at a distance. However, even with mid and late-production improvements, by 1944 the Tiger was fighting a losing battle.
The Victory of Mass Production
The Germans went for quality over quantity in tank production, but a lack of time and resources meant they never really delivered on quality. They also chose to pursue an obsolete military strategy at odds with the realities of their situation. In contrast, the Allies went for simple, reliable vehicles they could mass-produce in vast quantities. Over 110,000 Soviet T-34 and American M4 Sherman medium tanks were manufactured compared with just over 1,300 Tiger I Ausf. E. That’s 85 to one, and only half the Tigers would be fit for service at any time. What’s more, the Allies didn’t stand still. They improved their existing tank forces and introduced new, heavier tanks. The British Comet, for example, entered service in December 1944. Ultimately, the Tiger only ever won the propaganda war. In all other respects, the Tiger was a costly, unreliable failure.